How To Replace A Stabilizer Bar Link
Replacing a stabilizer bar link, also known as a sway bar link, is a common repair that many experienced DIYers can tackle at home. While it might seem like a minor component, a faulty stabilizer bar link can significantly impact your vehicle's handling and ride quality. This article will guide you through the process, providing the technical details you need to confidently replace your stabilizer bar links and restore your vehicle's stability.
Understanding the Stabilizer Bar System
Before diving into the replacement procedure, let's review the role of the stabilizer bar system within your vehicle's suspension. The primary function of the stabilizer bar, also called an anti-roll bar or sway bar, is to reduce body roll during cornering. Think of it as a torsion spring that resists twisting forces.
Technical Breakdown: How It Works
The stabilizer bar is typically a U-shaped steel bar that connects the left and right sides of the suspension. It's mounted to the vehicle's frame or chassis using bushings. The ends of the stabilizer bar are connected to the suspension components (usually the lower control arms or struts) via the stabilizer bar links. These links are essentially short rods or bars with ball joints or bushings at each end, allowing for some articulation.
When your vehicle corners, the body tends to lean towards the outside of the turn. This causes the suspension on the outside of the turn to compress, while the suspension on the inside of the turn extends. The stabilizer bar resists this difference in suspension travel. As one side of the suspension moves up and the other moves down, the stabilizer bar twists. This twisting force is then transferred back to the suspension through the stabilizer bar links, helping to keep the vehicle more level and improve stability.
Mathematically, the effectiveness of a stabilizer bar is related to its torsional stiffness, which depends on its material, diameter, and length. A thicker bar offers greater resistance to twisting, resulting in less body roll, but can also make the ride harsher. The link length also influences the overall system stiffness.
Common Issues and Maintenance Concerns
Stabilizer bar links are exposed to harsh conditions, including road debris, moisture, and constant stress from suspension movement. This makes them prone to wear and failure. Here are some common issues to watch out for:
- Worn or Damaged Ball Joints: The ball joints in the stabilizer bar links are critical for articulation. Over time, these joints can become loose, worn, or corroded. Signs of ball joint failure include clunking or rattling noises, especially when driving over bumps or turning. You might also notice increased body roll or vague steering.
- Torn or Cracked Bushings: Some stabilizer bar links use rubber or polyurethane bushings instead of ball joints. These bushings can deteriorate over time, leading to excessive play and noise. Visual inspection can reveal cracks or tears in the bushing material.
- Corrosion and Rust: Exposure to road salt and moisture can cause corrosion on the stabilizer bar links, weakening them and potentially leading to failure. Severely corroded links may need to be cut off during replacement.
- Bent or Damaged Links: In some cases, stabilizer bar links can be bent or damaged due to impacts with potholes or other road hazards. A bent link can affect the suspension geometry and handling.
Preventative maintenance is key to extending the life of your stabilizer bar links. Regularly inspect the links for signs of wear or damage. Consider lubricating the ball joints (if applicable) with a suitable grease to help reduce friction and corrosion. Replacing worn stabilizer bar links promptly can prevent further damage to other suspension components and improve your vehicle's handling and safety.
Replacing the Stabilizer Bar Link: A Step-by-Step Guide
Now, let's move on to the replacement procedure. This guide assumes you have basic automotive knowledge and tools.
Tools and Materials Required:
- New Stabilizer Bar Link(s) (matching your vehicle's make, model, and year)
- Jack and Jack Stands
- Wheel Chocks
- Socket Set (metric or SAE, depending on your vehicle)
- Wrench Set (metric or SAE)
- Penetrating Oil (e.g., PB Blaster)
- Torque Wrench
- Hammer (optional, for stubborn links)
- Pickle Fork or Ball Joint Separator (optional, for stubborn ball joints)
- Safety Glasses
- Gloves
Procedure:
- Safety First: Chock the rear wheels and engage the parking brake. Loosen the lug nuts on the wheel(s) you will be removing.
- Raise and Secure the Vehicle: Jack up the vehicle and securely support it with jack stands. Never work under a vehicle supported only by a jack.
- Remove the Wheel(s): Remove the wheel(s) on the side(s) where you will be replacing the stabilizer bar link(s).
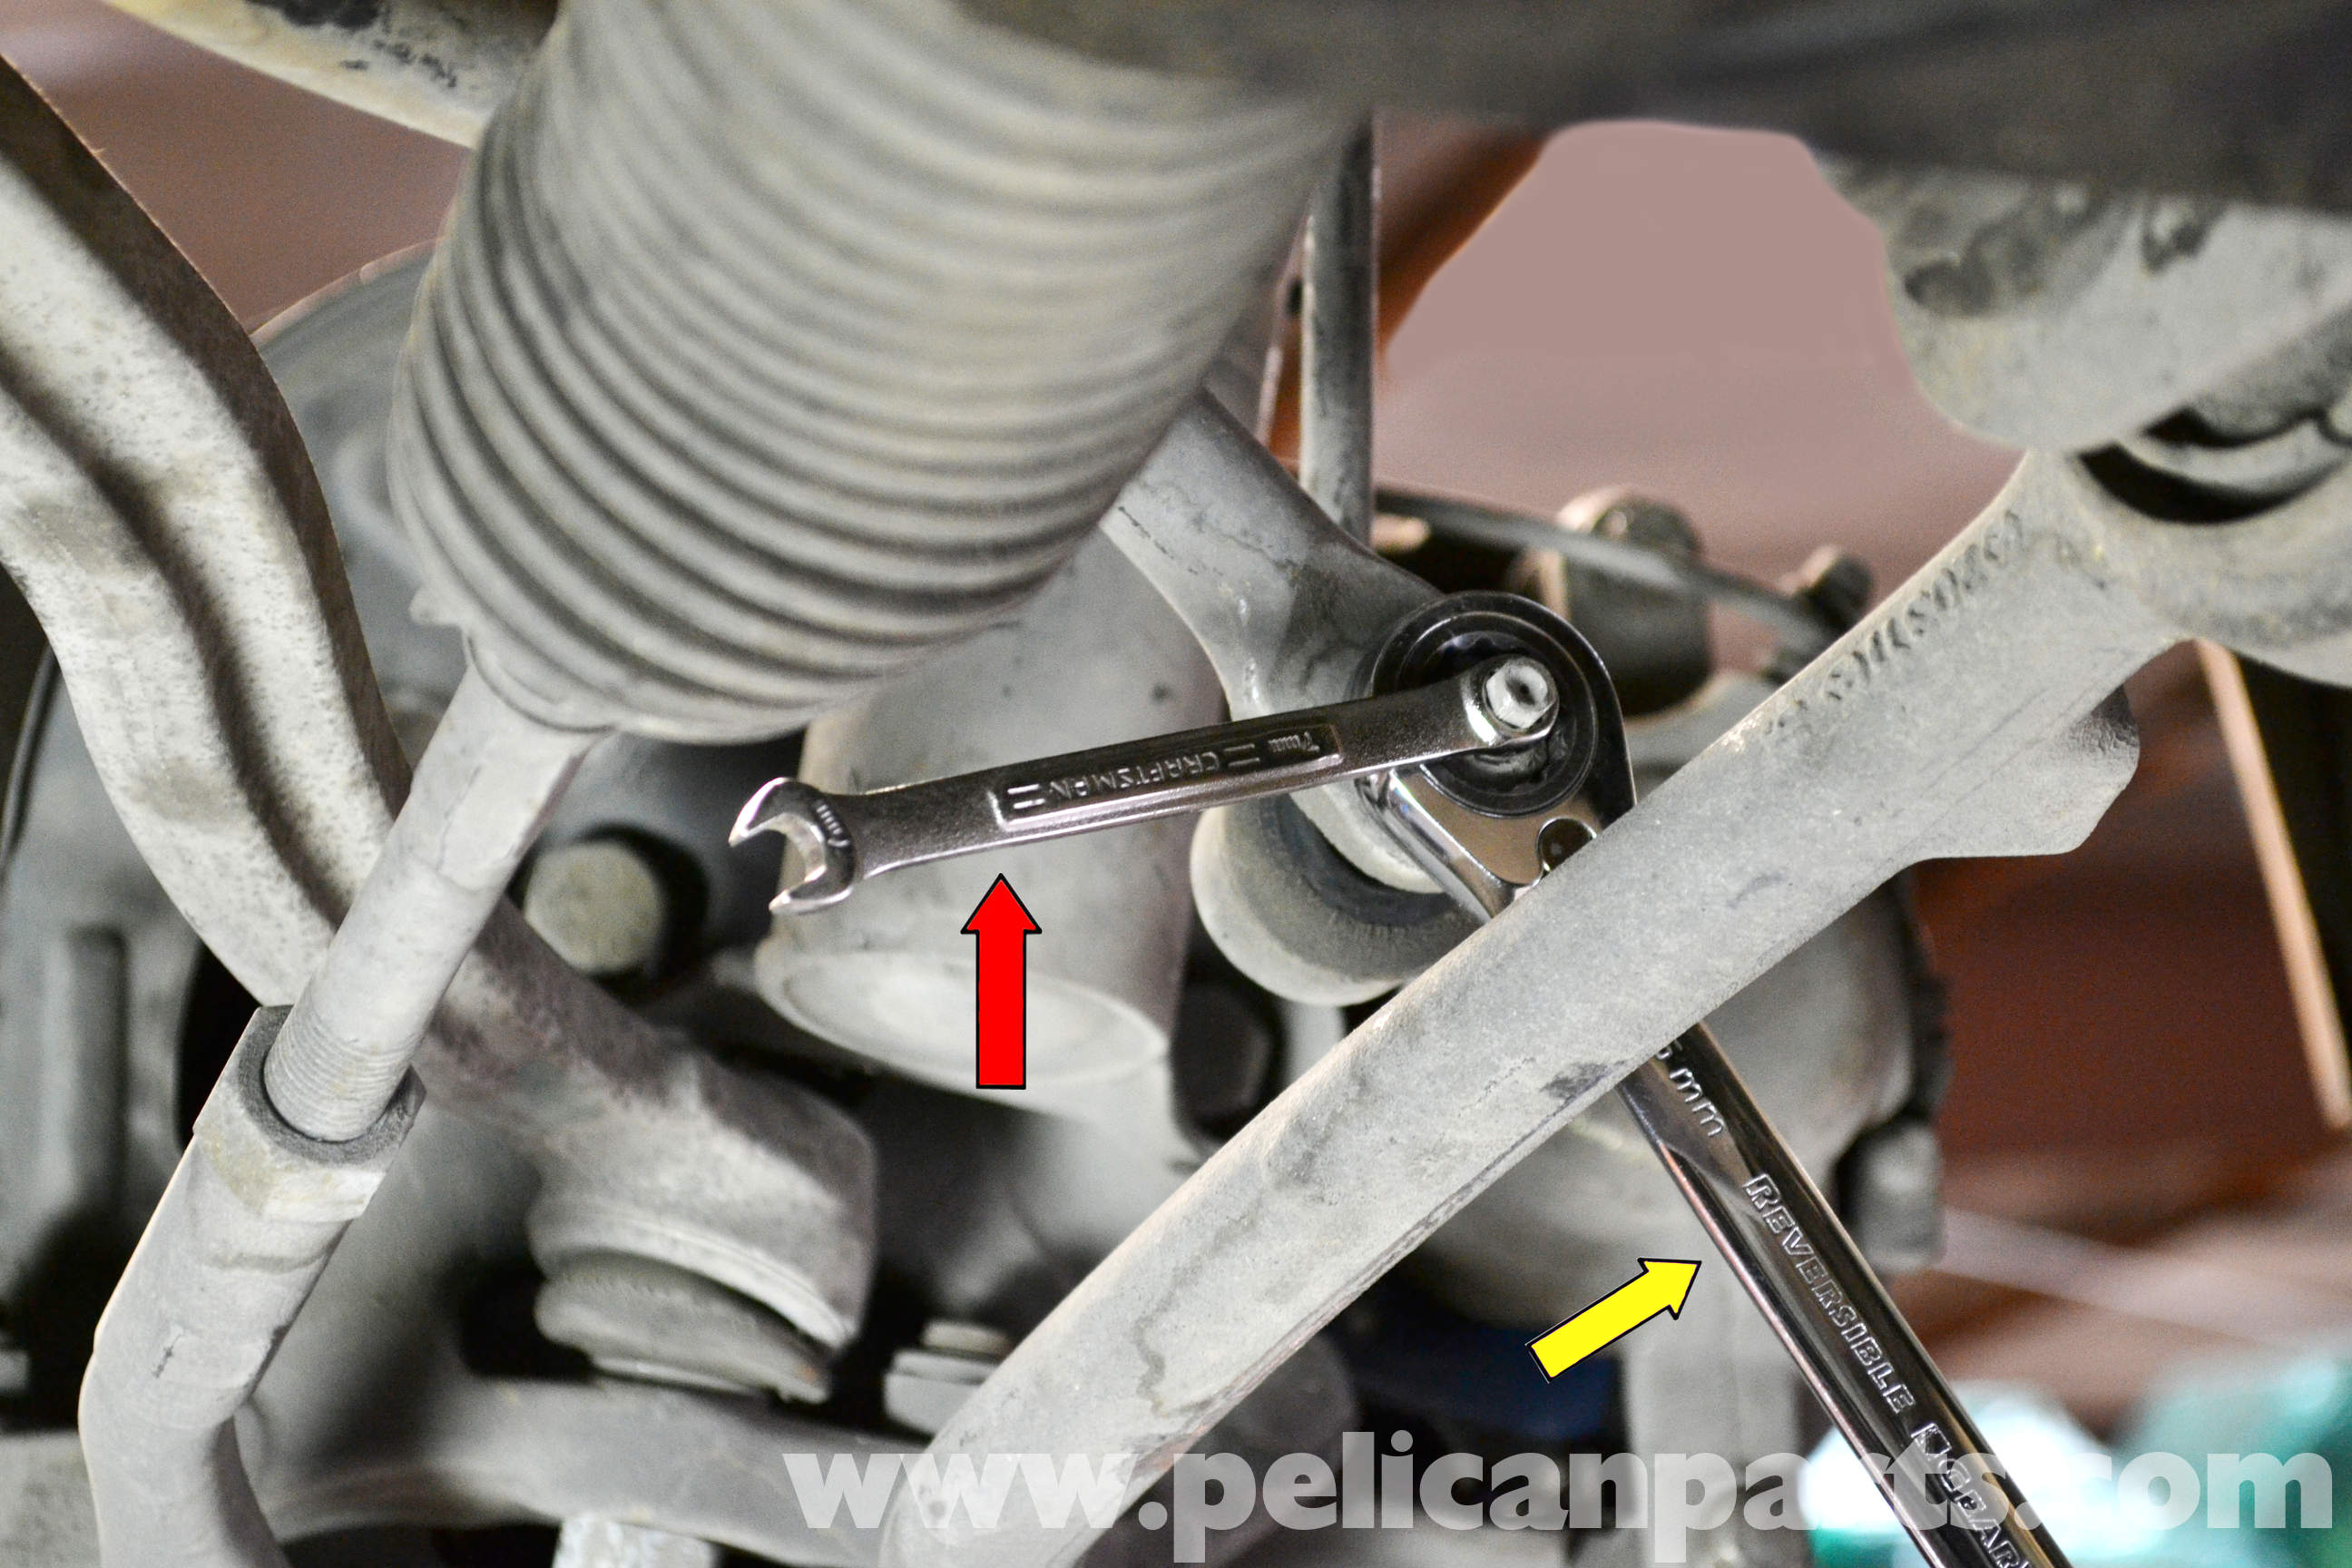
- Locate the Stabilizer Bar Link: Identify the stabilizer bar link you will be replacing. It connects the stabilizer bar to the suspension component (usually the lower control arm or strut).
- Apply Penetrating Oil: Spray penetrating oil on the nuts and bolts that secure the stabilizer bar link. Let it soak for at least 15-20 minutes to help loosen them.
- Loosen and Remove the Nuts/Bolts: Use a socket or wrench to loosen and remove the nuts and bolts that secure the stabilizer bar link. Be prepared for the stabilizer bar to shift slightly once the link is disconnected. Some stabilizer bar links have a hex key socket in the end of the stud to hold it while you loosen the nut. If so, use the hex key in conjunction with the wrench.
- Remove the Old Stabilizer Bar Link: Once the nuts and bolts are removed, carefully remove the old stabilizer bar link. If the ball joints are seized, you may need to use a pickle fork or ball joint separator to dislodge them. Caution: A pickle fork can damage the rubber boots on the ball joints, so use it as a last resort.
- Inspect the Mounting Surfaces: Clean the mounting surfaces on the stabilizer bar and suspension component. Inspect for any damage or corrosion.
- Install the New Stabilizer Bar Link: Install the new stabilizer bar link, aligning the ball joints or bushings with the mounting holes. Install the new nuts and bolts, but do not fully tighten them yet.
- Tighten the Nuts/Bolts: Lower the suspension slightly, so that it is under load, and then tighten the nuts and bolts to the manufacturer's specified torque. Using a torque wrench is crucial to ensure proper clamping force and prevent over-tightening or under-tightening. Refer to your vehicle's repair manual for the correct torque specifications.
- Reinstall the Wheel(s): Reinstall the wheel(s) and tighten the lug nuts to the specified torque.
- Lower the Vehicle: Carefully lower the vehicle back to the ground.
- Final Torque Check: After driving a short distance (e.g., 50 miles), re-torque the lug nuts and the stabilizer bar link nuts/bolts to ensure they are still properly tightened.
Do's and Don'ts / Best Practices
Do's:
- Do use penetrating oil to loosen stubborn nuts and bolts.
- Do use a torque wrench to tighten fasteners to the specified torque.
- Do replace stabilizer bar links in pairs (both left and right sides) to ensure balanced handling.
- Do inspect the stabilizer bar bushings for wear or damage and replace them if necessary.
- Do consult your vehicle's repair manual for specific instructions and torque specifications.
- Do wear safety glasses and gloves to protect yourself from injury.
Don'ts:
- Don't work under a vehicle supported only by a jack. Always use jack stands.
- Don't over-tighten fasteners, as this can damage the threads or the component.
- Don't use excessive force when removing stubborn parts. If necessary, use a specialized tool like a pickle fork or ball joint separator.
- Don't reuse old hardware (nuts and bolts). Always use new hardware that comes with the replacement stabilizer bar links.
Conclusion
Replacing stabilizer bar links is a manageable task for experienced DIYers. By understanding the function of the stabilizer bar system, recognizing common issues, and following the step-by-step instructions outlined in this article, you can confidently restore your vehicle's handling and ride quality. Remember to prioritize safety, use the correct tools, and consult your vehicle's repair manual for specific instructions and torque specifications. If you're uncomfortable performing this repair yourself, it's always best to seek the assistance of a qualified mechanic. Regular inspections and prompt replacement of worn stabilizer bar links are crucial for maintaining your vehicle's safety and performance.