How To Replace Cabin Air Filter In Car
Ever notice a musty odor emanating from your car's vents, especially when you first turn on the air conditioning or heater? Or perhaps your HVAC system just doesn't seem to be blowing air as strongly as it used to? While several factors could be at play, the prime suspect is often a neglected cabin air filter. Replacing it is a relatively simple and inexpensive maintenance task that can dramatically improve your in-car air quality and HVAC system performance. This guide will walk you through the process, the underlying mechanics, and why this little piece of filtration is so important.
The Case of the Stuffy Car: A Scenario
Imagine this: you're stuck in rush hour traffic, surrounded by exhaust fumes, construction dust, and pollen. Your car's HVAC system is working overtime, attempting to keep you cool and comfortable. But as the minutes tick by, you notice a subtle, almost stale smell. Your allergies start to flare up, and you find yourself sneezing and reaching for tissues. The culprit? A cabin air filter clogged with months – or even years – of accumulated pollutants. A clean cabin air filter is the gatekeeper to fresh, breathable air inside your vehicle. Neglecting it is like trying to run a marathon while breathing through a straw.
The Mechanics of Clean Air: How the System Works
The cabin air filter is typically a pleated paper or fiber filter located within the HVAC system of your vehicle. Its primary function is to remove pollutants such as dust, pollen, mold spores, exhaust fumes, and other airborne particles from the air entering the passenger compartment. Here's a breakdown of the process:
- Air Intake: Outside air is drawn into the HVAC system through vents located near the base of the windshield or in the engine compartment.
- Filtration: The air then passes through the cabin air filter, where the filter media traps particulate matter. Depending on the type of filter, it may also incorporate activated carbon to absorb odors and gases.
- HVAC Unit: Filtered air then flows through the heater core or evaporator core, where it's either heated or cooled, depending on your climate control settings.
- Distribution: Finally, the conditioned air is distributed throughout the cabin via vents located on the dashboard and floor.
The filter itself is usually housed in a plastic compartment, and accessibility varies significantly depending on the vehicle make and model. Some are easily accessible behind the glove box, while others may require removing trim panels or even working under the hood.
Filter Types
Cabin air filters come in several varieties, each offering different levels of filtration:
- Particulate Filters: These are the most common type and primarily focus on removing dust, pollen, and other particulate matter. They are generally made of pleated paper or synthetic fiber.
- Activated Carbon Filters: These filters incorporate a layer of activated carbon, which helps to absorb odors, gases, and volatile organic compounds (VOCs). They are more effective at removing unpleasant smells and improving air quality in polluted environments.
- Electrostatic Filters: These filters use an electrostatic charge to attract and trap particles. They can be more efficient at capturing very small particles, such as bacteria and viruses, but may require more frequent replacement.
Pros and Cons of Regular Replacement
Pros:
- Improved Air Quality: The most significant benefit is cleaner, fresher air inside the car, reducing exposure to allergens and pollutants.
- Enhanced HVAC Performance: A clean filter allows for better airflow, improving the efficiency of the heating and cooling systems. This can lead to better temperature control and potentially save fuel by reducing the strain on the HVAC system.
- Reduced Odors: Activated carbon filters can eliminate unpleasant odors from outside sources.
- Protection of HVAC Components: A clogged filter can restrict airflow, putting stress on the blower motor and other HVAC components, potentially leading to premature failure.
Cons:
- Cost: While relatively inexpensive, cabin air filters do represent an ongoing maintenance cost.
- Time and Effort: Replacing the filter requires some time and effort, although it's generally a straightforward process.
Use Cases and Manufacturer Examples
The need for regular cabin air filter replacement is particularly pronounced in certain use cases:
- Urban Environments: Drivers in cities with high levels of air pollution will benefit significantly from frequent filter changes.
- Allergy Sufferers: Individuals with allergies or respiratory sensitivities should replace their filters more often to minimize exposure to allergens.
- Vehicles Driven on Unpaved Roads: Driving on gravel or dirt roads exposes the filter to more dust and debris, necessitating more frequent replacement.
Many manufacturers, such as Toyota, Honda, and BMW, recommend replacing the cabin air filter every 12,000 to 15,000 miles or once a year, whichever comes first. Some manufacturers, particularly those in regions with severe air pollution, may recommend even more frequent changes.
Step-by-Step Replacement Guide (General)
While the specific procedure varies by vehicle, here's a general guide to replacing a cabin air filter:
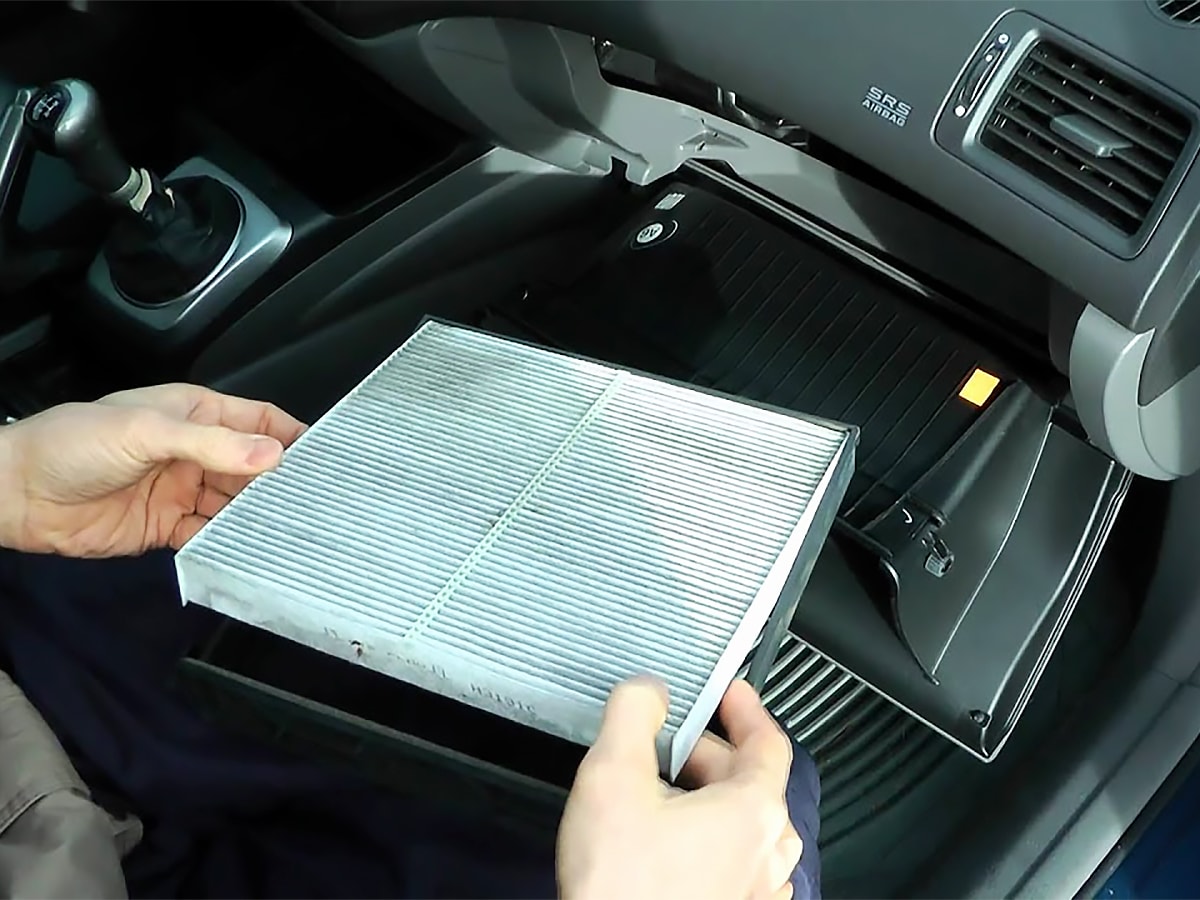
- Locate the Filter Housing: Consult your owner's manual to find the location of the cabin air filter housing. As mentioned earlier, it's often behind the glove box, but it could also be under the dashboard or even under the hood.
- Access the Filter: Depending on the location, you may need to remove screws, clips, or trim panels to access the filter housing. Be careful not to damage any components.
- Remove the Old Filter: Carefully slide out the old filter. Note the direction of airflow indicated on the filter (usually an arrow). This is important for installing the new filter correctly.
- Clean the Housing: Use a vacuum cleaner to remove any debris from the filter housing.
- Install the New Filter: Insert the new filter into the housing, ensuring that the airflow arrow is pointing in the correct direction.
- Reassemble: Reinstall any screws, clips, or trim panels that were removed.
- Test: Turn on the HVAC system and verify that the airflow is strong and the air is clean.
Important Considerations:
- Owner's Manual is Key: Always refer to your vehicle's owner's manual for specific instructions and torque specifications.
- Safety First: Disconnect the negative battery terminal before starting any electrical work.
- Correct Filter: Make sure you purchase the correct cabin air filter for your vehicle make and model.
- Direction Matters: Pay close attention to the airflow direction arrow on the filter.
- Cleanliness: Keep the area around the filter housing clean to prevent debris from entering the HVAC system.
Real-World Insights and Recommendations
In my experience, the "recommended" replacement intervals from manufacturers can be a bit optimistic, especially if you live in a dusty or polluted area. I've found that inspecting the filter every 6 months and replacing it as needed is a good practice. Pay close attention to the color and amount of debris on the filter. If it's significantly darkened or heavily loaded with particles, it's time for a change, regardless of the mileage or time elapsed. Also, if you notice a persistent musty odor, even after running the AC for a while, it's a strong indicator that the filter needs replacing, and perhaps the evaporator core needs to be cleaned as well.
Consider upgrading to an activated carbon filter, especially if you're sensitive to odors or live in an area with high levels of air pollution. The added cost is usually minimal, and the benefits in terms of air quality can be significant. Finally, don't underestimate the importance of this seemingly small maintenance task. A clean cabin air filter is crucial for maintaining a healthy and comfortable driving environment, protecting your HVAC system, and ensuring optimal performance.