How To Replace Emergency Brake Cable
Few things are as unsettling as pressing the emergency brake and realizing it's not holding. A properly functioning emergency brake, also known as a parking brake, is crucial for safety, especially when parking on inclines or during a primary brake system failure. This article will guide you through the process of replacing your emergency brake cable, providing the technical understanding and practical steps to complete the job safely and effectively.
Emergency Brake System: A Technical Overview
The emergency brake system is an independent secondary braking system designed to hold your vehicle stationary. Unlike the primary hydraulic brake system, which relies on brake fluid pressure, the emergency brake typically uses a mechanical cable system. While some newer vehicles employ electronic parking brakes (EPB), the cable-operated system remains prevalent.
Components of a Typical Emergency Brake System
- Parking Brake Lever/Pedal: This is the actuator, located in the cabin, that initiates the braking action. Pulling the lever or pressing the pedal engages the cable system.
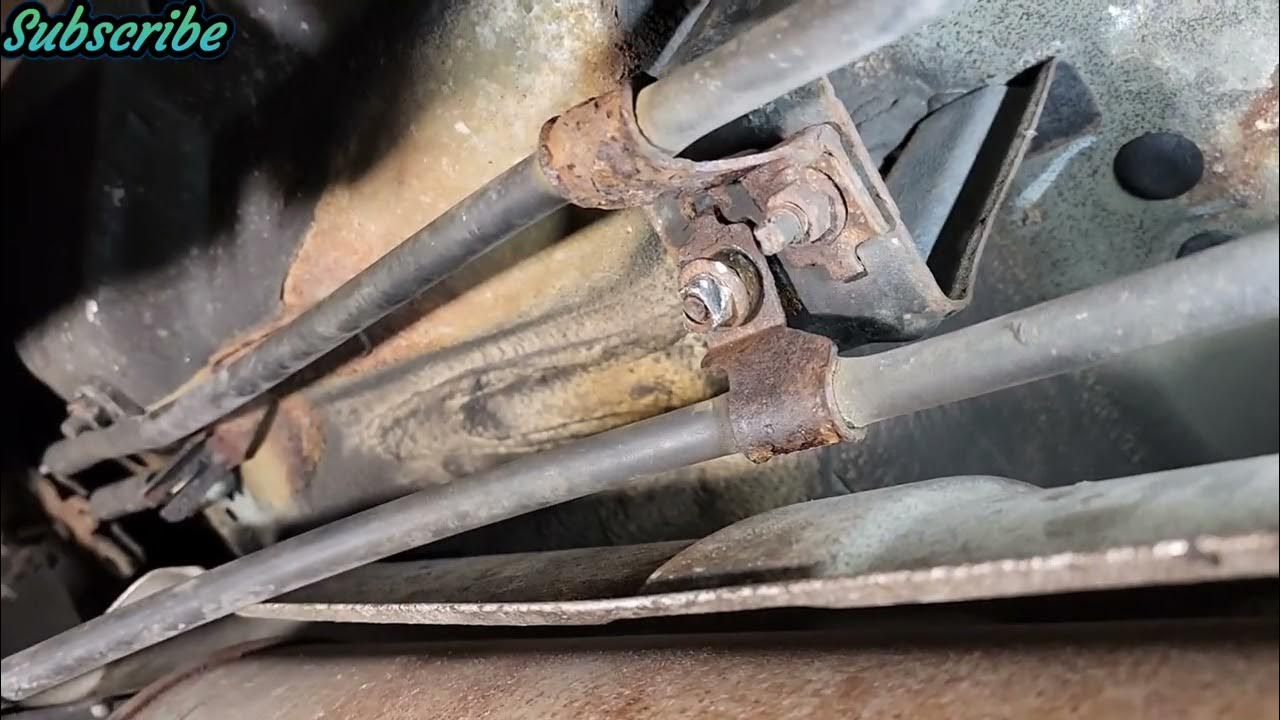
- Cables: These are the lifelines of the system, transmitting the force from the lever/pedal to the brake mechanisms at the wheels. Most vehicles have at least two cables: a primary cable that runs from the lever to an equalizer, and secondary cables that run from the equalizer to each rear wheel.
- Equalizer: This component (often a pivoting bracket) balances the tension between the secondary cables, ensuring even braking force at both rear wheels.
- Brake Mechanisms: These are the components that actually apply the braking force. In vehicles with drum brakes, the emergency brake cable typically actuates a lever inside the drum that expands the brake shoes against the drum. In vehicles with disc brakes, the emergency brake might actuate a separate, smaller drum brake inside the rotor "hat" or directly actuate the disc brake caliper via a mechanical linkage.
How the System Works (Technical Breakdown)
When you engage the parking brake lever/pedal, you're essentially pulling on the primary cable. This tension is then transferred to the secondary cables via the equalizer. The equalizer ensures that both rear wheels receive roughly equal braking force, preventing the vehicle from pulling to one side. At the wheels, the cable pulls on a lever or actuator. This actuator then engages the brake mechanism, either expanding the brake shoes against the drum or clamping the brake pads against the rotor (or engaging a separate drum brake within the rotor). The friction generated by these components provides the holding force to prevent the wheels from rotating.
Replacing the Emergency Brake Cable: Step-by-Step Guide
Replacing an emergency brake cable can seem daunting, but with the right tools and a methodical approach, it's a manageable task for the experienced DIYer. Safety first! Always use jack stands when working under a vehicle. Wear safety glasses and gloves.
Tools and Materials Needed
- New emergency brake cable(s)
- Jack and jack stands
- Wheel chocks
- Wrench set (metric or SAE, depending on your vehicle)
- Socket set (metric or SAE)
- Pliers
- Screwdrivers (Phillips and flathead)
- Penetrating oil (e.g., PB Blaster)
- Wire brush
- Torque wrench
- Gloves
- Safety Glasses
- Optional: Emergency brake tool kit (often includes specialized pliers or levers)
Procedure
- Preparation: Chock the front wheels securely. Loosen the lug nuts on the rear wheels. Jack up the rear of the vehicle and support it securely with jack stands placed under the frame rails. Remove the rear wheels.
- Locate the Cable: Identify the emergency brake cable(s) you'll be replacing. Trace the cable from the parking brake lever/pedal down to the rear wheels. Note the routing of the cable and any clips or brackets holding it in place. Take pictures for reference.
- Loosen the Equalizer: Locate the equalizer. Use penetrating oil on any rusted bolts or nuts. Loosen the adjustment nut on the equalizer cable to relieve tension on the secondary cables. This will make it easier to disconnect the cables at the wheels.
- Disconnect the Cable at the Wheels: This is often the trickiest part. The cable is typically attached to a lever on the brake backing plate (drum brakes) or directly to the caliper (disc brakes). Use penetrating oil generously. You may need to use pliers or a specialized emergency brake tool to compress the spring and detach the cable from the lever. Be careful not to damage the lever or other brake components.
- Detach the Cable from the Car Body: Remove any clips, brackets, or fasteners holding the cable to the undercarriage. These may be simple clips, screws, or bolts. Use a wire brush to clean any rust or debris. Again, take photos as you go.
- Disconnect the Cable at the Lever/Pedal: Go inside the vehicle. Access the parking brake lever/pedal mechanism. This may require removing some interior trim panels. Disconnect the cable from the lever/pedal. This may involve removing a pin, clip, or bolt.
- Remove the Old Cable: With all connections detached, carefully remove the old cable from the vehicle. Be mindful of the routing and try to keep the old cable intact as much as possible. This will help you route the new cable correctly.
- Install the New Cable: Route the new cable exactly as the old one was routed. Attach it to the car body using the original clips and brackets. Secure the cable at the lever/pedal mechanism, ensuring it's properly connected.
- Connect the Cable at the Wheels: Connect the new cable to the brake lever or caliper at each rear wheel. Ensure the cable is properly seated and the spring is correctly positioned.
- Adjust the Equalizer: Tighten the adjustment nut on the equalizer cable to take up the slack in the system. The goal is to have a firm but not overly tight parking brake lever/pedal. Consult your vehicle's service manual for the correct adjustment procedure. Some manuals specify the number of "clicks" the lever should travel before fully engaged.
- Test the Parking Brake: With the wheels still off the ground, engage the parking brake and try to rotate the rear wheels. They should be locked. Release the parking brake and ensure the wheels rotate freely.
- Reinstall the Wheels: Reinstall the rear wheels. Tighten the lug nuts to the specified torque. Lower the vehicle and remove the jack stands. Give the lug nuts a final torque check.
- Final Test: On a safe, flat surface, test the parking brake thoroughly. Ensure it holds the vehicle securely on an incline. Check for any unusual noises or binding.
Common Issues and Maintenance Concerns
- Cable Corrosion: Corrosion is the most common cause of emergency brake cable failure. Moisture and road salt can penetrate the cable housing and cause the cable to rust and seize. Regular inspection and lubrication (using a cable lubricant) can help prevent corrosion.
- Sticking Cables: Cables can also stick due to dirt and debris accumulating inside the housing. This can cause the parking brake to be difficult to engage or disengage.
- Broken Cables: In extreme cases, the cable can break entirely, rendering the emergency brake useless.
- Improper Adjustment: An improperly adjusted parking brake can be either too loose (not holding the vehicle) or too tight (causing premature brake wear). Regular adjustment is necessary to maintain proper function. Refer to your vehicle's service manual for the correct adjustment procedure.
- Sticking Caliper or Drum Components: Even with a good cable, if the caliper's internal mechanism for applying the parking brake is corroded and sticking, it will cause a failure. Inspect the hardware during the cable swap.
Do's and Don'ts / Best Practices
- Do: Use penetrating oil liberally on rusted bolts and connections.
- Do: Take pictures before disassembling anything, especially the cable routing.
- Do: Consult your vehicle's service manual for specific instructions and torque specifications.
- Do: Replace both secondary cables at the same time if one is failing.
- Do: Use new clips and fasteners where necessary.
- Don't: Force anything. If a bolt is stuck, use more penetrating oil and try again later.
- Don't: Over-tighten the equalizer adjustment nut. This can damage the cables and brake components.
- Don't: Neglect the parking brake. Use it regularly to keep the system in good working order.
- Don't: Assume the cables are universal. Always order the correct cable for your vehicle's year, make, and model.
Conclusion
Replacing an emergency brake cable is a challenging but rewarding task for the experienced DIYer. By understanding the system, following the steps outlined in this guide, and exercising caution, you can restore your vehicle's emergency braking system to proper working order. If you're not comfortable with any aspect of this procedure, it's always best to consult a qualified mechanic. However, with careful planning and execution, replacing your emergency brake cable can save you money and provide you with the satisfaction of a job well done. Remember to always prioritize safety and consult your vehicle's service manual for specific instructions.