How To Replace Front Bumper Cover On A 2018 Murano
So, you're looking to replace the front bumper cover on your 2018 Nissan Murano? Whether it's due to a minor fender bender, rock chips, or you're just looking to freshen up the look, swapping out the bumper cover is a manageable project for the experienced DIYer. This guide will walk you through the process step-by-step, providing the technical knowledge and practical advice to get the job done right.
Background: The Murano's Front Fascia
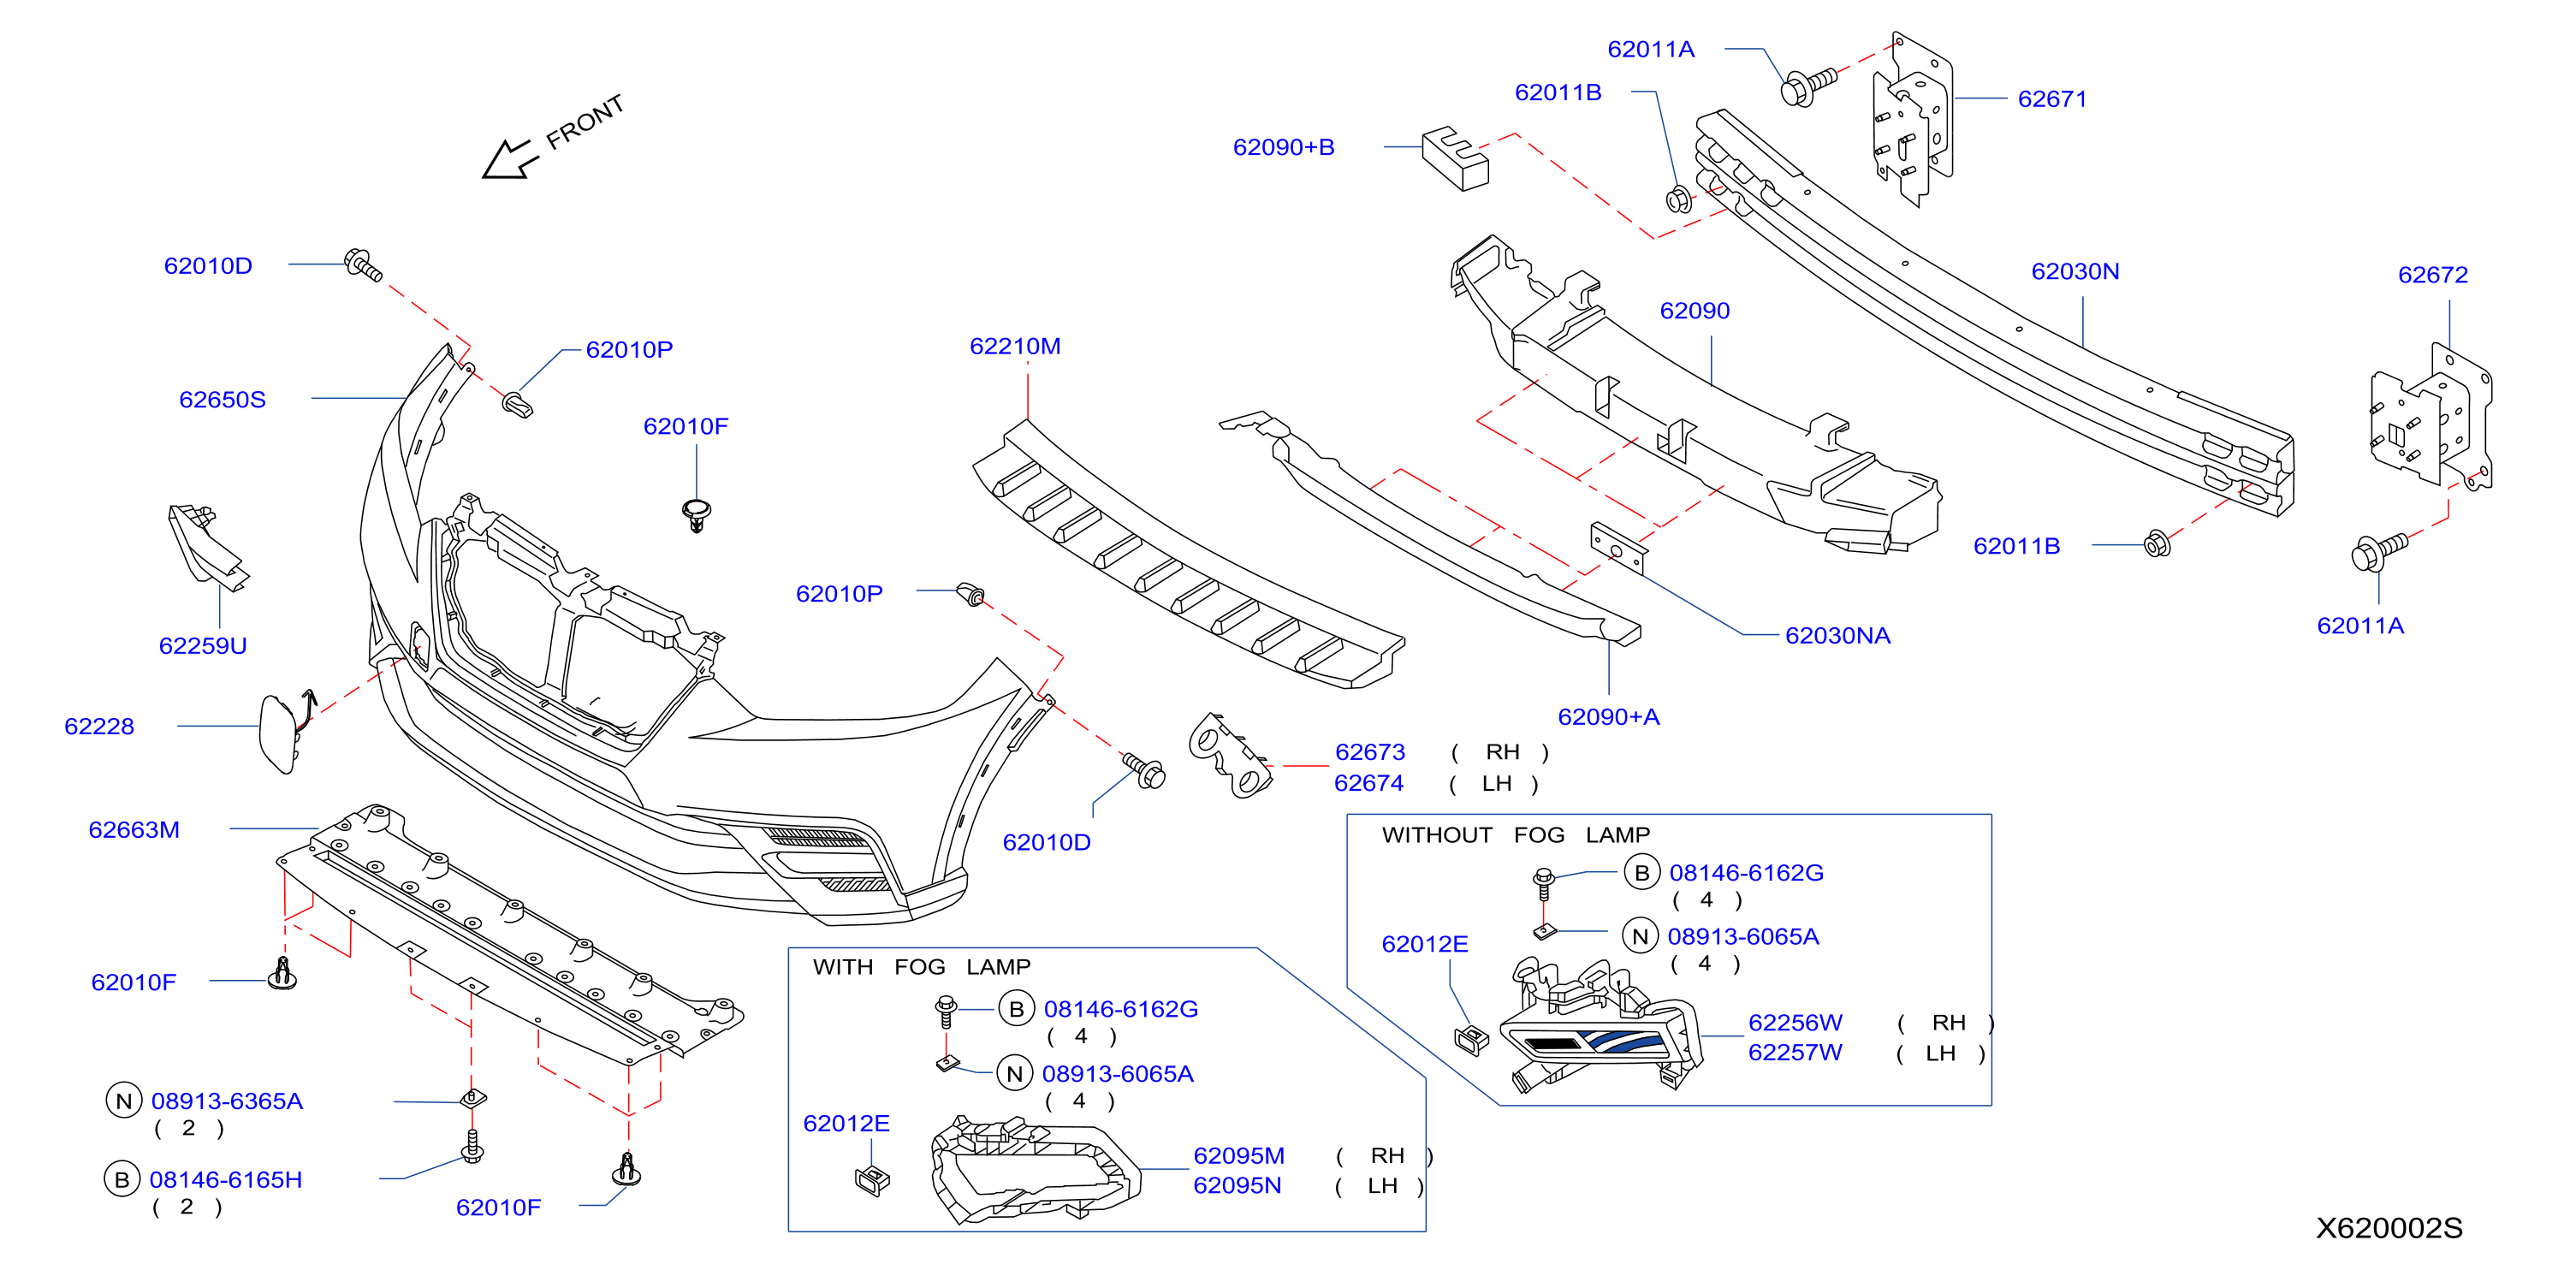
The front bumper cover, often referred to as the fascia, on your 2018 Murano is primarily an aesthetic and aerodynamic component. While it does offer some minor impact protection, its main role is to improve the vehicle's appearance and direct airflow around the vehicle. It's typically made of a flexible plastic polymer, such as polypropylene (PP) or thermoplastic olefin (TPO), chosen for its durability and ability to absorb minor impacts without shattering. Underneath the bumper cover, you'll find the actual bumper, usually constructed of steel or aluminum, which is designed to absorb significant impact in a collision. The bumper cover attaches to the vehicle's frame and surrounding body panels via a series of fasteners, clips, and mounting points.
Technical Breakdown: Replacing the Bumper Cover
Here's a detailed, step-by-step guide to replacing the front bumper cover on your 2018 Nissan Murano:
1. Preparation and Safety
Safety First! Disconnect the negative terminal of the battery using a wrench. This prevents accidental electrical shorts while you're working. Wear safety glasses and gloves to protect yourself from debris and sharp edges. Make sure you have a well-lit and clean workspace. Gather your tools:
- Socket set (metric)
- Screwdriver set (Phillips and flathead)
- Trim removal tools (plastic pry bars)
- Panel popper
- Wrench set (metric)
- Jack and jack stands (optional, but highly recommended for better access)
- New bumper cover (primed or painted to match your vehicle)
2. Removal of Existing Bumper Cover
This is the most crucial step. Take your time and be gentle to avoid damaging other parts of your vehicle.
- Remove the Grille (if applicable): Some Murano models have a separate grille insert that needs to be removed before the bumper cover. This usually involves releasing a few clips or screws from behind the grille. Gently pry it out using a trim removal tool.
- Remove Fasteners: Start by locating and removing all visible screws and bolts. These are typically located:
- Along the top edge of the bumper cover, where it meets the hood.
- Inside the wheel wells, securing the bumper cover to the fender liner.
- Underneath the bumper cover, attaching it to the splash shield or lower valance.
- Detach Fender Liner Clips: The fender liner (the plastic shield inside the wheel well) is often attached to the bumper cover with plastic clips. Use a panel popper or trim removal tool to carefully detach these clips. Be careful not to break them, as you may need to reuse them.
- Release Side Retainers: This is where patience is key. The bumper cover is usually held in place by retainer clips along the sides, where it meets the fenders. Gently pull the bumper cover outwards, starting from one side. You may need to use a trim removal tool to help release the clips. Work your way along the side, carefully releasing each clip until the bumper cover is free. Repeat on the other side.
- Disconnect Electrical Connectors: Before completely removing the bumper cover, check for any electrical connectors attached to it (e.g., fog lights, parking sensors). Disconnect these connectors carefully. Important: Take a picture of the connector locations before disconnecting them, so you know where they go when you reinstall the new bumper cover.
- Remove the Bumper Cover: With all fasteners and connectors removed, carefully pull the bumper cover straight forward, away from the vehicle. It may require a little wiggling. Have someone help you if possible, as the bumper can be bulky.
3. Inspection and Preparation
Once the old bumper cover is removed, take a moment to inspect the underlying components. Check the bumper itself for any signs of damage. Also, inspect the mounting brackets and clips for any cracks or breaks. Replace any damaged parts before installing the new bumper cover. Clean the area where the new bumper cover will be installed.
4. Installation of New Bumper Cover
Now for the reinstallation.
- Reconnect Electrical Connectors: Reconnect any electrical connectors that you disconnected during removal. Refer to the pictures you took earlier to ensure that you connect them correctly.
- Align and Attach: Carefully align the new bumper cover with the vehicle's front end. Start by lining up the side retainers with the fender. Gently push the bumper cover into place, ensuring that the clips engage securely.
- Reinstall Fasteners: Reinstall all the screws and bolts that you removed earlier. Start with the fasteners along the top edge of the bumper cover, then move to the wheel wells and underneath the bumper cover.
- Reattach Fender Liner Clips: Reattach the fender liner clips to the bumper cover.
- Reinstall Grille (if applicable): Reinstall the grille insert, if applicable.
5. Final Check
Once you have installed the new bumper cover, double-check that everything is properly aligned and secured. Make sure all the fasteners are tightened and that all electrical connectors are properly connected. Turn on the headlights and fog lights to ensure they are working correctly (if applicable). Reconnect the negative battery terminal.
Common Issues and Maintenance Concerns
- Broken Clips: Plastic clips can become brittle over time and break easily. Have some replacement clips on hand in case you break any during removal.
- Misalignment: If the bumper cover doesn't align properly, double-check that all the fasteners are properly installed and that the clips are fully engaged. Sometimes, slight adjustments to the mounting brackets may be necessary.
- Rust: Inspect the metal components behind the bumper cover for rust. Treat any rust with a rust converter or inhibitor to prevent further corrosion.
Do's and Don'ts / Best Practices
Do's:
- Work in a well-lit and clean environment.
- Take your time and be gentle when removing and installing the bumper cover.
- Use the correct tools for the job.
- Keep track of all the fasteners.
- Take pictures before disconnecting any electrical connectors.
- Test all electrical components after installation.
Don'ts:
- Force anything. If something doesn't seem right, stop and re-evaluate.
- Use excessive force when removing clips or fasteners.
- Work on the vehicle without proper safety precautions.
- Over-tighten fasteners, as this can damage the plastic components.
Conclusion
Replacing the front bumper cover on your 2018 Nissan Murano is a straightforward project for the reasonably skilled DIYer. By following these steps carefully and paying attention to detail, you can save money and gain valuable experience working on your vehicle. Remember to prioritize safety and take your time. If you're uncomfortable with any aspect of the procedure, it's always best to consult a professional mechanic. Good luck!