How To Replace Rear Brake Light
Replacing a rear brake light is a common car maintenance task that most vehicle owners can handle themselves. It's a relatively simple procedure that can save you time and money compared to taking your car to a mechanic. This article provides a comprehensive guide on how to replace your rear brake light, covering everything from choosing the right bulb to step-by-step instructions, ensuring a safe and successful outcome.
Why Replacing Your Rear Brake Light Matters
A functioning rear brake light is absolutely essential for safety. It's a critical communication tool, alerting drivers behind you that you are slowing down or stopping. A burnt-out brake light significantly increases the risk of a rear-end collision, especially in low-light conditions or heavy traffic. Beyond safety, driving with a non-functioning brake light can result in a citation and fine in many jurisdictions. Regular checks of all your vehicle's lights, including brake lights, are a crucial part of responsible vehicle ownership. Ignoring a faulty brake light is not only dangerous but can also lead to legal consequences.
Furthermore, a faulty brake light can sometimes indicate underlying electrical issues. While replacing the bulb might be a quick fix, it's wise to monitor the new bulb and the overall function of your vehicle's lighting system. If the bulb burns out quickly or you notice other electrical problems, it's best to consult a qualified mechanic.
How to Choose the Right Replacement Bulb
Selecting the correct replacement bulb is paramount for ensuring proper functionality and compatibility with your vehicle's electrical system. Using the wrong bulb can lead to dim lighting, flickering, or even damage to the electrical circuits. Here's how to choose the right one:
1. Consult Your Owner's Manual
Your vehicle's owner's manual is your best resource for finding the correct bulb type. It will typically list the specific bulb number or type required for your rear brake lights. Look for the section on "Bulb Replacement" or "Lighting."
2. Check the Old Bulb
Carefully remove the old bulb and inspect it. The bulb type is often printed directly on the bulb's base or glass. You might see a number like "7443" or "1157." This number corresponds to a specific bulb type.
3. Use an Online Bulb Finder
Most automotive parts stores have online bulb finder tools. You can enter your vehicle's year, make, and model, and the tool will provide a list of compatible bulbs. Reputable websites like AutoZone, Advance Auto Parts, and O'Reilly Auto Parts offer these tools.
4. Ask an Automotive Parts Store Employee
If you're still unsure, visit a local automotive parts store and ask for assistance. The employees can help you identify the correct bulb based on your vehicle's information. Be sure to provide accurate details about your car.
5. Consider LED Alternatives
While traditional incandescent bulbs are common, LED (Light Emitting Diode) bulbs are becoming increasingly popular. LED bulbs offer several advantages, including longer lifespan, brighter illumination, and lower energy consumption. If you're considering LED bulbs, ensure they are compatible with your vehicle's electrical system and meet DOT (Department of Transportation) standards. Some vehicles may require a load resistor when switching to LED bulbs to prevent hyper-flashing.
Important Note: When handling bulbs, avoid touching the glass with your bare fingers. The oil from your skin can create hotspots that shorten the bulb's lifespan. Use a clean cloth or gloves to handle the bulb.
Step-by-Step Guide to Replacing Your Rear Brake Light
Here's a detailed guide on how to replace your rear brake light. Always consult your owner's manual for vehicle-specific instructions, as procedures can vary slightly depending on the make and model.
Tools You'll Need:
- New replacement bulb (correct type)
- Screwdriver (Phillips or flathead, depending on your vehicle)
- Gloves (optional, to protect your hands and avoid touching the bulb glass)
- Clean cloth or paper towel
Steps:
- Safety First: Turn off the ignition and engage the parking brake. This is crucial for safety.
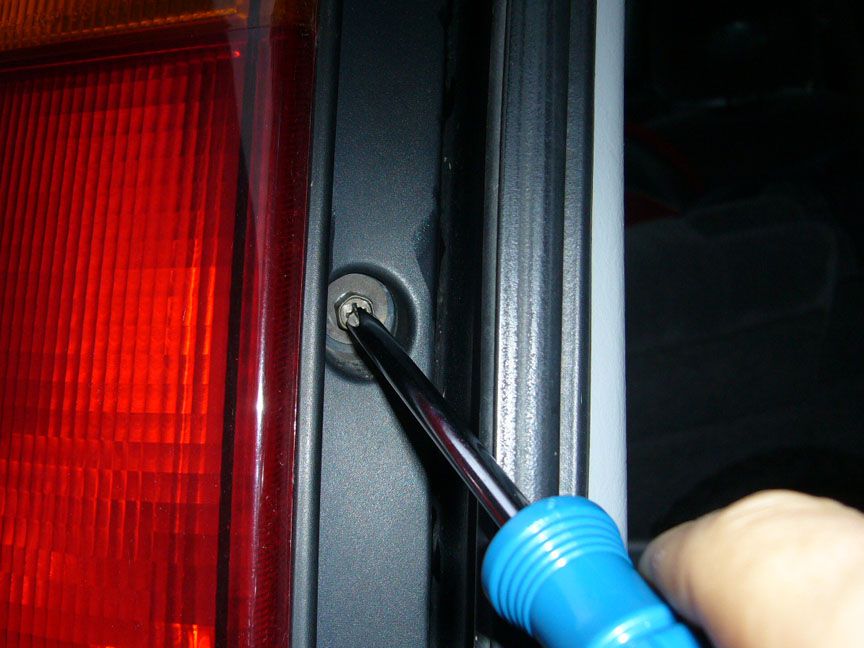
- Access the Bulb Housing: The location of the bulb housing varies depending on your vehicle. In some cars, you can access it from inside the trunk or cargo area. You may need to remove a plastic panel or access door. In other cars, you might need to remove the entire taillight assembly from the outside. Consult your owner's manual for specific instructions.
- Remove the Bulb Socket: Once you have access to the bulb housing, locate the bulb socket. It's usually a plastic piece that twists or pulls out. Gently twist the socket counterclockwise (usually about a quarter turn) to release it. If it's a pull-out type, carefully pull it straight out. Avoid forcing it.
- Remove the Old Bulb: Once the socket is removed, carefully remove the old bulb. The method for removing the bulb varies depending on the type. Some bulbs simply pull straight out, while others require a slight twist and pull. Refer to your owner's manual or the markings on the socket for guidance.
- Install the New Bulb: Insert the new bulb into the socket, aligning the pins or notches correctly. Ensure the bulb is firmly seated. If you're using an LED bulb, double-check the polarity (positive and negative) if it doesn't work initially, try flipping the bulb around.
- Reinstall the Bulb Socket: Carefully reinsert the bulb socket into the bulb housing, twisting it clockwise to lock it in place or pushing it straight in until it clicks.
- Test the Brake Light: Turn on the ignition (without starting the engine) and have someone press the brake pedal. Check to ensure the new brake light is working correctly. If it doesn't work, double-check the bulb installation and the socket connection. Also, check your vehicle's fuses to rule out a blown fuse.
- Reassemble the Housing: If the brake light is working correctly, reassemble the bulb housing and any panels you removed to access it.
- Repeat for the Other Side: If necessary, repeat the process for the other brake light. It's often recommended to replace both brake lights at the same time to ensure consistent brightness and color.
Troubleshooting Tips: If the new bulb doesn't work, check the following:
- Ensure you're using the correct bulb type.
- Check the bulb socket for corrosion or damage.
- Inspect the vehicle's fuses. A blown fuse can prevent the brake light from working.
- If you're using LED bulbs, ensure they are compatible with your vehicle. You might need to install a load resistor.
Real-World Owner Experiences
Many vehicle owners have shared their experiences replacing rear brake lights online. One common theme is the importance of having the right tools and taking your time. Rushing the process can lead to broken plastic clips or damaged wiring. Another common tip is to take a picture of the bulb housing before disassembling it. This can help you remember how everything goes back together. Several owners have also emphasized the importance of consulting the owner's manual for specific instructions related to their vehicle's make and model. Furthermore, forums and online communities dedicated to specific car brands often have detailed guides and troubleshooting tips for common repairs like replacing brake lights.
Frequently Asked Questions (FAQs)
Q: How often should I check my brake lights?
A: It's recommended to check your brake lights at least once a month, or more frequently if you drive often in heavy traffic or at night.
Q: Can I replace my brake light with an LED bulb?
A: Yes, but ensure the LED bulb is compatible with your vehicle's electrical system. Some vehicles may require a load resistor to prevent hyper-flashing.
Q: What does it mean if my brake light is dim or flickering?
A: A dim or flickering brake light can indicate a loose connection, a corroded bulb socket, or a failing bulb. Check the connections and replace the bulb if necessary.
Q: Is it illegal to drive with a broken brake light?
A: Yes, in most jurisdictions, it is illegal to drive with a broken brake light. It's a safety hazard and can result in a citation.
Q: How much does it cost to have a mechanic replace a brake light?
A: The cost can vary depending on the mechanic and the vehicle. It typically ranges from $20 to $50 for labor, plus the cost of the bulb. Replacing it yourself can save you money.
Q: What are some signs of a brake light problem besides a completely burnt-out bulb?
A: Besides a completely dark brake light, other signs include: dimming, flickering, intermittent operation (working sometimes, not others), and error messages on your car's dashboard related to the lighting system.
By following these steps and tips, you can confidently replace your rear brake light and ensure your vehicle remains safe and compliant with traffic laws. Remember, safety is paramount! If you're uncomfortable performing the repair yourself, consult a qualified mechanic.