How To Replace Rubber Gasket On Infinity G25 Car Door
The relentless assault of weather, the abrasive friction of daily use, and the inevitable march of time all conspire against the humble rubber gasket on your Infinity G25 car door. These unsung heroes are critical for maintaining a quiet, dry, and comfortable cabin. When they fail, you'll notice increased wind noise, water leaks, and even a potentially damaging buildup of moisture inside your vehicle. Replacing these gaskets, while seemingly straightforward, requires a methodical approach to ensure a proper seal and prevent further issues.
Understanding the Problem: A Leaky Fortress
Imagine your G25 as a meticulously crafted fortress. The doors are the primary gates, and the rubber gaskets are the gatekeepers, tasked with preventing unwanted intrusions. Just like a crumbling castle wall weakens its defenses, degraded door gaskets compromise the integrity of your car's seal. A compromised seal leads to a host of problems:
- Wind Noise: Whistling sounds at highway speeds are a telltale sign of air leaking through gaps in the gasket.
- Water Leaks: Rainwater finds its way into the cabin, potentially damaging carpets and electronics.
- Increased Road Noise: External sounds, like passing traffic, become more prominent.
- Reduced Climate Control Efficiency: Your air conditioning or heating system has to work harder to maintain the desired temperature.
- Corrosion: Water trapped inside the door frame can lead to rust and corrosion.
These problems aren't just annoyances; they can lead to more serious issues down the road. Ignoring a leaky gasket can result in costly repairs to interior components and even compromise the structural integrity of the door itself.
The Mechanics of a Door Gasket: A Detailed Look
A car door gasket isn't just a simple strip of rubber; it's an engineered component designed to perform several crucial functions. Let's break down its key features:
Profile: The shape of the gasket is carefully designed to create a tight seal against both the door frame and the car body. Different sections of the gasket might have varying thicknesses and curvatures to accommodate the contours of the door and frame. Often, a hollow section within the profile allows for compression and rebound, ensuring a consistent seal even with slight variations in door alignment.
Material: Most door gaskets are made from ethylene propylene diene monomer (EPDM) rubber, a synthetic rubber known for its excellent resistance to weathering, ozone, and UV radiation. EPDM rubber also maintains its flexibility over a wide temperature range, making it suitable for use in various climates. Some gaskets may incorporate other materials, such as foam or metal inserts, to enhance their sealing properties or provide structural support.
Attachment Mechanism: Gaskets are typically attached to the door frame or car body using one or more of the following methods:
- Adhesive: A strong adhesive is used to bond the gasket to the surface. This is a common method, particularly for gaskets that are difficult to clip or slide into place.
- Clips: Plastic or metal clips are molded into the gasket and snap into corresponding holes in the door frame or car body. This method allows for easier installation and removal.
- Interlocking Channels: The gasket has a channel that slides onto a flange on the door frame or car body. This provides a secure and weather-resistant seal.
The effectiveness of a door gasket depends on a combination of these factors. A properly designed gasket made from high-quality materials and securely attached to the vehicle will provide years of reliable service.
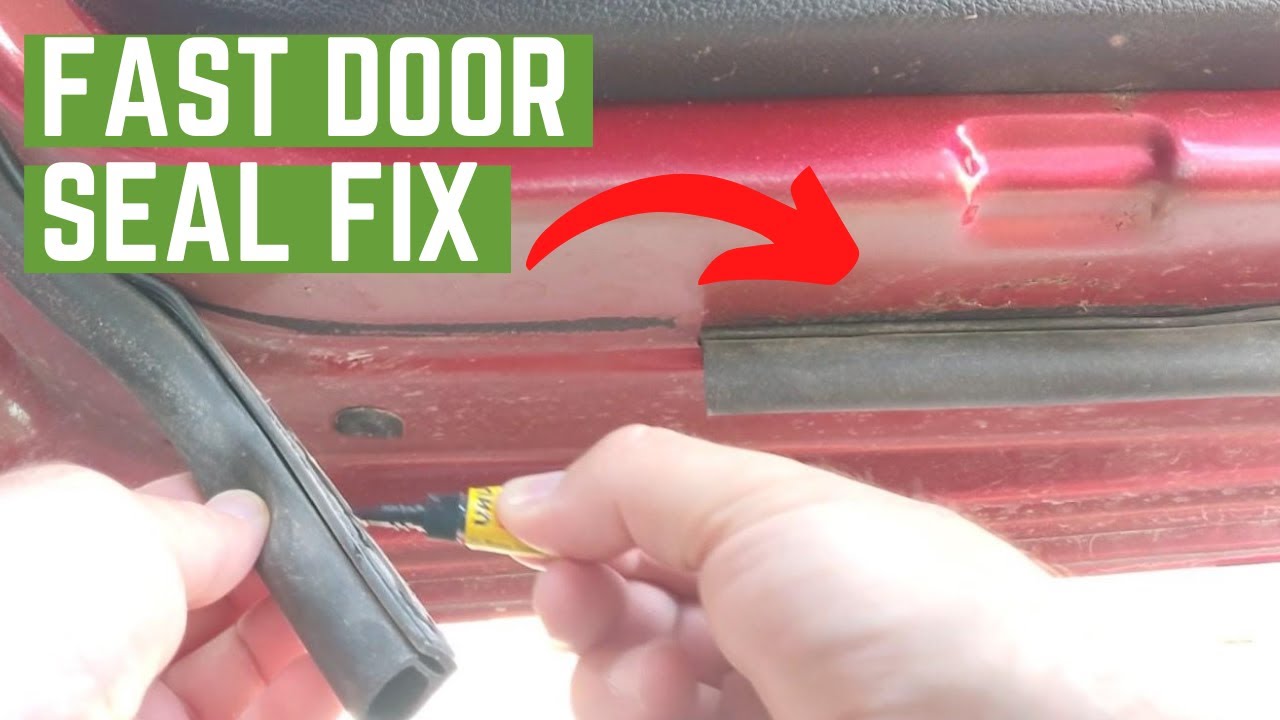
The Replacement Process: A Step-by-Step Guide
Replacing a door gasket on a G25 is a task that can be accomplished with basic tools and a bit of patience. Here's a detailed guide:
- Preparation:
- Gather your tools: A plastic trim removal tool, a clean rag, rubbing alcohol or a mild solvent, adhesive remover (if needed), and the new door gasket. Ensure the new gasket is the correct one for your G25's door (driver or passenger, front or rear).
- Protect the surrounding area: Use painter's tape to mask off the paint around the gasket to prevent scratches or damage during removal.
- Gasket Removal:
- Start by carefully prying the old gasket loose using the plastic trim removal tool. Work your way around the perimeter of the gasket, gently separating it from the door frame or car body. If the gasket is held in place by clips, try to disengage them one at a time.
- If the gasket is heavily glued, use an adhesive remover specifically designed for automotive applications. Apply the remover according to the manufacturer's instructions and allow it to soften the adhesive before attempting to remove the gasket. Avoid using excessive force, as this could damage the underlying surface.
- Once the gasket is removed, thoroughly clean the area with rubbing alcohol or a mild solvent to remove any residual adhesive or dirt. Allow the surface to dry completely.
- Gasket Installation:
- Carefully align the new gasket with the door frame or car body. Start at one end and gradually work your way around the perimeter, pressing the gasket firmly into place.
- If the gasket has clips, ensure that they are properly aligned with the corresponding holes and snap them into place.
- If the gasket is held in place by adhesive, apply a thin bead of automotive-grade weatherstrip adhesive to the mating surface. Press the gasket firmly into place and hold it for a few minutes to allow the adhesive to bond. Follow the adhesive manufacturer’s instructions for curing time.
- Double-check that the gasket is properly seated and that there are no gaps or wrinkles.
- Testing:
- Close the door and check the seal. Look for any gaps or areas where the gasket is not making contact with the car body.
- Pour water around the door and check for leaks inside the cabin.
- If you notice any leaks, adjust the gasket as needed. You may need to reapply adhesive or adjust the position of the clips.
Pros and Cons of DIY Replacement
Pros:
- Cost Savings: Replacing the gasket yourself can save you a significant amount of money compared to having a professional do it.
- Personal Satisfaction: Completing the job yourself provides a sense of accomplishment.
- Convenience: You can do the job at your own pace and on your own schedule.
Cons:
- Time Commitment: The job can take several hours, especially if you are not experienced.
- Potential for Damage: If you are not careful, you could damage the paint or trim on your car.
- Incorrect Installation: If the gasket is not installed properly, it may leak or come loose.
Manufacturer Examples and Use Cases
Many aftermarket manufacturers produce replacement door gaskets for the Infinity G25. Companies like Metro Moulded Parts and Steele Rubber Products are well-known for their high-quality rubber components. These manufacturers often offer gaskets that are specifically designed to match the original equipment manufacturer (OEM) specifications, ensuring a proper fit and seal. In some cases, aftermarket gaskets may even offer improved performance or durability compared to the original parts.
Use cases for replacing door gaskets extend beyond simply addressing leaks. Some owners choose to replace their gaskets as part of a restoration project, while others may do so to improve the overall appearance of their vehicle. Replacing worn or faded gaskets can make a significant difference in the way a car looks and feels.
Real-World Insights and Recommendations
Based on user experiences and professional observations, here are some key recommendations for replacing door gaskets on your G25:
- Choose the Right Gasket: Always ensure that you are purchasing the correct gasket for your specific vehicle model and door location. Double-check the part number and compare it to the original gasket before installation.
- Cleanliness is Key: Thoroughly cleaning the mating surfaces is essential for proper adhesion. Remove all traces of old adhesive and dirt before installing the new gasket.
- Use the Right Adhesive: Use an automotive-grade weatherstrip adhesive that is specifically designed for bonding rubber to metal or plastic. Avoid using generic adhesives, as they may not provide a strong or durable bond.
- Take Your Time: Don't rush the installation process. Work carefully and methodically, ensuring that the gasket is properly aligned and seated.
- Consider Professional Help: If you are not comfortable performing the job yourself, or if you encounter any difficulties, it is best to seek professional assistance. A qualified mechanic can ensure that the gasket is properly installed and that your car is protected from leaks.
Replacing your Infinity G25's door gaskets is a manageable task that can significantly improve your driving experience and protect your vehicle from the elements. By understanding the mechanics of the system, following the proper installation procedures, and taking your time, you can successfully restore the integrity of your car's seal and enjoy a quieter, drier, and more comfortable ride.