How To Replace Side Mirror Cover
A cracked or scuffed side mirror cover is an aesthetic blight and, while not immediately impacting vehicle functionality, it's often the first casualty of close encounters with parking bollards, errant shopping carts, or the infamous unseen garage door frame. Replacing it might seem like a daunting task best left to professionals, but with a bit of patience, the right tools, and a fundamental understanding of how these covers are attached, it's a surprisingly accessible DIY project. Think of it as replacing a phone case – same principle, different scale. This guide breaks down the process, exploring the mechanics, potential pitfalls, and overall feasibility of swapping out your side mirror cover.
The Problem: More Than Just Looks
Imagine this: You're pulling into a tight parking spot downtown. A momentary lapse in judgment, a slight miscalculation, and *crunch*. You check the damage. No major dents, thankfully, but the side mirror cover now sports a jagged crack. While the mirror itself remains intact and the electric adjustment still functions perfectly, the damaged cover detracts from your car's appearance and, depending on the severity, could potentially become a snag hazard. This is a common scenario, and the good news is that in many cases, the entire mirror assembly doesn't need replacing – just the cover.
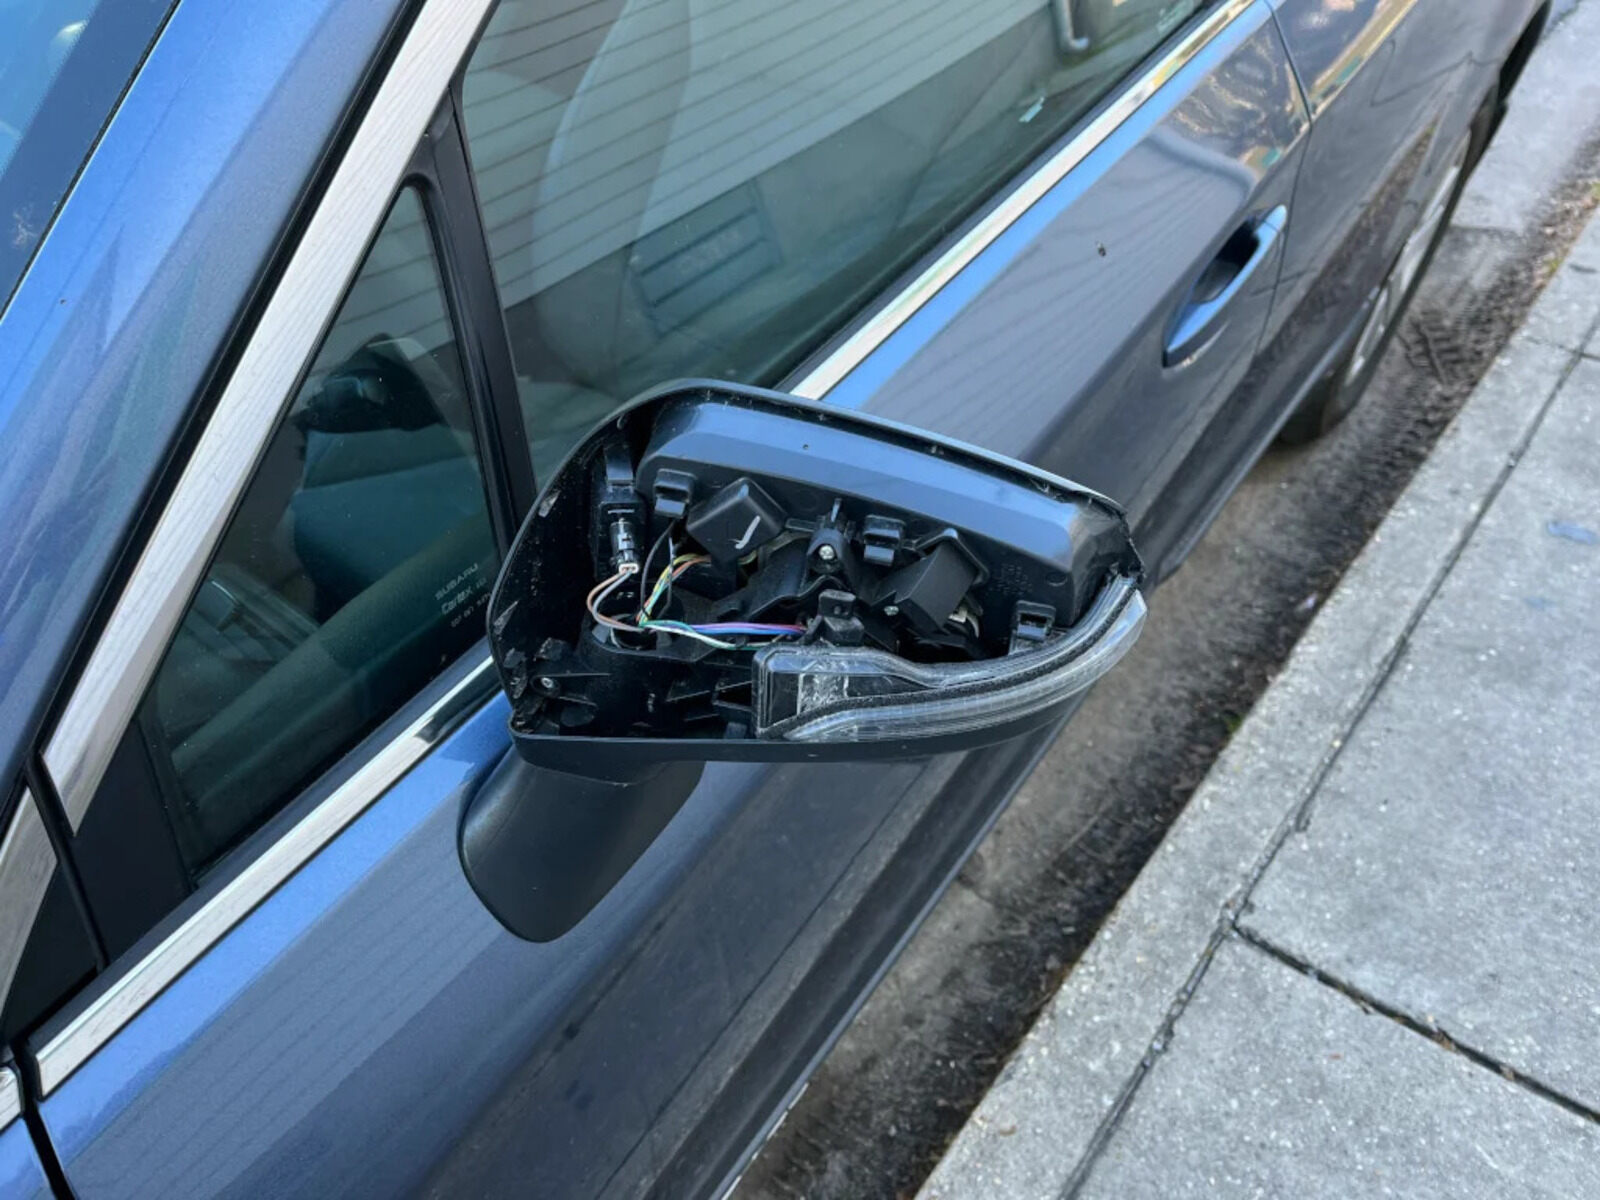
A damaged mirror cover can also expose the internal components of the mirror assembly to the elements. Rain, snow, and road salt can accelerate corrosion and potentially damage the delicate electrical connections controlling the mirror's adjustment motors, heating elements (if equipped), and even the turn signal repeater often integrated into the mirror housing. Addressing the issue promptly prevents further, more costly, repairs down the line.
Understanding the Mechanics: Clips, Tabs, and Friction
The typical side mirror cover isn't held on by screws or bolts (though some models might have one or two hidden fasteners). Instead, it relies on a system of plastic clips, tabs, and strategically placed friction points. Think of it like Lego blocks – they snap together securely but can be carefully disassembled with the right technique. The number and configuration of these clips and tabs vary depending on the vehicle manufacturer and model, but the underlying principle remains the same: a secure, yet detachable, connection.
The Anatomy of a Side Mirror Cover Attachment
Let's break down the key components that keep your side mirror cover in place:
- Clips: These are small, usually flexible, plastic protrusions molded into the back of the mirror cover. They're designed to snap into corresponding slots or openings on the mirror housing. When properly engaged, the clips provide a strong, audible "click," indicating a secure connection.
- Tabs: Similar to clips, tabs are often wider and flatter. They might slide into grooves or under retaining lips on the mirror housing. Unlike clips, tabs often contribute more to alignment and preventing lateral movement than to the primary locking force.
- Friction Fit: In some areas, the mirror cover might rely on a tight friction fit with the mirror housing. This is particularly common around the edges of the cover, where the plastic is designed to press snugly against the housing, creating a seal and preventing vibrations.
The challenge lies in disengaging these clips and tabs without breaking them. Brute force is rarely the answer. Instead, finesse and understanding are key. Applying pressure in the correct areas, often combined with a gentle rocking or prying motion, allows the clips to release one by one.
The Replacement Process: A Step-by-Step Guide
Before you begin, gather the necessary tools:
- New Side Mirror Cover: Ensure it's the correct part for your vehicle's year, make, and model. Check the part number to be certain.
- Plastic Pry Tools: These are essential for gently releasing the clips without scratching or damaging the surrounding plastic. Avoid using metal screwdrivers, as they can easily mar the finish.
- Gloves: Protect your hands from sharp edges and keep them clean.
- Optional: Heat Gun or Hair Dryer: A gentle warming of the plastic can make it more pliable and reduce the risk of breakage, especially in cold weather.
Step-by-Step Instructions
- Preparation: Clean the area around the mirror cover with a mild detergent and water. This removes dirt and grime, making it easier to see the clips and tabs. If using a heat gun or hair dryer, apply gentle heat to the edges of the cover. Be careful not to overheat the plastic.
- Locate the Clips: Examine the new mirror cover to identify the location of the clips and tabs. This will give you a better idea of where to apply pressure.
- Release the Clips: Starting at one edge of the cover, gently insert a plastic pry tool between the cover and the mirror housing. Apply gentle pressure to release the first clip. Work your way around the cover, releasing each clip one at a time. Listen for the "click" as each clip disengages.
- Remove the Old Cover: Once all the clips are released, the cover should come off easily. If it's still stuck, double-check that you haven't missed any clips.
- Clean the Mirror Housing: Before installing the new cover, clean the mirror housing to remove any dirt or debris.
- Install the New Cover: Align the new cover with the mirror housing and press it into place, ensuring that all the clips engage properly. You should hear a distinct "click" as each clip snaps into place.
- Test the Fit: Once the cover is installed, check that it's securely attached and that there are no gaps or loose edges.
Pros and Cons of DIY Replacement
Pros:
- Cost Savings: Replacing the mirror cover yourself can save you a significant amount of money compared to having a professional do it. Labor costs at a repair shop can easily double the price of the repair.
- Convenience: You can complete the repair at your own pace and on your own schedule, without having to leave your car at a shop.
- Sense of Accomplishment: Successfully completing a DIY repair can be a rewarding experience.
- Learning Opportunity: You gain valuable knowledge about your vehicle's construction and how it works.
Cons:
- Risk of Damage: If you're not careful, you could damage the mirror housing or break the clips on the new cover.
- Time Commitment: The repair can take longer if you're not experienced.
- Potential for Incorrect Installation: If the cover isn't installed properly, it could come loose or leak.
- Requires Basic Mechanical Skills: While not rocket science, the task demands some dexterity and patience.
Use Cases and Manufacturer Examples
The clip-and-tab attachment method is widely used across various manufacturers and models. For example:
- Honda Civic: Known for relatively straightforward mirror cover removal, often requiring a gentle upward pull after releasing a few key clips.
- Toyota Camry: Similar to Honda, with a focus on secure clip placement for a tight fit.
- BMW 3 Series: Can be slightly more complex, sometimes requiring the removal of the mirror glass itself to access hidden clips.
- Ford F-150: Given the size of the mirror, the F-150's cover typically uses more robust clips and tabs for added security.
The specific removal procedure varies slightly between these models, highlighting the importance of consulting your vehicle's repair manual or searching for model-specific online tutorials before attempting the repair.
Real-World Insights and Recommendations
Based on anecdotal evidence and online forums, the most common mistake when replacing a side mirror cover is using excessive force. Patience is paramount. If a clip isn't releasing easily, double-check that you're applying pressure in the correct area. Sometimes, a gentle rocking motion can help to dislodge stubborn clips.
Another common pitfall is purchasing the wrong replacement cover. Always verify the part number to ensure compatibility with your vehicle. Some manufacturers offer different mirror cover options (e.g., with or without turn signal repeaters), so pay close attention to the details.
Finally, consider investing in a set of good-quality plastic pry tools. Cheap tools can break easily and may not be shaped correctly for releasing the clips. A small investment in the right tools can make the job much easier and reduce the risk of damage.
In conclusion, replacing a side mirror cover is a manageable DIY project for the average car owner. By understanding the mechanics of the attachment system, using the right tools, and exercising patience, you can save money and restore your vehicle's appearance. Just remember to proceed with caution, and don't be afraid to seek professional help if you encounter any difficulties.