How To Set The Distributor Timing
Setting the distributor timing is a critical task for maintaining the performance and longevity of older engines. While modern cars rely on electronic ignition systems, many classic cars, trucks, and even some earlier fuel-injected vehicles use a distributor-based ignition. Incorrect timing can lead to a host of problems, from poor fuel economy and reduced power to overheating and even engine damage. This guide provides a comprehensive walkthrough of how to set your distributor timing correctly, ensuring optimal engine performance.
Background: The Distributor-Based Ignition System
To understand why setting the timing is important, let's first review the basics of a distributor-based ignition system. In essence, this system's job is to deliver a high-voltage spark to the correct cylinder at precisely the right moment to ignite the air-fuel mixture. The key components include:
- Battery: Provides the initial electrical power.
- Ignition Coil: Steps up the battery's voltage (typically 12V) to a very high voltage (often 20,000 to 40,000 volts) necessary to create a spark.
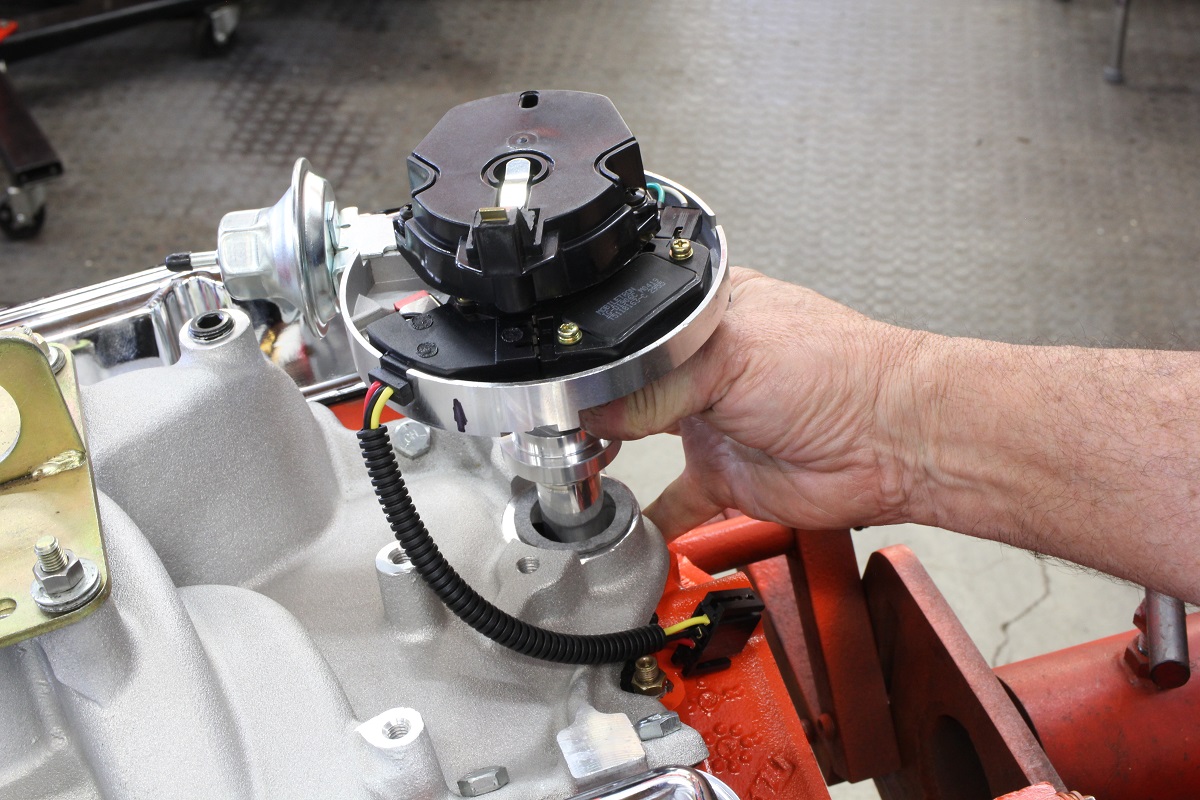
- Distributor: This is the heart of the system. It performs several vital functions:
- Breaker Points (or Electronic Ignition Module): Opens and closes the primary circuit of the ignition coil, causing it to generate a high-voltage pulse. In older systems, mechanical breaker points were used; newer systems often use a magnetic pickup or Hall-effect sensor and an electronic ignition module to perform the same function without the wear and tear of mechanical points.
- Distributor Cap: Directs the high-voltage pulse from the coil to the correct spark plug.
- Rotor: A rotating arm inside the distributor cap that makes contact with each of the cap's terminals in sequence.
- Vacuum Advance (and/or Mechanical Advance): Advances the timing of the spark based on engine load and speed. We'll discuss these in more detail later.
- Centrifugal Advance: A mechanical system within the distributor that uses weights and springs to advance timing based on engine RPM.
- Spark Plugs: Provide a gap across which the high-voltage electricity jumps, creating the spark that ignites the air-fuel mixture in the cylinder.
- Ignition Wires: Conduct the high-voltage electricity from the distributor cap to the spark plugs.
Technical Breakdown: How Timing Works
The engine's timing refers to the precise moment the spark plug fires in relation to the position of the piston in its cylinder. This is typically measured in degrees Before Top Dead Center (BTDC) or After Top Dead Center (ATDC). Top Dead Center (TDC) is the point where the piston is at its highest position in the cylinder. Firing the spark before TDC allows time for the combustion process to reach peak pressure as the piston begins its downward power stroke.
The distributor's job is to ensure that the spark occurs at the correct BTDC angle for each cylinder. This angle is determined by a combination of factors, including engine RPM, engine load (vacuum), and the engine's design characteristics. The distributor achieves this through two primary mechanisms:
- Base Timing: This is the timing set at idle speed with the vacuum advance disconnected. It's the foundation upon which all other timing adjustments are built. This is what you adjust when you rotate the distributor.
- Vacuum Advance: Connected to a vacuum port on the carburetor or intake manifold, this mechanism advances the timing based on engine vacuum. High vacuum (light engine load) indicates a lean air-fuel mixture that burns slower, so the timing is advanced to compensate. Low vacuum (heavy engine load) indicates a richer mixture that burns faster, so the timing is retarded (delayed).
- Centrifugal Advance: As engine speed increases, weights inside the distributor swing outward due to centrifugal force. This movement advances the timing, allowing the engine to produce more power at higher RPMs.
Setting the Timing: A Step-by-Step Guide
- Gather Your Tools: You'll need:
- Timing light (inductive pickup type is recommended)
- Wrench to loosen the distributor hold-down clamp
- Vacuum gauge (optional, but helpful for diagnosing vacuum advance issues)
- Tachometer (either built-in or handheld)
- Service manual for your vehicle (essential for finding the correct timing specifications)
- Chock blocks for the wheels
- Warm Up the Engine: The engine should be at its normal operating temperature before setting the timing.
- Locate the Timing Marks: These are typically located on the crankshaft pulley or the vibration damper. There will be a series of marks indicating degrees BTDC (and sometimes ATDC). A pointer or tab on the engine block indicates the TDC reference point. Clean the marks and the pointer with a wire brush to make them easier to see. A dab of white paint on the appropriate mark can also help.
- Identify the Timing Specification: Consult your service manual for the correct base timing specification for your engine. This will be expressed in degrees BTDC at a specific RPM. For example, "8 degrees BTDC @ 700 RPM".
- Disconnect and Plug the Vacuum Advance: Disconnect the vacuum hose from the vacuum advance unit on the distributor and plug the hose to prevent vacuum leaks. This is crucial because the vacuum advance will skew your timing readings if it's active.
- Connect the Timing Light: Connect the timing light's inductive pickup to the spark plug wire of the #1 cylinder. Connect the power leads of the timing light to the battery (positive to positive, negative to negative).
- Start the Engine: Start the engine and allow it to idle at the specified RPM (or as close as possible). Use the tachometer to verify the RPM.
- Aim the Timing Light: Aim the timing light at the timing marks on the crankshaft pulley/damper and the pointer on the engine block. The timing light will flash, making the marks appear to freeze in place.
- Adjust the Distributor: Loosen the distributor hold-down clamp just enough so that you can rotate the distributor. Slowly rotate the distributor until the timing mark corresponding to the specified base timing aligns with the pointer.
- Tighten the Distributor Clamp: Once the timing is set correctly, carefully tighten the distributor hold-down clamp. Be careful not to move the distributor while tightening the clamp. Recheck the timing after tightening the clamp to ensure it hasn't shifted.
- Reconnect the Vacuum Advance: Reconnect the vacuum hose to the vacuum advance unit.
- Verify Vacuum Advance Operation: With the engine running, slowly increase the engine speed. You should see the timing advance further as the vacuum advance unit activates. You can also use a vacuum gauge connected to the vacuum advance hose to verify that vacuum is present when the throttle is opened.
- Road Test: Take the vehicle for a test drive. Listen for engine pinging or knocking under load, which can indicate excessive timing advance. If you hear pinging, retard the timing slightly.
Common Issues and Maintenance Concerns
- Worn Distributor Components: Over time, the distributor cap, rotor, breaker points (if equipped), and vacuum advance unit can wear out. Inspect these components regularly for signs of wear, such as cracks, corrosion, or loose connections. Replace them as needed.
- Sticking Vacuum Advance: The vacuum advance unit can become sticky or seized, preventing it from advancing the timing properly. Test the vacuum advance unit by applying vacuum to it with a vacuum pump. The diaphragm should move freely.
- Incorrect Timing Specifications: Make sure you're using the correct timing specifications for your specific engine. Using the wrong specifications can lead to poor performance or engine damage.
- Timing Chain Stretch: In older engines with timing chains, the chain can stretch over time, which can affect the timing. If you're having trouble setting the timing, check the timing chain for excessive slack.
- Damaged Harmonic Balancer: The harmonic balancer (vibration damper) on the crankshaft can deteriorate over time, causing the timing marks to become inaccurate. If you suspect that the harmonic balancer is damaged, replace it.
- Ignition System Issues Weak spark or damaged plug wires can appear as timing issues. Make sure these components are in proper order.
Do's and Don'ts / Best Practices
- DO consult your service manual for the correct timing specifications and procedures for your vehicle.
- DO use a timing light with an inductive pickup for accurate readings.
- DO disconnect and plug the vacuum advance hose before setting the base timing.
- DO warm up the engine to its normal operating temperature before setting the timing.
- DO double-check the timing after tightening the distributor clamp.
- DO road test the vehicle after setting the timing to ensure it's performing correctly.
- DON'T set the timing by ear. This is not accurate and can lead to engine damage.
- DON'T over-tighten the distributor clamp. This can damage the distributor housing.
- DON'T forget to reconnect the vacuum advance hose after setting the timing.
- DON'T ignore signs of engine pinging or knocking. This indicates that the timing is too far advanced.
- DO use a high quality timing light.
- DO mark your desired timing with chalk or paint for easy viewing under the timing light.
Conclusion
Setting the distributor timing is a crucial maintenance task for older vehicles. By following the steps outlined in this guide and adhering to best practices, you can ensure that your engine is running at its peak performance and avoid costly repairs. Remember to always consult your service manual for the correct specifications and procedures for your vehicle. If you're not comfortable performing this task yourself, it's always best to seek the assistance of a qualified mechanic. Regular timing checks will help keep your classic running strong for years to come.