How To Take Car Tint Off
So, you're ready to tackle removing that old, bubbling tint from your car windows? Maybe it's faded, peeling, or just doesn't suit your current aesthetic. Whatever the reason, removing window tint is a task that, while somewhat tedious, is absolutely within the capabilities of an experienced DIYer. This guide will walk you through the process, explaining the tools and techniques needed to achieve a clean, professional result.
Purpose of This Guide
This guide serves as a comprehensive resource for removing aftermarket window tint. It's intended to empower experienced car owners, modders, and DIY mechanics to perform this task effectively and safely, without damaging their vehicle's glass or interior. We'll cover everything from identifying the necessary tools and materials to understanding the chemical processes involved and troubleshooting common issues. A key goal is to provide you with the knowledge to avoid costly mistakes that could lead to scratched glass or adhesive residue.
Key Specs and Main Parts
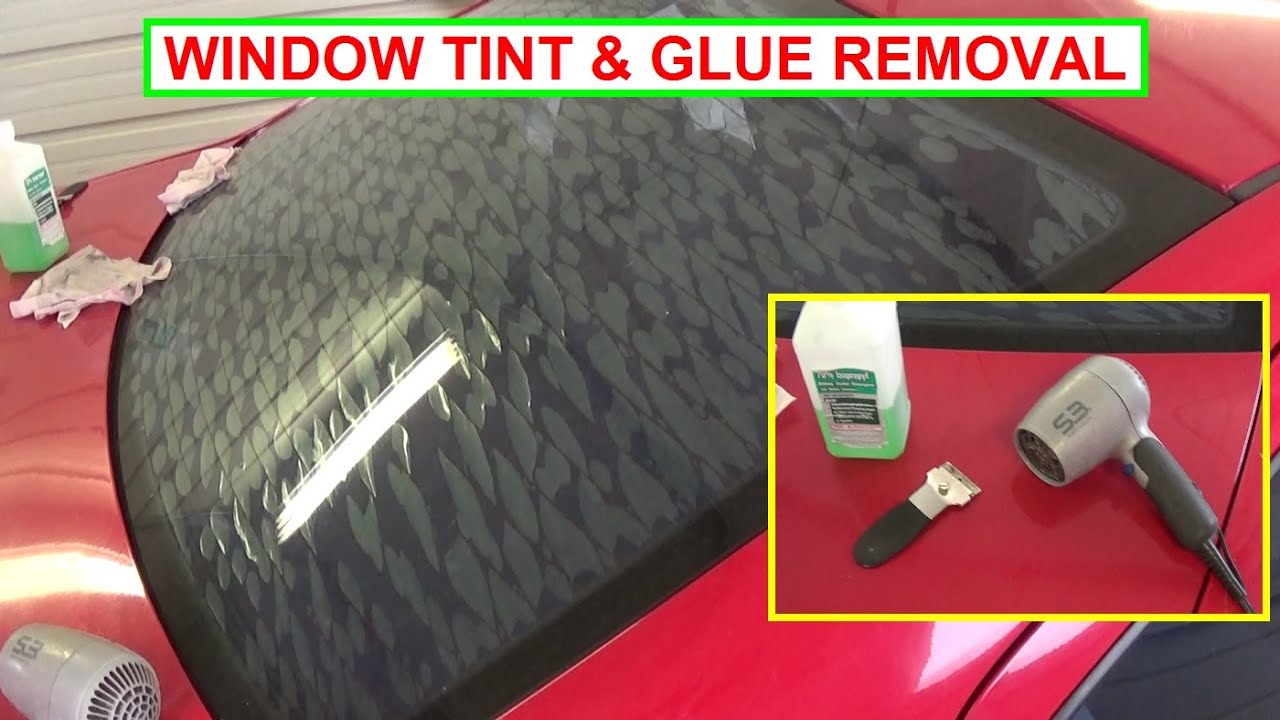
Before diving into the removal process, let's break down the key elements and required tools:
- Heat Gun: A heat gun is crucial for softening the adhesive bond between the tint and the glass. Look for one with adjustable temperature settings. A range of 200-1000°F is ideal. Overheating can damage the glass so start low.
- Razor Blade Scraper: A sharp razor blade scraper is essential for lifting the edges of the tint and scraping away stubborn adhesive. Choose a scraper with a comfortable handle and replaceable blades. A plastic razor blade is also an option, reducing the risk of scratching the glass, but will require more effort.
- Ammonia Solution: A mixture of ammonia and water (or a dedicated window tint remover) helps dissolve the adhesive. The concentration is key, too much ammonia can damage plastics and rubber.
- Spray Bottle: For applying the ammonia solution evenly.
- Microfiber Towels: For cleaning the glass and absorbing excess solution.
- Plastic Sheeting and Tape: To protect interior surfaces from overspray and drips.
- Safety Glasses and Gloves: Essential for protecting your eyes and skin from chemical exposure and sharp edges.
- (Optional) Steamer: A handheld steamer can sometimes be used in place of a heat gun, though it may be less effective on heavily adhered tint.
How It Works: The Science of Tint Removal
The effectiveness of tint removal hinges on understanding the adhesive properties of the film. Window tint typically consists of a polyester film coated with a pressure-sensitive adhesive (PSA). This adhesive bonds to the glass surface through van der Waals forces, which are relatively weak intermolecular attractions. Applying heat or chemicals weakens these bonds, allowing the film to be peeled away.
The Heat Gun Method: Applying heat with a heat gun increases the kinetic energy of the adhesive molecules, reducing their attraction to both the glass and the film. This makes the tint more pliable and easier to peel off in large sections. It's crucial to apply even heat and avoid overheating, which can cause the film to become brittle and tear into smaller pieces.
The Ammonia Method: Ammonia acts as a solvent, breaking down the adhesive's polymeric structure. It disrupts the cross-linking between the adhesive molecules, reducing their stickiness. The ammonia solution is typically applied between the tint and the glass, allowing it to penetrate and dissolve the adhesive from the backside. Ventilation is vital when working with ammonia due to its strong odor and potential respiratory irritation.
The combination of heat and ammonia is often the most effective approach, as the heat softens the adhesive while the ammonia penetrates and weakens it. After the tint is removed, residual adhesive often remains on the glass. This can be removed with further applications of ammonia and scraping. Commercial adhesive removers can be used as well, but some contain harsh chemicals. Always follow the manufacturer's instructions and wear appropriate PPE.
Step-by-Step Tint Removal
- Preparation: Park your car in a shaded area, if possible. Cover any interior surfaces, like the dashboard and door panels, with plastic sheeting and tape. This prevents damage from chemicals and scraping.
- Heating the Tint: Use the heat gun to gently warm a corner of the tint. Start with a low setting and gradually increase the temperature until the tint becomes pliable. Move the heat gun in a sweeping motion to avoid overheating a single spot.
- Peeling the Tint: Once the corner is warmed, use the razor blade scraper to carefully lift it. Once you have a small section lifted, gently pull the tint away from the glass at a shallow angle. Continue applying heat ahead of the peeling edge to ease the process. Try to peel the tint in large sheets to minimize adhesive residue.
- Applying Ammonia (if needed): If the tint is difficult to peel, spray the ammonia solution between the tint and the glass as you peel. This helps to further dissolve the adhesive.
- Removing Residual Adhesive: After removing the tint, spray the glass with the ammonia solution and let it sit for a few minutes. Use the razor blade scraper to carefully scrape away the remaining adhesive. Work in small sections and apply steady pressure.
- Cleaning the Glass: Once all the adhesive is removed, clean the glass with a glass cleaner and microfiber towels to remove any streaks or residue.
Real-World Use: Troubleshooting Tips
Despite careful execution, you might encounter some common issues:
- Tint Tears Easily: This often indicates that the tint is old and brittle. Apply more heat and try to peel it at a slower, more consistent rate. If necessary, use a steamer instead of a heat gun for more even heat distribution.
- Excessive Adhesive Residue: This is common with older or lower-quality tint. Try using a stronger adhesive remover (following the manufacturer's instructions) and a plastic razor blade to avoid scratching the glass. Multiple applications may be needed.
- Scratched Glass: If you accidentally scratch the glass, you may be able to buff out minor scratches with a glass polishing compound. However, deeper scratches may require professional repair. Always use sharp, clean razor blades and avoid excessive pressure.
- Ammonia Smell Lingering: Ventilate the vehicle thoroughly after cleaning. You can also use an odor eliminator spray to help remove the ammonia smell.
Safety: Risky Components and Practices
Heat Gun: Heat guns can reach extremely high temperatures, posing a burn risk. Always wear gloves and avoid pointing the heat gun at yourself or others. Never leave a heat gun unattended while it's plugged in.
Razor Blades: Razor blades are extremely sharp and can cause serious cuts. Always wear gloves and handle them with extreme caution. Dispose of used blades properly in a puncture-proof container.
Ammonia: Ammonia is a respiratory irritant and can cause skin and eye irritation. Always work in a well-ventilated area and wear safety glasses and gloves. Avoid prolonged exposure to ammonia fumes. If you experience any respiratory distress, stop immediately and seek fresh air.
Glass: Applying too much heat to the glass can cause it to crack or shatter, especially if the glass already has minor chips or cracks. Always start with a low heat setting and gradually increase it as needed. Be careful not to apply too much pressure when scraping the glass.
Conclusion
Removing window tint requires patience, careful technique, and attention to safety. By following the steps outlined in this guide and taking the necessary precautions, you can successfully remove unwanted tint from your car windows and achieve a professional-looking result. Remember to always prioritize safety and consult with a professional if you encounter any difficulties or are unsure about any aspect of the process.