How To Take Off A Bumper
The seemingly simple act of removing a car bumper can feel like unlocking a complex puzzle. More than just a cosmetic panel, the bumper is a critical safety component. Understanding its construction and attachment methods is key to performing repairs, upgrades, or simply gaining a deeper appreciation for automotive engineering. This guide delves into the anatomy of bumper removal, offering a blend of practical advice and technical insight.
The Bumper Dilemma: When Removal Becomes Necessary
Imagine this: You've gently nudged a parking bollard, resulting in a minor crack on your bumper cover. While the damage might seem superficial, accessing the area for repair, like patching a tear or performing a color match, often necessitates removing the entire bumper. Similarly, if you're upgrading your headlights, fog lights, or installing a winch on an off-road vehicle, bumper removal becomes a crucial initial step. Even seemingly simple tasks like replacing a damaged parking sensor can become significantly easier (and prevent further damage) with the bumper safely off the car.
Bumper Anatomy: A Layered Defense
Before diving into the removal process, it's crucial to understand the composition of a modern bumper system. It's not just a single piece of plastic; rather, it's a carefully engineered assembly designed to absorb impact energy. The key components are:
- Bumper Cover: This is the visible, typically plastic, painted exterior. It's designed to deform upon impact and protect underlying components. Materials range from relatively brittle plastics in older vehicles to more flexible, impact-resistant polymers in newer models.
- Bumper Beam: This is a crucial structural element, usually made of high-strength steel or aluminum. It sits behind the bumper cover and is directly responsible for absorbing the brunt of a collision. Its shape and material properties are carefully calculated to distribute impact forces.
- Energy Absorber: Positioned between the bumper cover and the beam, this component is typically made of foam or honeycomb-structured plastic. Its purpose is to cushion low-speed impacts and further dissipate energy, reducing damage to the vehicle's frame.
- Mounting Brackets: These brackets connect the bumper assembly to the vehicle's frame. They are designed to shear or deform in a severe collision, absorbing energy and preventing damage from propagating to the chassis.
Mechanical Breakdown: The Fasteners and Fixings
The attachment of a bumper relies on a combination of fasteners, each serving a specific purpose. Understanding these fixing mechanisms is critical for a smooth and damage-free removal process. Typical fasteners include:
- Bolts and Screws: These are the workhorses of bumper attachment, typically securing the bumper beam and mounting brackets to the vehicle's frame. Sizes and configurations vary widely between manufacturers and models.
- Plastic Clips: Often hidden underneath the bumper or in the wheel wells, these clips secure the bumper cover to the fender liners and other body panels. They are notorious for breaking during removal if not handled carefully. Special trim removal tools are invaluable for disengaging these clips without causing damage.
- Retaining Tabs: Some bumper covers utilize molded plastic tabs that snap into corresponding slots on the vehicle body. These tabs can be fragile and require careful manipulation to avoid breakage.
The Removal Process: A Step-by-Step Guide
While specific steps vary depending on the vehicle model, the general procedure for bumper removal follows these principles:
- Preparation: Gather necessary tools, including sockets, wrenches, screwdrivers, trim removal tools, and potentially a jack and jack stands for improved access. Consult your vehicle's repair manual for specific fastener locations and torque specifications. Disconnect the negative terminal of the battery to prevent accidental short circuits, especially if the bumper contains electrical components like parking sensors or fog lights.
- Locating Fasteners: The first step involves identifying all fasteners securing the bumper. Common locations include:
- Wheel wells: Screws or bolts attaching the bumper cover to the fender liner.
- Underneath the bumper: Bolts or screws securing the lower edge of the bumper cover.
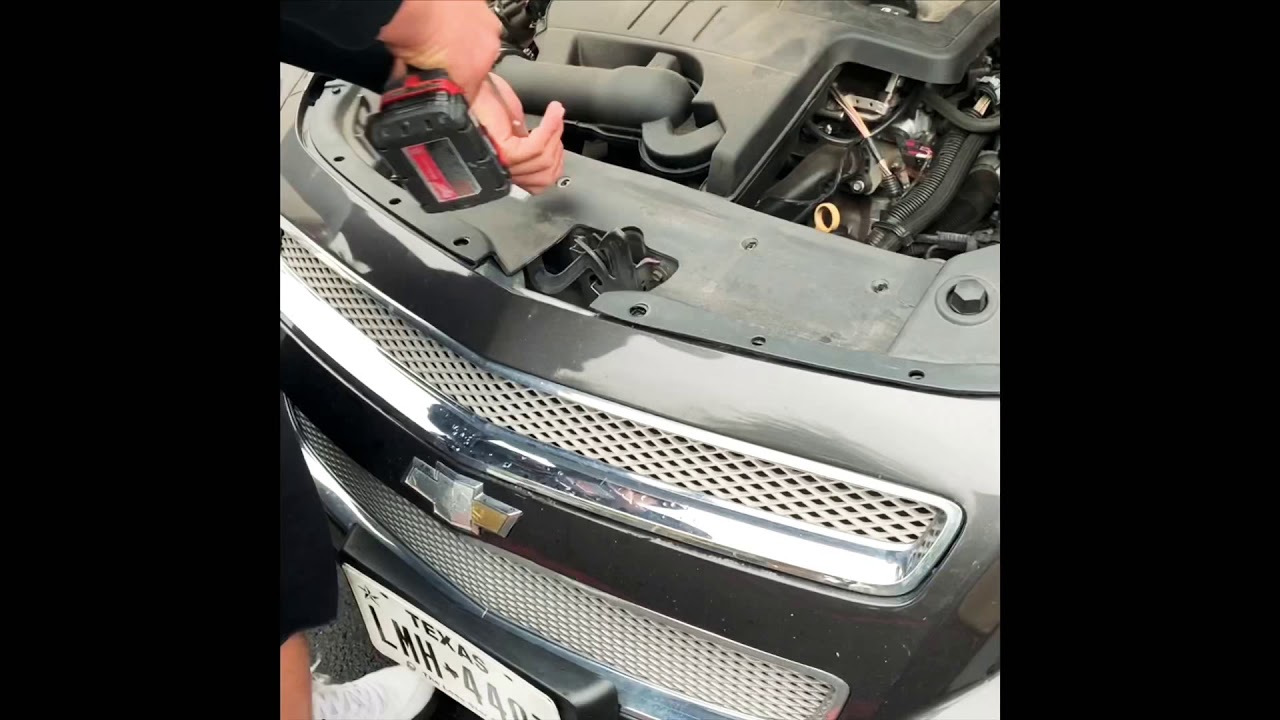
- Inside the engine bay: Bolts or screws attaching the bumper to the frame.
- Behind the grille: Some vehicles have hidden fasteners located behind the grille.
- Removing Fasteners: Using the appropriate tools, carefully remove all identified fasteners. Exercise caution when dealing with plastic clips, as they can easily break. Use a trim removal tool to gently pry them loose, working around the perimeter of the clip.
- Disconnecting Electrical Connectors: If your bumper has electrical components, such as fog lights or parking sensors, disconnect the corresponding electrical connectors before attempting to pull the bumper away from the vehicle. Carefully depress the locking tabs on the connectors and gently pull them apart. Label the connectors to ensure correct reassembly.
- Bumper Removal: With all fasteners removed and electrical connectors disconnected, gently pull the bumper away from the vehicle. Start from one side and gradually work your way across, ensuring that no hidden fasteners are still engaged. If the bumper is reluctant to move, double-check for missed fasteners or retaining tabs.
- Storage: Once removed, store the bumper in a safe location where it won't be damaged. Consider placing it on a soft surface, such as a blanket or cardboard, to prevent scratches.
Pros and Cons of DIY Bumper Removal
Pros:
- Cost Savings: Avoid labor costs associated with professional repair shops.
- Learning Opportunity: Gain valuable experience in automotive repair and maintenance.
- Control Over the Process: Ensure the job is done to your specific standards.
Cons:
- Risk of Damage: Improper technique can lead to damaged fasteners, clips, or even the bumper cover itself.
- Time Commitment: Bumper removal can be time-consuming, especially for beginners.
- Potential for Injury: Working with tools and heavy components carries a risk of injury.
- Complexity: Some vehicles have complex bumper attachment systems that may require specialized tools or knowledge.
Real-World Examples and Manufacturer Variations
Bumper designs and attachment methods vary significantly between manufacturers and models. For example:
- BMW: Often employs a relatively complex system of hidden fasteners and interlocking tabs, requiring specialized tools and a thorough understanding of the vehicle's construction.
- Toyota: Generally uses a more straightforward system of bolts, screws, and easily accessible plastic clips.
- Ford: May utilize a combination of bolts and "Christmas tree" style plastic rivets that require a special removal tool.
Understanding these nuances requires consulting your vehicle's repair manual or online resources specific to your make and model. Manufacturer service information is key to avoiding damage and ensuring a successful bumper removal.
Use Cases: More Than Just Collision Repair
Beyond collision repair, bumper removal finds application in a variety of scenarios:
- Performance Upgrades: Installing aftermarket intercoolers, air intakes, or other performance parts often requires bumper removal to access the engine compartment.
- Off-Road Modifications: Installing winches, brush guards, or custom bumpers for off-road use necessitates removing the factory bumper.
- Lighting Upgrades: Installing aftermarket headlights, fog lights, or LED light bars frequently requires bumper removal for access to wiring and mounting points.
- Cosmetic Enhancements: Painting, wrapping, or applying custom graphics to the bumper cover is significantly easier with the bumper removed from the vehicle.
Final Thoughts: Knowledge is Key
Removing a car bumper is not inherently difficult, but it requires a methodical approach, a basic understanding of automotive fasteners, and a healthy dose of patience. While some jobs can be accomplished with basic hand tools, investing in a quality set of trim removal tools is highly recommended, as it will significantly reduce the risk of damaging plastic clips and retaining tabs. More importantly, always consult your vehicle's repair manual or online resources before attempting bumper removal. Knowing the specific fastener locations and any model-specific quirks can save you time, frustration, and potential damage. Remember, a little research can go a long way in ensuring a successful and satisfying DIY project.