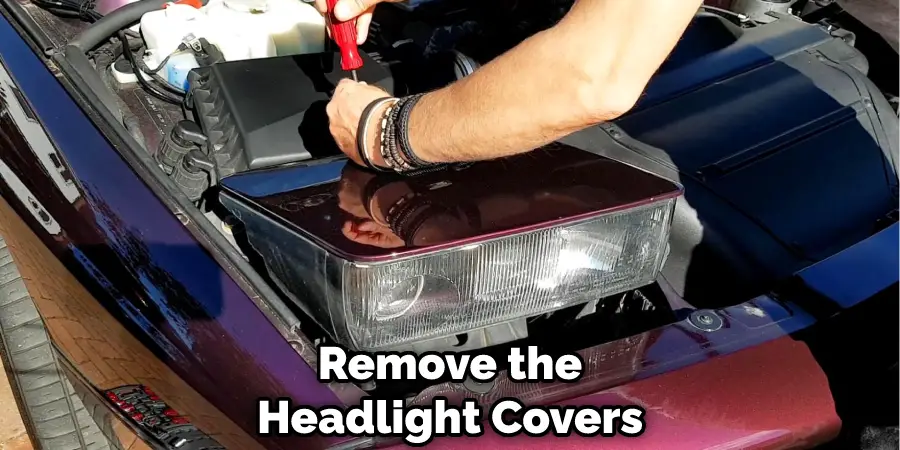
How To Take Off Headlight Cover
The quest to restore clarity to your car's headlights, or perhaps replace a burnt-out bulb, often begins with a seemingly simple task: removing the headlight cover. But beneath the transparent (or increasingly cloudy) surface lies a variety of fastening mechanisms, each designed with specific engineering considerations in mind. This isn't just a matter of unscrewing a few bolts; it's about understanding the intricate dance between aesthetics, aerodynamics, and accessibility that defines modern automotive design.
Decoding the Headlight Housing: A Practical Problem
Imagine your kitchen refrigerator. The core functionality is cooling, but consider the design of the door. It needs to seal tightly, be easy to open and close repeatedly, and potentially house features like ice and water dispensers. Similarly, a headlight housing must protect the delicate bulb and reflector from the elements, direct the light beam effectively, and allow for bulb replacement without requiring a complete disassembly of the car. Accessing that bulb – or the entire headlight assembly – often necessitates removing the headlight cover.
Common reasons for removing a headlight cover include:
- Bulb Replacement: The most frequent reason. Replacing a burnt-out bulb is a routine maintenance task.
- Headlight Restoration: Over time, UV exposure degrades the plastic lens, causing clouding and yellowing. Removing the cover allows for polishing or application of protective coatings.
- Component Repair/Replacement: Issues with the internal reflector, leveling motors (if equipped), or wiring may require access behind the lens.
- Customization: Some enthusiasts replace the stock lens with aftermarket options for aesthetic or performance enhancements.
Mechanical Deep Dive: How Headlight Covers Are Attached
There are several primary methods manufacturers use to secure headlight covers, each with its own set of advantages and drawbacks:
1. Screws and Bolts: The Traditional Approach
This is perhaps the most straightforward method. The headlight cover is secured to the housing with screws or bolts, often accessible from the front or back of the assembly. The number and location of these fasteners vary depending on the vehicle model. Pros: Simple to understand, relatively easy to disassemble (assuming you have the right tools), and secure. Cons: Can be time-consuming if many fasteners are involved, and the screws/bolts can corrode over time, making removal difficult. Requires visual access to the fasteners, which may be obstructed by other components.
Example: Many older vehicles, and some trucks, use this method extensively.
2. Clips and Retainers: The Snap-On Solution
Clips and retainers offer a faster and often more cost-effective assembly method. The headlight cover is designed with integrated tabs that snap into corresponding slots on the housing. These clips may be made of plastic or metal. Pros: Quick assembly and disassembly, reduces the number of individual parts, and can be aesthetically cleaner (fewer visible fasteners). Cons: Clips can break or become brittle with age and temperature fluctuations. Removal can be tricky and requires careful prying to avoid damage. Finding the location of all the clips can be challenging, especially on complex designs.
Example: Many modern cars utilize clip-based retention, particularly for smaller access panels within the headlight assembly.
3. Adhesive Bonding: The Seamless Integration
Some manufacturers employ adhesive bonding to permanently attach the headlight cover to the housing. This creates a smooth, aesthetically pleasing appearance and enhances weather sealing. Pros: Excellent weather sealing, clean appearance, and can contribute to the structural rigidity of the assembly. Cons: Makes bulb replacement extremely difficult and often requires specialized tools and techniques to separate the cover without damaging it. This method essentially renders the headlight assembly a sealed unit, meaning disassembly for any reason is a significant undertaking.
Example: Certain high-end vehicles and performance models use bonded headlight covers for aerodynamic and aesthetic reasons. This is also common with LED headlight assemblies which are designed to last the lifetime of the car. A heat gun is required for softening the adhesive. Extreme caution should be taken when using this method.
4. Combination Methods: The Hybrid Approach
Often, manufacturers use a combination of the above methods. For example, a headlight cover might be secured with a few screws and then held in place with clips around the perimeter. This provides a balance of security, ease of assembly, and aesthetic appeal. Pros: Offers a compromise between the advantages and disadvantages of each individual method. Cons: Can be more complex to disassemble, as you need to identify and address all the different types of fasteners.
Example: Mid-range sedans and SUVs frequently use a combination of screws and clips to secure headlight covers.
Real-World Considerations and Best Practices
Before attempting to remove a headlight cover, it's crucial to consult your vehicle's repair manual or online resources. These resources will provide specific instructions and diagrams for your particular make and model. A generic approach can lead to broken clips, stripped screws, or even damage to the headlight housing itself. Always exercise patience and apply gentle pressure. Forcing anything is a surefire way to break it.
Tools of the Trade:
- Screwdrivers: A set of Phillips and flathead screwdrivers in various sizes is essential.
- Socket Set: For removing bolts, a socket set with different sizes and extensions is crucial.
- Plastic Trim Removal Tools: These are designed to gently pry apart plastic components without causing damage.
- Heat Gun (for adhesive bonding): Use with extreme caution and only if you are comfortable working with heat and sensitive materials.
- Penetrating Oil: For loosening corroded screws or bolts.
- Work Gloves: To protect your hands.
- Lighting: A good work light is essential for seeing what you're doing.
Potential Pitfalls:
- Broken Clips: Plastic clips are fragile, especially in cold weather. Warm them up with a heat gun (on low setting) before attempting to remove them.
- Stripped Screws: Use the correct size screwdriver and apply firm, even pressure. If a screw is stripped, try using a screw extractor.
- Damaged Lens: Be careful not to scratch or crack the lens during removal. Use masking tape to protect surrounding areas.
- Incorrect Reassembly: Make sure all fasteners are properly tightened and that the cover is securely seated before driving.
- Water Leaks: After reassembly, check for water leaks by spraying the headlight with a garden hose. If leaks are present, you may need to replace the gasket or sealant.
Manufacturer Examples and Design Philosophies
Different manufacturers often adopt distinct design philosophies when it comes to headlight cover attachment. For instance, German manufacturers like BMW and Mercedes-Benz tend to favor more robust and complex systems, often involving a combination of screws, clips, and precise alignment mechanisms. This reflects their emphasis on engineering and durability. Japanese manufacturers like Toyota and Honda often prioritize ease of assembly and cost-effectiveness, using simpler clip-based systems or easily accessible screw arrangements. American manufacturers like Ford and Chevrolet often strike a balance between these two approaches, depending on the specific vehicle model and target market. Understanding these general trends can help you anticipate the type of fasteners you'll encounter.
Final Thoughts: Clarity and Confidence
Removing a headlight cover might seem like a simple task, but it's a microcosm of automotive engineering principles. Understanding the different attachment methods, the potential pitfalls, and the design philosophies behind them empowers you to tackle this task with confidence and avoid costly mistakes. Whether you're replacing a bulb, restoring a faded lens, or customizing your headlights, a careful and methodical approach will ensure a successful outcome. Remember to always consult your vehicle's repair manual, use the correct tools, and exercise patience. With a little knowledge and the right techniques, you can restore clarity to your headlights and enhance the safety and appearance of your vehicle.