How To Take Out Fuel Injectors
So, you're tackling a fuel injector replacement? Maybe you're diagnosing a rough idle, experiencing poor fuel economy, or perhaps you're upgrading to higher-flowing injectors for a performance boost. Whatever the reason, removing fuel injectors can seem daunting, but with the right knowledge and approach, it's a manageable task for the home mechanic. This guide breaks down the process, explaining the underlying mechanics and offering insights based on real-world experience.
The Case of the Hesitant Honda
Imagine this: You're driving your trusty Honda Civic, and suddenly, the engine starts sputtering. The check engine light flickers on, and the car feels like it's running on fewer cylinders than it should. After running diagnostics, the culprit appears to be a faulty fuel injector. One injector is no longer spraying fuel correctly, disrupting the air-fuel mixture and causing the engine to stumble. This is a classic scenario where injector removal and replacement (or cleaning) are necessary.
Understanding the Fuel Injection System: A Pressurized Symphony
Before we get our hands dirty, let's understand how the fuel injection system works. Think of it as a precisely orchestrated symphony, where the fuel injectors are the brass section, delivering the lifeblood of the engine at precisely timed intervals.
The fuel injection system, in its simplest form, works like this:
- Fuel Tank: Stores the fuel.
- Fuel Pump: Pumps fuel from the tank to the engine at a specific pressure.
- Fuel Filter: Cleans the fuel, removing contaminants.
- Fuel Rail: A manifold that distributes pressurized fuel to the injectors.
- Fuel Injectors: Electrically controlled valves that spray fuel into the intake manifold or directly into the cylinder.
- Engine Control Unit (ECU): The brain of the system, controlling the timing and duration of injector pulses.
The ECU receives data from various sensors (like the Mass Airflow Sensor, Throttle Position Sensor, and Oxygen Sensor) to determine the optimal amount of fuel to inject. It then sends an electrical signal to the injector, which opens a valve, allowing fuel to spray into the engine. The duration of this signal determines the amount of fuel injected.
Fuel injectors are precision devices. They consist of a solenoid, a needle valve, and a nozzle. When the solenoid is energized, it lifts the needle valve, opening the nozzle and allowing fuel to spray. The nozzle is designed to atomize the fuel, creating a fine mist that mixes readily with air for efficient combustion.
Mechanical Breakdown: How They Sit
The way fuel injectors are installed varies depending on the engine type (inline, V-shaped, etc.) and fuel injection type (port fuel injection or direct injection). However, the general principle remains the same:
- Sealing: Injectors are sealed with O-rings at both ends to prevent fuel leaks. One O-ring seals the injector to the fuel rail, and the other seals it to the intake manifold (or cylinder head in direct injection systems).
- Retention: Injectors are held in place either by a fuel rail that clamps them down, or by individual clips or retaining brackets. The method varies between makes, models and year of manufacture.
- Electrical Connection: Each injector has an electrical connector that plugs into the engine wiring harness, providing the power and control signal from the ECU.
The Removal Process: A Step-by-Step Guide
Now for the practical part. Safety first! Always disconnect the negative battery terminal before working on any part of the fuel system. This prevents accidental sparks and electrical damage.
- Depressurize the Fuel System: This is crucial to prevent fuel spraying everywhere when you disconnect the fuel lines. There are a few ways to do this. The easiest is to locate the fuel pump relay (consult your car's service manual for its location) and remove it. Then, start the engine and let it run until it stalls. This will relieve the pressure in the fuel lines. Alternatively, some vehicles have a Schrader valve on the fuel rail that allows you to bleed off the pressure. Always be careful when bleeding the system and be prepared to mop up any fuel spills.
- Disconnect the Electrical Connectors: Carefully disconnect the electrical connectors from each injector. These connectors usually have a small clip or latch that needs to be released. Be gentle, as these connectors can become brittle with age.
- Remove the Fuel Rail: The fuel rail is typically held in place by bolts or screws. Remove these fasteners, taking care not to damage any fuel lines or fittings. Once the fasteners are removed, gently lift the fuel rail away from the engine. It may take some wiggling to free the injectors from the intake manifold.
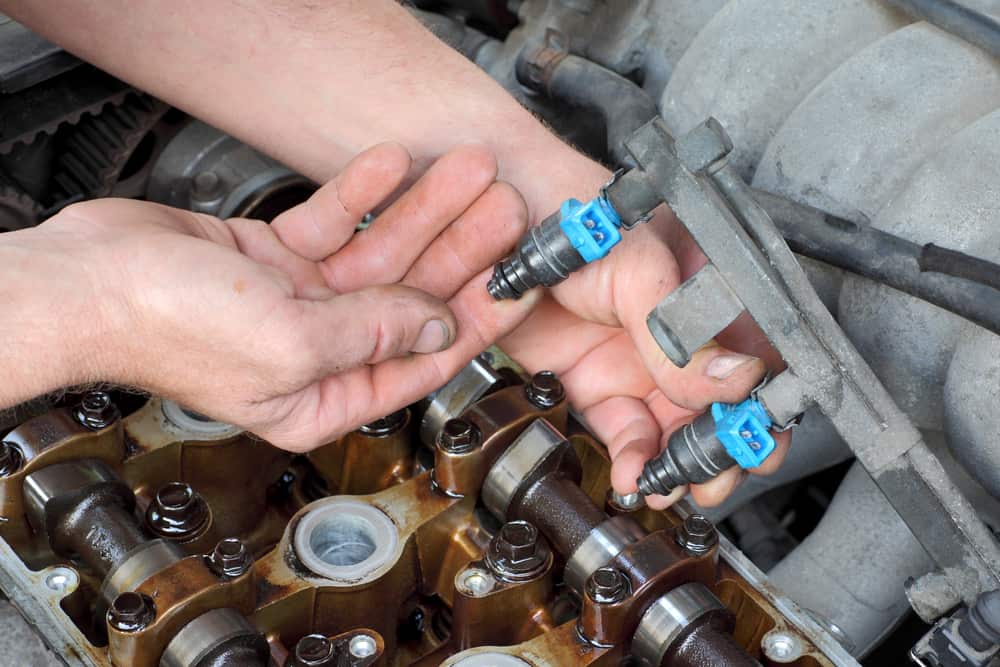
- Remove the Injectors: With the fuel rail removed, you can now access the injectors. Depending on the design, they may simply pull out, or they may be held in place by clips or retainers. If there are clips, release them carefully. Then, gently twist and pull the injector to remove it from the intake manifold. Avoid using excessive force, as you don't want to damage the injector or the intake manifold.
- Inspect and Replace O-rings: Once the injectors are removed, inspect the O-rings for any signs of damage or wear. Replace them with new O-rings before reinstalling the injectors. This is essential for preventing fuel leaks.
Tools You'll Need:
- Wrenches and sockets
- Screwdrivers (Phillips and flathead)
- Pliers
- O-ring pick or small hook
- Fuel line disconnect tool (if required)
- Shop towels
- Safety glasses
- Gloves
Pros and Cons of DIY Injector Removal
Pros:
- Cost Savings: Avoid labor charges from a mechanic.
- Learning Experience: Gain a deeper understanding of your car's engine.
- Control: You have complete control over the process and can ensure it's done correctly.
Cons:
- Time Commitment: It can take several hours, especially if you're inexperienced.
- Potential for Mistakes: Incorrect installation can lead to fuel leaks or engine damage.
- Specialized Tools: Some vehicles may require specialized tools.
Use Cases and Manufacturer Examples
Fuel injector removal is common in several scenarios:
- Cleaning: Injectors can become clogged with deposits over time, affecting their performance. Removal allows for thorough cleaning using specialized injector cleaning machines.
- Replacement: Faulty injectors need to be replaced to restore proper engine function.
- Upgrading: Performance enthusiasts often upgrade to higher-flowing injectors to support increased horsepower.
Examples:
- Bosch: Many European cars use Bosch injectors. Their injectors are generally reliable, but can still become clogged over time.
- Denso: Common in Japanese vehicles (Toyota, Honda, etc.). Denso injectors are known for their durability and precision.
- Delphi: Often found in American cars (GM, Ford, Chrysler). Delphi injectors are typically more affordable but may require more frequent maintenance.
Direct Injection vs. Port Fuel Injection
It's worth noting the difference between port fuel injection (PFI) and direct injection (DI). PFI injects fuel into the intake manifold, while DI injects fuel directly into the cylinder. DI systems operate at much higher pressures (sometimes exceeding 2,000 psi), which can make injector removal and installation more complex and potentially dangerous. Extra caution is needed when working with DI systems due to the high pressures involved.
Real-World Insights and Recommendations
Based on experience, here are a few crucial tips:
- Take Pictures: Before disassembling anything, take pictures of the fuel rail and injector arrangement. This will help you remember how everything goes back together.
- Label Everything: Label each injector and its corresponding connector to avoid confusion during reassembly.
- Use Penetrating Oil: If the injectors are stuck, apply penetrating oil around the O-rings and let it soak for a while before attempting to remove them.
- Don't Force It: If an injector is extremely difficult to remove, don't force it. You could damage the injector or the intake manifold. Instead, try using a specialized injector removal tool.
- Torque Specifications: Always use a torque wrench to tighten the fuel rail bolts to the manufacturer's specifications. Overtightening can damage the fuel rail or the intake manifold.
- Check for Leaks: After reassembling everything, start the engine and carefully check for fuel leaks around the injectors and fuel rail. If you detect any leaks, immediately shut off the engine and address the problem.
- Consult a Repair Manual: A repair manual specific to your vehicle will provide detailed instructions and diagrams that can be invaluable.
- Consider Professional Cleaning/Testing: Unless you have access to a professional injector cleaning and flow testing machine, it is worth sending your injectors to a specialist. They will be able to clean the injectors to a like-new state and also flow test them to see if any are underperforming.
Ultimately, removing fuel injectors is a task that requires patience, attention to detail, and a good understanding of the fuel injection system. While it's a manageable job for the DIY enthusiast, don't hesitate to seek professional help if you're unsure or encounter difficulties. With the right approach, you can successfully tackle this project and keep your engine running smoothly.