How To Tell If Car Rim Is Bent
Is That Rim Bent? A DIY Guide to Wheel Inspection
As a seasoned DIYer, you probably already know that your wheels aren't just for aesthetics. They're a crucial part of your vehicle's handling, ride comfort, and safety. A bent rim, however slight, can wreak havoc on all of those. It can cause vibrations, uneven tire wear, and even compromise your suspension. In this guide, we'll dive deep into how to identify a bent rim, covering everything from visual inspection to more technical methods. This knowledge will empower you to diagnose issues early, potentially saving you money on costly repairs and ensuring a smoother, safer driving experience.
Purpose: Why This Matters
Understanding how to identify a bent rim is essential for several reasons:
- Early Detection: Catching a bend early can prevent further damage to your tires, suspension, and even steering components.
- Cost Savings: Identifying a bend yourself can save you the cost of a diagnostic fee at a mechanic shop. You can then decide if the repair is something you can tackle or need to outsource.
- Performance Optimization: Correcting bent rims improves handling, reduces vibrations, and ensures optimal tire contact with the road.
- Safety: A severely bent rim can be a safety hazard, increasing the risk of tire blowouts or loss of control.
- Customization & Modification: When upgrading or modifying your wheels, knowing the condition of your existing rims is critical.
Key Specs and Main Parts of a Wheel (Rim)
Before we get into diagnosing bends, let's review the key components and terminology:
- Rim (Wheel): The entire metal structure that supports the tire.
- Wheel Diameter: The size of the wheel from bead seat to bead seat, measured in inches (e.g., 17 inches).
- Wheel Width: The distance between the inside edges of the rim flanges, measured in inches (e.g., 7.5 inches).
- Offset (ET): The distance in millimeters (mm) between the wheel's mounting surface and its centerline. A positive offset means the mounting surface is closer to the outside of the wheel; a negative offset means it's closer to the inside. Improper offset can cause rubbing against suspension components or fender.
- Bolt Pattern (PCD): The number and spacing of the lug bolts/nuts. Expressed as 'number of bolts x bolt circle diameter' (e.g., 5x114.3mm).
- Center Bore: The diameter of the hole in the center of the wheel that fits over the hub of the vehicle.
- Bead Seat: The area where the tire sits against the wheel, forming an airtight seal. This is a critical area; any damage here can cause air leaks.
- Flange: The outer edges of the rim that help retain the tire.
How It Works: Identifying a Bent Rim
There are several methods to determine if a rim is bent, ranging from simple visual inspections to more technical approaches:
- Visual Inspection (Wheel On Vehicle):
This is your first line of defense. Start by slowly rotating the wheel while looking for any wobbles, dents, or flat spots on the rim. Pay close attention to the outer edge of the rim. Compare the suspect wheel with others on your car. Use a reference point like the edge of the fender well to help identify if the wheel is true and straight.
- Visual Inspection (Wheel Off Vehicle):
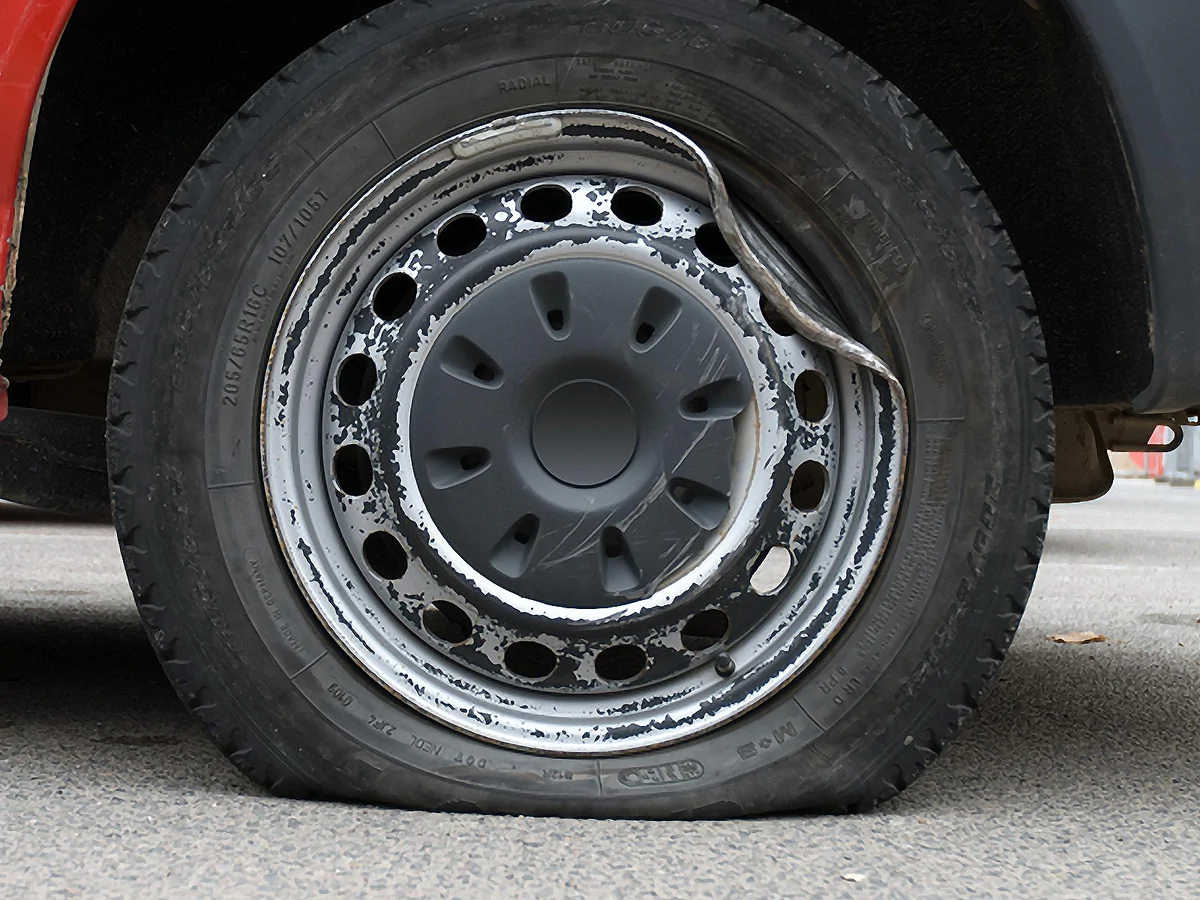
Removing the wheel allows for a more thorough inspection. Clean the rim thoroughly to expose any imperfections. Place the wheel on a flat surface (like a workbench) and rotate it. Observe the bead seat and flange for any bends, dents, or cracks. Use a straight edge to check for deviations in the rim's profile.
- Tire Pressure Monitoring System (TPMS) Alerts:
Frequent low tire pressure warnings from your TPMS, even after inflating the tire, could indicate a slow leak caused by a bent rim at the bead seat. This is particularly true if you haven’t punctured the tire.
- The "Spin Test" (Wheel Off Vehicle):
This requires a bit more effort, but it's more accurate. You'll need a way to safely spin the wheel. If you have a balancing machine, use it. Alternatively, carefully support the wheel on jack stands, ensuring it's stable and can rotate freely. Spin the wheel and observe the rim's trueness. Use a fixed object like a screwdriver tip or marker held close to the rim as a reference point. Any wobble or deviation indicates a bend.
- Road Force Variation Measurement
While not something you can do at home without specialized equipment, many tire shops use a road force balancer. This machine measures not only static and dynamic imbalance, but also simulates the wheel rolling under load, revealing any high spots or radial force variation caused by bends or internal tire issues. While not a direct measurement of the rim, a high road force variation reading, especially after balancing the wheel, is highly indicative of a problem with the rim or the tire. If the tire shop is unable to resolve the issue by indexing the tire on the rim (rotating the tire relative to the rim) they will likely recommend rim repair or replacement.
Real-World Use: Basic Troubleshooting Tips
Here are some common issues and troubleshooting tips:
- Vibration at High Speeds: This is a classic symptom of a bent rim. Start with a visual inspection. If no obvious bends are visible, try the "spin test."
- Uneven Tire Wear: A bent rim can cause uneven pressure distribution on the tire, leading to irregular wear patterns. Inspect your tires for cupping, feathering, or excessive wear on one side.
- Air Leaks: A bent rim, especially at the bead seat, can prevent a proper seal between the tire and the rim, causing slow air leaks. Check for bubbles around the bead seat when spraying soapy water on the inflated tire.
- Clunking Noises: In severe cases, a badly bent rim can cause clunking noises, particularly when going over bumps.
- Steering Wheel Wobble: A bent front rim can transmit vibrations directly to the steering wheel, causing it to wobble, especially at specific speeds.
Safety Considerations
Working with wheels and tires can be dangerous. Always follow these safety precautions:
- Proper Lifting: Use a jack rated for your vehicle's weight and always use jack stands. Never work under a vehicle supported only by a jack.
- Wheel Chocks: Use wheel chocks to prevent the vehicle from rolling.
- Tighten Lug Nuts Correctly: Use a torque wrench to tighten lug nuts to the manufacturer's specifications. Overtightening can damage the studs and undertightening can cause the wheel to come loose.
- Tire Inflation: Always inflate tires to the recommended pressure (found on the door jamb sticker). Overinflation or underinflation can be dangerous.
- Damaged Rims: Never drive on a severely bent or cracked rim. It could fail catastrophically, leading to an accident.
- Bead Seat Area: The bead seat area is critical for maintaining tire pressure. Be extra careful when inspecting and handling rims in this area. Sharp edges or damage here can compromise the seal.
Remember, if you're uncomfortable performing any of these inspections or repairs yourself, don't hesitate to take your vehicle to a qualified mechanic. Your safety is paramount.
With the knowledge you've gained here, you're well-equipped to identify and address bent rim issues. Remember to prioritize safety and don't hesitate to seek professional help when needed. Good luck!
We have prepared a detailed rim diagram for your reference, which you can download by clicking here.