How To Tell My Alternator Is Bad
So, your car's acting up and you suspect the alternator. Good call! The alternator is a critical component in your vehicle's electrical system, and a failing one can leave you stranded. This guide will walk you through the signs of a failing alternator, the technical aspects, and how to diagnose it like a pro. Think of me as your experienced mechanic friend, here to break it down for you.
Purpose – Powering Your Ride and More
Why does understanding your alternator matter? Well, beyond keeping your car running, knowing its function and potential problems empowers you to:
- Save money: Diagnosing a bad alternator yourself can prevent unnecessary trips to the mechanic and avoid being upsold services you don't need.
- Perform preventative maintenance: Recognizing early warning signs allows you to replace the alternator *before* it completely fails, preventing a breakdown at the worst possible time.
- Deepen your automotive knowledge: Understanding the alternator's role helps you grasp the bigger picture of your car's electrical system.
- Handle upgrades and modifications: Planning on adding a high-powered sound system or auxiliary lighting? Knowing your alternator's capabilities is crucial.
Key Specs and Main Parts
The alternator's job is to convert mechanical energy from the engine into electrical energy, which then charges the battery and powers all the electrical components in your car when the engine is running. Let's look at the key parts:
- Stator: This is the stationary part of the alternator and contains the windings where the alternating current (AC) electricity is generated.
- Rotor (also called the field winding): The rotating part inside the stator. It's an electromagnet energized by the voltage regulator. The rotor spins inside the stator, inducing the AC current.
- Rectifier (Diode Trio/Assembly): This converts the AC voltage produced by the stator to DC (Direct Current) voltage, which is what your car's electrical system uses. Diodes act like one-way valves for electricity.
- Voltage Regulator: This crucial component maintains a constant voltage output (typically around 13.5-14.5 volts) regardless of engine speed or electrical load. It does this by controlling the amount of current flowing through the rotor. A faulty regulator is a common cause of alternator failure.
- Brushes: These small carbon blocks make contact with the slip rings on the rotor, providing the electrical current necessary to energize the rotor's electromagnet. They wear down over time.
- Pulley: Attached to the front of the rotor, the pulley is driven by the engine's serpentine belt.
- Housing: The outer casing protects the internal components.
Key Specs to be Aware Of:
- Amperage Rating: This indicates the maximum amount of current the alternator can produce. Higher amperage is needed for vehicles with lots of electrical accessories. Replacing a failed alternator with one of the *same or higher* amperage is usually okay, but never lower.
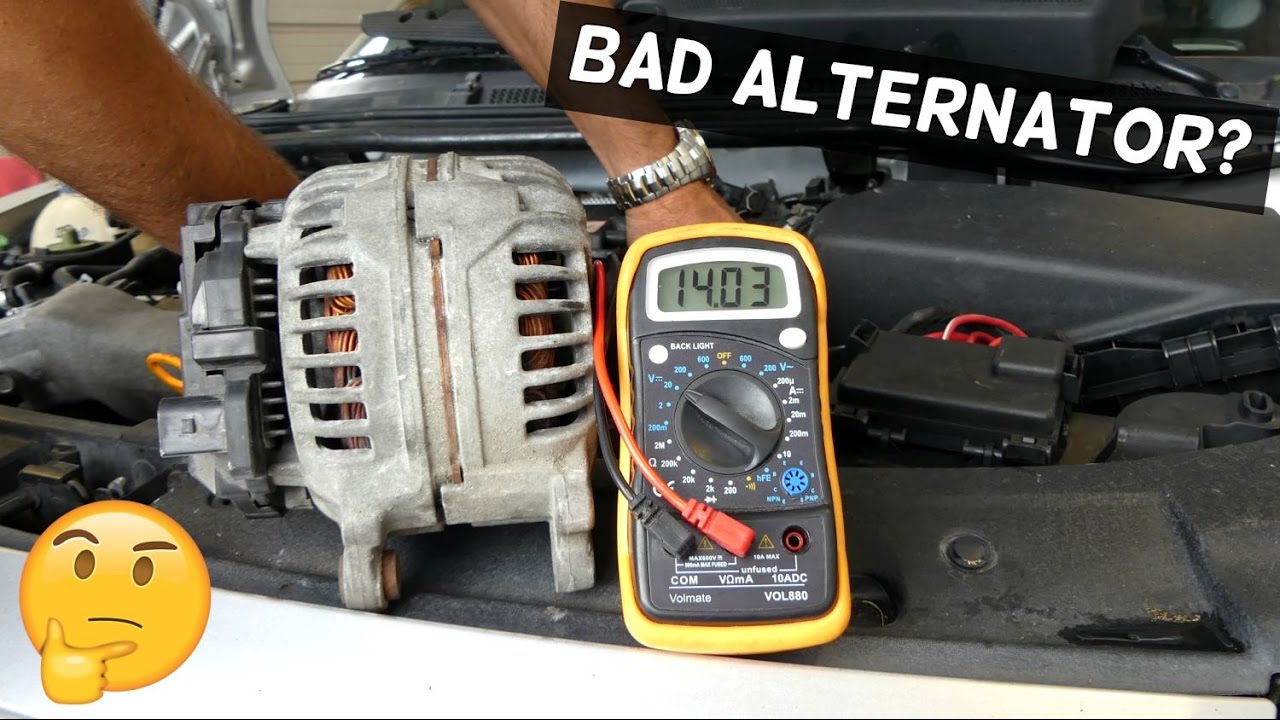
- Voltage Output: As mentioned above, a healthy alternator should output between 13.5 and 14.5 volts when the engine is running.
How It Works – From Crankshaft to Current
Here's the step-by-step breakdown of how an alternator works:
- The engine's serpentine belt turns the alternator's pulley, causing the rotor to spin inside the stator.
- The voltage regulator sends a small current to the rotor, creating an electromagnetic field.
- As the rotor spins, its electromagnetic field cuts across the stator windings, inducing an AC voltage.
- The rectifier converts the AC voltage to DC voltage.
- The voltage regulator monitors the output voltage and adjusts the current supplied to the rotor to maintain a constant output voltage.
- The regulated DC voltage is then supplied to the car's battery and electrical system.
Real-World Use – Troubleshooting Like a Pro
Here's where things get practical. These are the common symptoms of a failing alternator and how to troubleshoot them:
- Dim or Flickering Headlights: One of the most obvious signs. As the alternator struggles to supply enough power, the headlights will dim, especially at idle. If you rev the engine and the headlights brighten, it's a strong indicator of alternator problems.
- Warning Light (Battery/ALT): Your car's computer is monitoring the charging system. If the voltage drops below a certain threshold, the warning light will illuminate. However, this light can also be triggered by a bad battery or wiring issue, so further diagnosis is needed.
- Slow or No Start: A weak alternator may not properly charge the battery, leading to slow cranking or a complete no-start condition. Don't automatically assume it's the battery – check the alternator output.
- Electrical System Problems: Malfunctioning power windows, erratic radio operation, or instrument panel lights flickering are all potential signs. These components may not be receiving enough power.
- Growling or Whining Noises: Worn bearings inside the alternator can produce a noticeable noise that increases with engine speed.
- Stalling: In severe cases, a failing alternator can cause the engine to stall, especially when under load (e.g., using the air conditioner).
Basic Troubleshooting Steps:
- Visual Inspection: Check the alternator's wiring harness for loose connections, corrosion, or damage. Inspect the serpentine belt for wear or cracks. Make sure the belt tension is correct.
- Voltage Test: With the engine running, use a multimeter to measure the voltage at the battery terminals. It should be between 13.5 and 14.5 volts. A reading significantly outside this range suggests a problem with the alternator or voltage regulator. Also test with lights, AC and other accessories turned on. Voltage drop indicates the alternator may not be able to keep up with the load.
- Load Test: Many auto parts stores offer free alternator load testing. This test simulates a heavy electrical load to see if the alternator can maintain the proper voltage.
Safety – Handle with Care!
Working with automotive electrical systems can be dangerous. Here are some key safety precautions:
- Disconnect the Negative Battery Terminal: Always disconnect the negative (-) battery terminal before working on any electrical component. This prevents accidental shorts and potential damage.
- Avoid Contact with Moving Parts: Keep your hands and tools clear of the serpentine belt and pulley while the engine is running.
- Be Aware of Hot Surfaces: The alternator can get very hot, especially after the engine has been running. Allow it to cool down before touching it.
- Handle Batteries Carefully: Batteries contain sulfuric acid, which can cause severe burns. Wear eye protection and gloves when working with batteries.
High-Voltage Components: While the alternator itself doesn't generate extremely high voltages (like the ignition system), the electrical system overall can deliver a nasty shock. Respect electricity! Ensure all connections are secure and properly insulated.
In Conclusion
Diagnosing a bad alternator requires a bit of understanding and careful troubleshooting. By following the steps outlined in this guide, you'll be well-equipped to identify the symptoms, perform basic tests, and determine if your alternator needs replacing. Remember safety first and don't hesitate to consult a qualified mechanic if you're unsure about anything. We hope this comprehensive guide has been helpful!