How To Test A Knock Sensor
The dreaded check engine light illuminates. A quick scan reveals a fault code related to the knock sensor. What now? Many shade-tree mechanics simply replace the sensor, hoping for the best. But what if the problem isn't the sensor itself? What if it's a wiring issue, or even a misfire causing excessive engine knock? This guide will walk you through the process of testing a knock sensor, enabling you to diagnose the problem accurately and avoid unnecessary expenses.
The Problem: Deciphering Knock Sensor Signals
Imagine your engine as an orchestra. Each cylinder firing in perfect harmony creates a beautiful, efficient sound. Now, imagine a trombone player suddenly hitting a wrong note consistently, creating a jarring dissonance. That's knock, or detonation, in your engine. Knock sensors are the microphones of this orchestra, listening for those dissonant notes. But what if the microphone is faulty, the amplifier isn't working, or the trombone player (the engine) is just having a really bad day?
Detonation, also known as engine knock or pinging, is the uncontrolled combustion of the air-fuel mixture in the cylinders. It occurs when the mixture ignites prematurely, creating pressure waves that collide within the cylinder. These collisions cause a characteristic "knocking" sound and, more importantly, can severely damage engine components like pistons, connecting rods, and cylinder heads. The Engine Control Unit (ECU) relies on the knock sensor to detect these occurrences and adjust timing and fuel parameters to prevent further damage.
How the Knock Sensor System Works
The knock sensor itself is a relatively simple device, but its role within the engine management system is critical. Let's break down its mechanics:
Mechanical Operation
Most modern knock sensors are piezoelectric sensors. These sensors contain a piezoelectric crystal that generates an electrical charge when subjected to mechanical stress. The sensor is mounted directly to the engine block, typically near the cylinders. When detonation occurs, the vibrations from the knocking translate into stress on the piezoelectric crystal, generating a small voltage signal. The amplitude and frequency of this signal are proportional to the intensity of the knock.
Electrical Signals and the ECU
The voltage signal generated by the knock sensor is sent to the ECU. The ECU is programmed to recognize specific frequencies and amplitudes associated with engine knock. When a knock signal is detected, the ECU responds by retarding the ignition timing (delaying the spark). Retarding the timing reduces the peak cylinder pressure and temperature, thus suppressing the detonation. The ECU may also enrich the air-fuel mixture, further reducing the likelihood of knock.
The system works in a closed-loop feedback. The ECU constantly monitors the knock sensor signal, adjusting timing and fuel as needed to maintain optimal engine performance while preventing detonation. If the knock sensor fails or provides inaccurate data, the ECU may enter a limp mode, reducing engine power to protect it from potential damage. This is why a faulty knock sensor can significantly impact your car's performance and fuel economy.
Testing the Knock Sensor: A Step-by-Step Guide
Before condemning the knock sensor, it's crucial to perform a thorough diagnostic test. Here's a comprehensive guide:
Tools You'll Need:
- Multimeter: Capable of measuring voltage (AC and DC) and resistance.
- Scan Tool: To read and clear diagnostic trouble codes (DTCs).
- Wiring Diagram: Essential for identifying the correct wires and terminals.
- Torque Wrench: For proper sensor installation (if replacement is necessary).
- Optional: Oscilloscope: For more advanced signal analysis (not essential for basic testing).
Step 1: Visual Inspection
Begin by visually inspecting the knock sensor and its wiring. Look for:
- Corrosion: On the sensor terminals or wiring connectors.
- Damage: Cracks or breaks in the sensor housing or wiring insulation.
- Loose Connections: Ensure the connector is securely attached to the sensor.
Clean any corrosion and repair any damaged wiring before proceeding.
Step 2: Resistance Test
This test checks the internal integrity of the knock sensor. Disconnect the sensor connector from the wiring harness. Use your multimeter to measure the resistance between the sensor terminals. The expected resistance value varies depending on the manufacturer and sensor type. Consult your vehicle's service manual for the correct specification. Generally, a good sensor will have a resistance value within a few ohms of the specified range. An open circuit (infinite resistance) or a short circuit (zero resistance) indicates a faulty sensor.
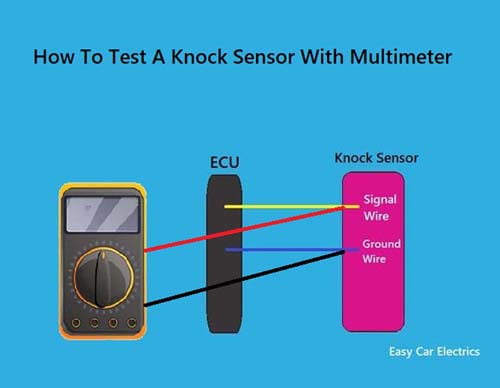
Step 3: Voltage Output Test (Dynamic Test)
This test checks the sensor's ability to generate a voltage signal when subjected to vibration. Important: This test requires the engine to be running, so take necessary safety precautions. With the engine idling, backprobe the knock sensor signal wire with your multimeter. Set the multimeter to AC voltage mode. Gently tap the engine block near the sensor with a small hammer or wrench. You should see a small AC voltage reading on the multimeter. The voltage reading will vary depending on the intensity of the tapping and the sensitivity of the sensor. If you see no voltage output, the sensor may be faulty. Be *very* careful not to damage any engine components while tapping. A faulty reading here could also indicate an issue with the ECU wiring or the ECU itself.
Step 4: Wiring Harness Test
If the sensor appears to be functioning correctly, the problem may lie in the wiring harness connecting the sensor to the ECU. Use your multimeter to perform the following tests:
- Continuity Test: Check for continuity between the sensor connector and the ECU connector. A lack of continuity indicates a broken wire.
- Short to Ground Test: Check for a short circuit between the sensor signal wire and ground. A short to ground can cause the ECU to misinterpret the sensor signal.
- Short to Voltage Test: Check for a short circuit between the sensor signal wire and a voltage source.
Repair any wiring faults as necessary.
Step 5: Scan Tool Data Monitoring
Connect your scan tool to the vehicle's diagnostic port (OBD-II port). Use the scan tool to monitor the knock sensor data in real-time. With the engine running, observe the knock sensor voltage or knock retard value. The voltage should fluctuate slightly as the engine runs. If the ECU is detecting knock, it will retard the ignition timing, and you should see a corresponding change in the knock retard value. This can help confirm that the ECU is receiving a signal from the sensor and responding appropriately.
Pros and Cons of DIY Knock Sensor Testing
Pros:
- Cost Savings: Avoid unnecessary replacement of a functional sensor.
- Improved Diagnostic Skills: Gain a better understanding of engine management systems.
- Confidence: Ensure the repair is done correctly.
Cons:
- Requires Specialized Tools: Multimeter, scan tool, and wiring diagrams are essential.
- Potential for Damage: Incorrect testing procedures can damage the sensor or other engine components.
- Time Commitment: Proper testing can be time-consuming.
Use Cases and Manufacturer Examples
Knock sensors are commonly found in most modern gasoline engines. Specific sensor designs and testing procedures may vary depending on the manufacturer and model. For example:
- Bosch: A major supplier of knock sensors to various automotive manufacturers. Their sensors often use a specific resistance range for testing.
- Denso: Another prominent manufacturer, known for their durable and reliable sensors.
- OEM Sensors: It's crucial to consult the vehicle's service manual for specific testing procedures and specifications for the OEM knock sensor. For example, a Toyota knock sensor might have a different resistance range than a Honda knock sensor.
Scenario 1: A mechanic working on a Subaru Impreza finds a P0325 knock sensor code. They perform a resistance test and find the sensor reads open circuit. This confirms a faulty sensor, which needs replacement.
Scenario 2: A DIY enthusiast working on a Ford F-150 finds a P0328 knock sensor code (high input). They perform a wiring harness test and find a short to voltage on the signal wire. Repairing the wiring solves the problem.
Real-World Insights and Recommendations
Knock sensors are often subjected to harsh environmental conditions, including high temperatures, vibrations, and exposure to engine oil and coolant. Over time, these conditions can degrade the sensor's performance, leading to inaccurate readings or complete failure. Therefore, regular maintenance and inspection of the knock sensor are essential for maintaining optimal engine performance.
Recommendations:
- Use a High-Quality Replacement Sensor: If replacement is necessary, opt for a reputable brand like Bosch or Denso.
- Proper Installation: Ensure the sensor is properly torqued to the manufacturer's specification. Overtightening or undertightening the sensor can affect its performance.
- Check for Misfires: Engine misfires can cause excessive engine knock, triggering false knock sensor readings. Address any misfire issues before replacing the knock sensor.
- Use Correct Fuel Octane: Using fuel with a lower octane rating than recommended can lead to engine knock. Ensure you are using the correct fuel for your vehicle.
By following this comprehensive guide, you can effectively test your knock sensor and accurately diagnose any related problems. Remember to consult your vehicle's service manual for specific testing procedures and specifications. With a little patience and the right tools, you can save money and ensure your engine runs smoothly and efficiently.