How To Test Spark Plugs And Wires
A misfiring engine is a frustrating experience. It's that tell-tale stumble, the rough idle, the drop in power – all pointing to an issue with the ignition system. And at the heart of that system are the unassuming, yet vital, spark plugs and wires. Knowing how to test them isn't just about saving money on garage bills; it's about understanding a fundamental aspect of how your engine works and taking control of its performance.
The Case of the Hesitant Hatchback
Imagine this: You're cruising down the highway in your trusty hatchback, enjoying the drive. Suddenly, the engine starts to sputter. It feels like it's momentarily losing power, then catching itself, only to stumble again a few seconds later. The check engine light flickers ominously. What's going on? More often than not, a misfire can be traced back to faulty spark plugs or wires. Let's explore how to diagnose the problem.
The Ignition System: A Spark of Genius
To understand how to test these components, you need to appreciate their role in the ignition system. The system's job is to ignite the air-fuel mixture inside the engine cylinders, creating the controlled explosion that drives the pistons and, ultimately, the wheels. Here's the breakdown:
- Battery: Provides the initial electrical energy.
- Ignition Coil: Transforms the battery's low voltage (typically 12V) into a high voltage (upwards of 20,000V) needed to create a spark. Modern cars often use coil-on-plug (COP) systems, where each cylinder has its own dedicated coil.
- Distributor (in older cars): Routes the high voltage from the coil to the correct spark plug at the correct time. Newer cars use electronic ignition systems controlled by the engine control unit (ECU).
- Spark Plug Wires (or Coil-On-Plug connection): Conduct the high voltage from the coil (or distributor) to the spark plug. In COP systems, the coil is directly connected to the plug, eliminating the need for wires.
- Spark Plugs: Located inside the cylinder head, they have a small gap at the tip. The high voltage jumps this gap, creating a spark that ignites the air-fuel mixture.
A misfire occurs when the spark plug fails to ignite the mixture properly, or doesn't ignite it at all. This can be due to several reasons:
- Worn spark plugs: The electrodes erode over time, widening the gap and making it harder for the spark to jump.
- Fouled spark plugs: Carbon deposits, oil, or fuel can accumulate on the plug, preventing the spark from forming.
- Damaged spark plug wires: Cracks, breaks, or corrosion can impede the flow of high voltage.
- Faulty ignition coil: If the coil isn't generating sufficient voltage, the spark plug won't fire.
Testing Spark Plugs: A Visual and Functional Assessment
Testing spark plugs involves both a visual inspection and, ideally, a functional test. Let's start with the visual examination.
Visual Inspection: Reading the Plugs
Remove the spark plugs using a spark plug socket (a deep socket with a rubber insert to protect the plug). Carefully inspect each plug, paying attention to the following:
- Electrode Condition: Are the electrodes worn, rounded, or excessively eroded? A healthy spark plug should have sharp, well-defined edges.
- Insulator Condition: Is the insulator (the white ceramic part) cracked, chipped, or stained? Cracks can cause the spark to leak to ground, while staining can indicate oil or fuel fouling.
- Color: The color of the insulator tip can tell you a lot about the engine's condition. A light tan or gray color is ideal, indicating proper combustion. Black, sooty deposits suggest a rich-running condition (too much fuel), while white or light gray can indicate a lean-running condition (too little fuel). Oil deposits indicate oil leaking into the combustion chamber.
- Carbon Deposits: Are there excessive carbon deposits on the electrodes or insulator? This can be caused by short trips, poor fuel quality, or a malfunctioning air filter.
Compare the condition of all the plugs. Are they uniformly worn, or is one plug significantly different from the others? A single bad plug can point to a problem specific to that cylinder, such as a leaky valve or a faulty fuel injector.
Functional Testing: The Spark Gap Test
The best way to assess a spark plug's performance is with a spark gap tester. This tool allows you to observe the spark produced by the plug under controlled conditions. Here's how to use it:
- Connect the spark plug to the tester, ensuring a good ground connection.
- Crank the tester (usually with a hand crank or a button) to generate high voltage.
- Observe the spark. A healthy spark should be strong, blue-white in color, and jump the gap consistently. A weak, orange, or intermittent spark indicates a bad plug.
Pros of spark plug testing: Relatively inexpensive, allows for visual diagnosis of engine conditions, can pinpoint individual cylinder problems. Cons of spark plug testing: Requires removal of the plugs, can be messy (especially if oil is present), spark gap testers require some skill to interpret results.
Manufacturer Example: NGK and Bosch are reputable manufacturers that offer detailed troubleshooting guides and spark plug diagnosis charts on their websites.
Testing Spark Plug Wires: The Path of Least Resistance
Spark plug wires, if your car has them, are responsible for carrying the high-voltage current from the distributor or coil to the spark plugs. Over time, these wires can degrade, leading to poor spark delivery and misfires. There are two primary methods for testing spark plug wires:
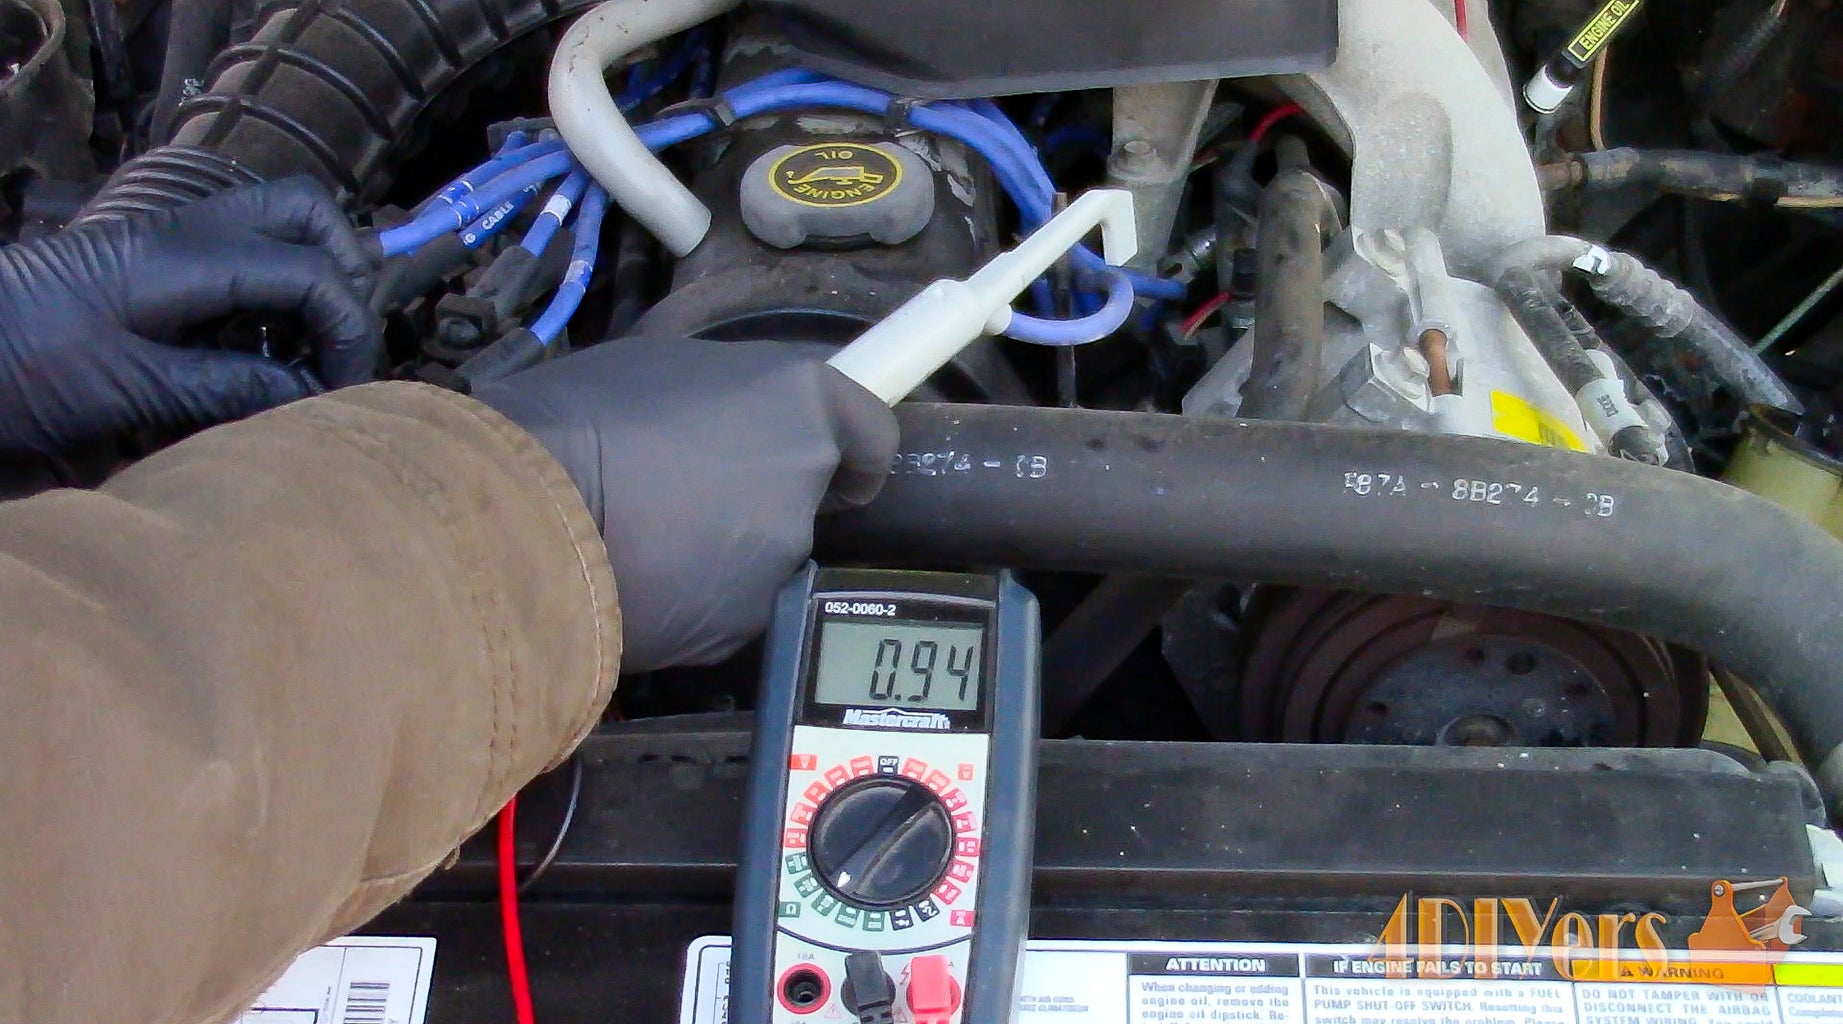
Resistance Testing: Measuring the Flow
Using a multimeter, you can measure the resistance of each spark plug wire. A healthy wire should have low resistance, allowing current to flow easily. Higher resistance indicates degradation or damage.
- Set the multimeter to the resistance setting (Ohms - Ω).
- Disconnect the spark plug wire from both the spark plug and the distributor/coil.
- Place one probe of the multimeter on each end of the wire.
- Record the resistance reading.
Compare the resistance readings of all the wires. A significant difference between wires can indicate a faulty wire. Consult your vehicle's service manual for the acceptable resistance range for your specific wires. Generally, resistance should be relatively low (typically a few thousand Ohms per foot of wire).
Visual Inspection: Looking for Trouble
Before and after resistance testing, give the wires a thorough visual inspection. Look for:
- Cracks or Breaks: Check the insulation for cracks, breaks, or cuts. These can allow the high voltage to leak to ground, causing a misfire.
- Corrosion: Inspect the terminals for corrosion. Clean them with a wire brush if necessary.
- Loose Connections: Ensure that the wires are securely connected to both the spark plugs and the distributor/coil.
The Water Mist Test: A Dark Art
This test should be done with extreme caution. Start the car in a dark environment. Lightly mist the spark plug wires with water from a spray bottle. If you see sparks jumping from the wires to the engine block, you have a bad wire that's arcing to ground.
WARNING: Be extremely careful to avoid touching any metal parts of the engine while it's running. High voltage can be dangerous.
Pros of spark plug wire testing: Relatively simple, can identify damaged or degraded wires. Cons of spark plug wire testing: Resistance testing requires a multimeter, the water mist test is dangerous.
Manufacturer Example: Companies like Delphi and AC Delco offer high-quality spark plug wires and detailed troubleshooting guides.
COP (Coil-On-Plug) Systems: A Different Approach
Many modern vehicles utilize coil-on-plug (COP) ignition systems, which eliminate the need for spark plug wires. In these systems, each cylinder has its own dedicated ignition coil that sits directly on top of the spark plug. Testing COP systems requires a different approach.
Scan Tool Diagnosis: Reading the Codes
The most effective way to diagnose COP problems is with a scan tool. This tool can read diagnostic trouble codes (DTCs) stored in the engine control unit (ECU). A misfire code (e.g., P0301, P0302) will indicate which cylinder is misfiring. You can then focus your attention on the coil and spark plug for that cylinder.
Coil Swapping: The Process of Elimination
If you suspect a faulty coil, you can try swapping it with a coil from a known good cylinder. For example, if you have a misfire on cylinder 1, swap the coil from cylinder 1 with the coil from cylinder 2. Clear the DTCs with the scan tool and start the engine. If the misfire moves to cylinder 2, you know the coil is bad.
Oscilloscope Testing: A Deep Dive
For a more advanced diagnosis, you can use an oscilloscope to analyze the waveform of the ignition signal. This can help you identify subtle problems with the coil, such as weak spark or excessive dwell time.
Wrapping Up: A Spark of Understanding
Testing spark plugs and wires isn't just about fixing a misfire; it's about gaining a deeper understanding of your engine's inner workings. By learning to diagnose these components, you can not only save money on repairs but also prevent more serious engine problems down the road.
Recommendations:
- Always consult your vehicle's service manual for specific testing procedures and specifications.
- When replacing spark plugs, use the correct type and gap for your engine.
- Consider upgrading to iridium or platinum spark plugs for longer life and improved performance.
- Don't neglect regular maintenance. Replacing spark plugs and wires (if applicable) at the recommended intervals can prevent misfires and improve fuel economy.
With a little knowledge and the right tools, you can keep your engine firing on all cylinders and enjoy a smooth, reliable ride.