How To Test Tps Sensor With Multimeter
Imagine your car hesitates when you press the accelerator, or idles erratically. These symptoms could stem from a variety of issues, but one often-overlooked culprit is a malfunctioning Throttle Position Sensor (TPS). This seemingly small component plays a crucial role in your engine's performance, and learning how to test it with a multimeter can save you money and frustration. In this guide, we'll delve into the inner workings of the TPS, explain how to diagnose its problems, and provide a step-by-step process for testing it using a multimeter.
Understanding the Throttle Position Sensor
Think of your car's engine as a sophisticated air pump. The amount of air entering the engine directly correlates to the amount of fuel needed for optimal combustion. The throttle valve controls this airflow. The TPS is the messenger, constantly relaying the throttle valve's position to the engine control unit (ECU), the car's brain. This information allows the ECU to precisely calculate the correct fuel injection and ignition timing, ensuring smooth acceleration, optimal fuel efficiency, and consistent idle.
The Mechanical and Electrical Interplay
Mechanically, the TPS is directly linked to the throttle valve shaft. As you press the accelerator pedal, the throttle valve opens, and the TPS rotates along with it. Inside the sensor, a wiper arm moves across a resistive strip. This movement changes the sensor's resistance, generating a voltage signal that is proportional to the throttle valve's opening angle. The ECU interprets this voltage signal to determine the throttle position – from fully closed (idle) to wide open throttle (WOT).
Here's a simple analogy: imagine a dimmer switch controlling a light. As you turn the knob (throttle), the light's brightness changes (engine power). The dimmer switch (TPS) sends a signal about its position to the light bulb (engine), allowing it to adjust its brightness (fuel injection and ignition timing) accordingly.
Types of Throttle Position Sensors
While the underlying principle remains the same, TPS designs can vary. The two main types are:
- Potentiometer-based TPS: This is the most common type. As described above, it uses a wiper arm moving across a resistive strip.
- Hall-effect TPS: This type uses a magnetic field and a Hall-effect sensor to detect the throttle position. Hall-effect sensors are generally more durable and reliable than potentiometer-based sensors, as they have no physical contact between moving parts.
Diagnosing TPS Problems: Symptoms and Causes
A failing TPS can manifest in several ways, often mimicking other engine problems. Common symptoms include:
- Hesitation or Stumbling During Acceleration: The ECU isn't receiving accurate throttle position information, leading to incorrect fuel delivery.
- Rough or Erratic Idle: The ECU struggles to maintain a stable idle speed due to inconsistent throttle position readings.
- Stalling: In severe cases, the engine may stall, especially when coming to a stop.
- Poor Fuel Economy: Inaccurate fuel injection can lead to increased fuel consumption.
- Check Engine Light: The ECU may detect a TPS malfunction and trigger the check engine light. Diagnostic Trouble Codes (DTCs) related to the TPS often include P0120, P0121, P0122, and P0123.
- Surging or Jerking: Erratic throttle position readings can cause the engine to surge or jerk unexpectedly.
The causes of TPS failure are varied, but often include:
- Wear and Tear: Over time, the resistive strip in potentiometer-based sensors can wear down, leading to inaccurate readings or dead spots.
- Contamination: Dirt, oil, or moisture can contaminate the sensor, interfering with its operation.
- Physical Damage: Impact or vibration can damage the sensor's internal components.
- Wiring Issues: Faulty wiring, loose connections, or corrosion can disrupt the signal between the TPS and the ECU.
Testing the TPS with a Multimeter: A Step-by-Step Guide
Before you begin, always consult your vehicle's service manual for specific instructions and wiring diagrams related to your particular make and model. Disconnecting the battery is generally a good safety practice before working on electrical components.
Tools Required:
- Multimeter (digital multimeter recommended for accuracy)
- Vehicle service manual (for wiring diagrams and specifications)
- Wire piercing probe (optional, but helpful for testing without damaging wires)
Procedure:
- Identify the TPS Connector: Locate the TPS on the throttle body. It's usually a small, rectangular sensor with a connector containing three or four wires.
- Consult the Wiring Diagram: Refer to your vehicle's service manual to identify the functions of each wire in the TPS connector. Typically, there will be a ground wire, a power wire (usually 5 volts), and a signal wire.
- Backprobe the Connector: With the connector plugged into the TPS, carefully insert the multimeter probes into the back of the connector, making contact with the terminals. Avoid piercing the wires directly unless absolutely necessary. Wire piercing probes can be very helpful here.
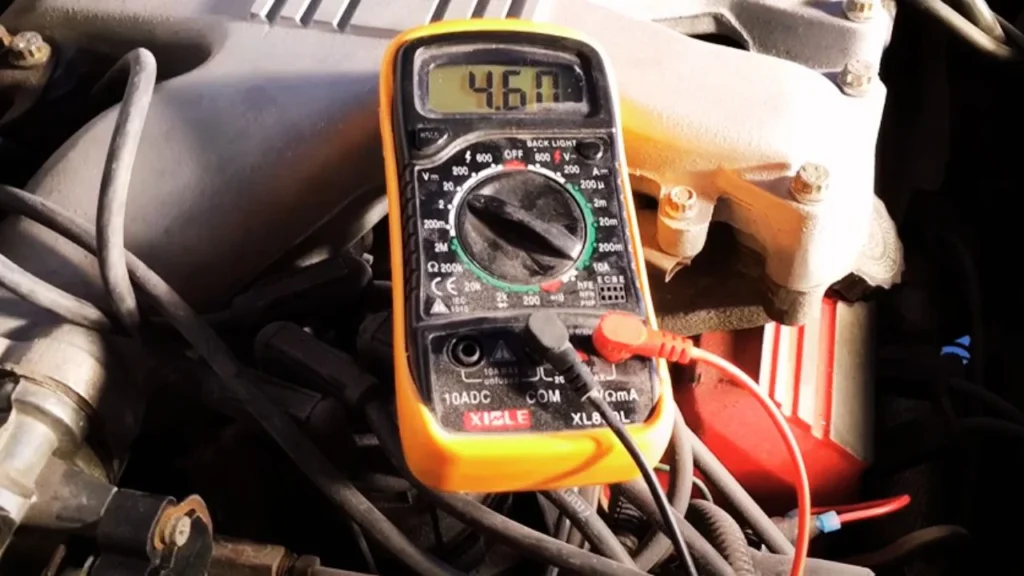
- Set the Multimeter to DC Voltage: Set your multimeter to read DC voltage in the appropriate range (typically 20V).
- Key On, Engine Off (KOEO): Turn the ignition key to the "ON" position, but do not start the engine.
- Measure the Reference Voltage: Connect the multimeter's black lead to the ground wire and the red lead to the power wire. You should read approximately 5 volts. If not, there may be a problem with the wiring or the ECU.
- Measure the Signal Voltage at Idle: Move the red lead to the signal wire. At idle (throttle closed), you should read a voltage within the range specified in your vehicle's service manual. This is typically between 0.5 and 1.0 volts.
- Slowly Open the Throttle: Manually open the throttle valve slowly, observing the voltage reading on the multimeter. The voltage should increase smoothly and linearly as the throttle opens, without any sudden jumps, drops, or dead spots. It should reach approximately 4.5 to 5.0 volts at wide open throttle.
- Check for Smooth Transition: Pay close attention to the voltage reading as you slowly open and close the throttle. Any sudden changes, erratic fluctuations, or dead spots indicate a problem with the TPS.
- Repeat the Test: Repeat the test several times to confirm your findings.
Interpreting the Results
- Incorrect Reference Voltage: If the reference voltage is not approximately 5 volts, there is likely a problem with the wiring, the ECU, or the vehicle's voltage regulator.
- Incorrect Signal Voltage at Idle: If the signal voltage at idle is outside the specified range, the TPS may be faulty or out of adjustment. Some TPS units are adjustable, but this is less common on newer vehicles.
- Erratic Voltage Readings: Fluctuating or jumping voltage readings indicate a worn or damaged resistive strip inside the sensor.
- Dead Spots: If the voltage drops to zero or remains constant as the throttle is opened, there is a dead spot in the sensor.
- No Voltage Change: If the voltage does not change as the throttle is opened, the TPS is likely faulty.
Pros and Cons of DIY TPS Testing
Pros:
- Cost Savings: Testing the TPS yourself can save you the cost of diagnostic labor at a mechanic's shop.
- Educational Value: Understanding how the TPS works and how to test it can improve your overall knowledge of automotive systems.
- Empowerment: Successfully diagnosing and potentially replacing the TPS yourself can be a rewarding experience.
Cons:
- Requires a Multimeter and Basic Mechanical Skills: You'll need a multimeter and some basic understanding of automotive electrical systems.
- Potential for Misdiagnosis: Incorrectly interpreting the results can lead to unnecessary repairs.
- Safety Concerns: Working around a running engine can be dangerous if proper precautions are not taken.
- Not a Substitute for Professional Diagnosis: If you're uncomfortable with electrical testing or are unsure of the results, it's best to consult a qualified mechanic.
Use Cases and Manufacturer Examples
The TPS is a ubiquitous component found in virtually all modern vehicles with electronic fuel injection. Here are some examples of how TPS issues can manifest in different vehicles:
- Ford F-150: A common issue with older Ford F-150s is a worn TPS causing erratic idle and hesitation during acceleration.
- Honda Civic: A failing TPS in a Honda Civic can lead to stalling, especially when coming to a stop.
- Chevrolet Silverado: A common problem with Chevrolet Silverados is a contaminated TPS causing poor fuel economy and a check engine light.
- Toyota Camry: A damaged TPS in a Toyota Camry can result in surging or jerking during acceleration.
Many manufacturers, such as Bosch, Delphi, and Denso, produce TPS sensors. Choosing a reputable brand can ensure quality and reliability.
Real-World Insights and Recommendations
Testing the TPS with a multimeter is a valuable troubleshooting technique that can help you diagnose engine performance problems. However, it's important to remember that the TPS is just one component in a complex system. Other factors, such as vacuum leaks, faulty fuel injectors, or ignition system problems, can also cause similar symptoms.
Recommendations:
- Always consult your vehicle's service manual: The service manual contains valuable information about the TPS, including wiring diagrams, specifications, and diagnostic procedures.
- Use a quality multimeter: A digital multimeter with good accuracy is essential for accurate testing.
- Take your time and be careful: Avoid rushing through the testing process, and be careful when working around a running engine.
- Document your findings: Record your voltage readings and observations to help you track down the problem.
- Consider replacing the TPS as a preventative measure: If your vehicle has high mileage, consider replacing the TPS even if it's not currently causing any problems. This can help prevent future issues and ensure optimal engine performance.
- If in doubt, seek professional help: If you're uncomfortable with electrical testing or are unsure of the results, it's best to consult a qualified mechanic.
By following these guidelines, you can effectively test the TPS with a multimeter and potentially save yourself time and money. Remember, a little knowledge and a systematic approach can go a long way in diagnosing and resolving automotive problems.