How To Use A Paint Pen On A Car
Minor scratches and chips are the bane of every car owner's existence. They're almost inevitable, whether from stray rocks, rogue shopping carts, or careless drivers. While professional auto body repairs are ideal for larger damage, a paint pen offers a cost-effective and convenient solution for addressing those smaller imperfections. This article will guide you through the proper techniques for using a paint pen on your car, ensuring a professional-looking repair that protects your vehicle's finish and prevents further damage.
Understanding Automotive Paint Systems
Before diving into the application, it's crucial to grasp the basics of automotive paint systems. Modern cars typically employ a multi-layer paint system for durability and aesthetics. This often includes:
- Primer: This is the foundation layer, providing adhesion for subsequent coats and corrosion protection. It's usually a grey or black color.
- Base Coat: This layer contains the color pigment. It can be a solid color (single-stage), metallic (containing tiny metal flakes), or pearlescent (containing mica particles for a shimmering effect).
- Clear Coat: This is the protective top layer, providing gloss, UV protection, and resistance to scratches and chemicals. It's a transparent coating that enhances the base coat's appearance.
When a scratch occurs, it may penetrate one or more of these layers. A paint pen aims to fill in the damaged area with matching color and protective properties. Understanding the original paint system helps you choose the right type of paint pen and application technique.
The Paint Pen: A Technical Breakdown
A paint pen is a self-contained applicator filled with automotive-grade paint. It typically features a valve-activated tip. When pressure is applied to the tip, the valve opens, allowing paint to flow out. Key components include:
- Reservoir: This holds the paint, often incorporating a mixing ball to ensure even pigment distribution.
- Valve Mechanism: This controls the flow of paint, preventing leaks and allowing for precise application.
- Applicator Tip: This can be a fine-tipped brush for detail work, a felt tip for broader coverage, or a needle-point applicator for very small chips.
- Color-Matched Paint: The heart of the pen. Proper color matching is *critical* for a seamless repair. This requires obtaining your car's paint code, usually found on a sticker inside the driver's side door jamb, under the hood, or in the owner's manual.
Paint pens work by delivering a controlled amount of paint to the damaged area. The paint then dries and hardens, filling the void and protecting the exposed metal or primer from corrosion. The quality of the paint pen and the technique used directly impact the final appearance of the repair.
Step-by-Step Guide: Using a Paint Pen for Scratch Repair
1. Preparation is Key
Thorough preparation is paramount for a successful paint pen repair. This involves:
- Cleaning the Area: Use a wax and grease remover to thoroughly clean the scratch and surrounding area. This removes contaminants that could interfere with paint adhesion. Automotive detailers or even isopropyl alcohol (IPA) can be used, just ensure the area is completely dry before proceeding.
- Masking (Optional): If the scratch is near other painted surfaces, use painter's tape to mask off the surrounding area. This prevents accidental paint application to unwanted areas.
- Removing Loose Paint or Rust: Use a fine-grit sandpaper (e.g., 2000-grit or higher) or a fiberglass scratch brush *very gently* to remove any loose paint chips or surface rust. Be extremely careful not to further damage the surrounding paint.
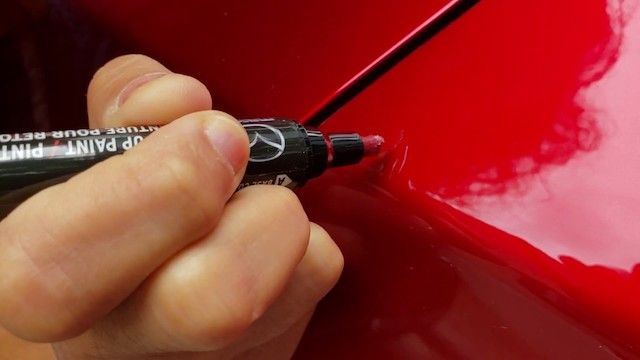
2. Applying the Paint
Now comes the actual application of the paint pen:
- Shake the Pen Vigorously: This ensures the paint is properly mixed and the pigments are evenly distributed. Shake for at least one minute.
- Prime the Pen: Follow the manufacturer's instructions to prime the pen. This usually involves pressing the tip against a clean surface (like a piece of cardboard) until the paint flows freely.
- Apply Thin Coats: Apply the paint in thin, even coats, allowing each coat to dry completely before applying the next. Avoid applying too much paint at once, as this can lead to runs and drips. "Less is more" is the rule here. Typically 2-3 thin coats will provide optimal coverage.
- Allow Sufficient Drying Time: Refer to the paint pen manufacturer's instructions for drying times. Drying times can vary depending on temperature and humidity.
3. Blending and Finishing (Optional)
For a more seamless repair, consider these optional steps:
- Wet Sanding (if necessary): If the applied paint is slightly higher than the surrounding paint, you can gently wet sand the area with ultra-fine grit sandpaper (e.g., 3000-grit or higher) to level it. Use plenty of water and light pressure. This requires experience and caution to avoid damaging the surrounding clear coat.
- Buffing and Polishing: Use a polishing compound and a microfiber cloth or a buffing machine (with appropriate pad) to polish the repaired area. This will restore the shine and blend the repair into the surrounding paint.
- Applying Clear Coat (Optional): If the paint pen does not contain a clear coat, consider applying a separate clear coat pen or spray to provide added protection and gloss.
Common Issues and Maintenance Concerns
- Color Matching Issues: Even with the correct paint code, slight variations in paint batches can occur. Test the paint in an inconspicuous area before applying it to the scratch.
- Paint Runs and Drips: These are caused by applying too much paint at once. If a run occurs, immediately wipe it away with a clean cloth and start over.
- Uneven Application: This can be caused by inconsistent pressure on the paint pen tip. Practice on a test surface to develop a consistent application technique.
- Clogged Pen Tip: This can be caused by dried paint. Clean the tip regularly with a small amount of paint thinner or solvent recommended by the manufacturer.
- Paint Pen Drying Out: Store the paint pen properly with the cap tightly sealed to prevent the paint from drying out.
Do's and Don'ts / Best Practices
Do's:
- Do use the correct paint code for your vehicle.
- Do clean the area thoroughly before applying paint.
- Do apply thin, even coats, allowing each coat to dry completely.
- Do shake the paint pen vigorously before each use.
- Do store the paint pen properly with the cap tightly sealed.
- Do practice on a test surface before applying paint to your car.
- Do work in a well-ventilated area.
Don'ts:
- Don't apply paint in direct sunlight or extreme temperatures.
- Don't apply too much paint at once.
- Don't use excessive force when wet sanding or buffing.
- Don't use harsh chemicals or abrasive cleaners on the repaired area.
- Don't ignore deep scratches or rust; these require more extensive repairs.
- Don't use a paint pen on flexible parts of your vehicle.
Conclusion: A Practical Solution with Skillful Execution
Using a paint pen on your car is a practical and affordable way to address minor scratches and chips. While it's not a substitute for professional auto body repairs, it can effectively conceal imperfections, prevent corrosion, and maintain the overall appearance of your vehicle. By understanding the principles of automotive paint systems, following the recommended techniques, and paying attention to detail, you can achieve professional-looking results. For best results, start with careful preparation, apply thin coats, and allow sufficient drying time. With a little practice and patience, you can keep your car looking its best for years to come. However, if the damage is extensive or you are not comfortable with the process, consult a professional auto body shop.