How To Use Auto Touch Up Paint Pen
Scratches and chips. They're the bane of every car owner's existence. Whether it's a rogue shopping cart, flying gravel, or an unfortunate encounter with a stray key, paint damage is almost inevitable. While a professional respray is the ideal solution, it can be costly and time-consuming. That's where the humble auto touch-up paint pen comes in. It's a cost-effective and surprisingly effective tool for addressing minor paint imperfections and preventing rust. This article provides a detailed, technical breakdown of how to properly use a touch-up paint pen to achieve professional-looking results.
Understanding Automotive Paint Systems
Before diving into the application process, it's crucial to understand the layering of automotive paint. Modern vehicles typically employ a multi-stage paint system, consisting of:
- Primer: The foundation layer, providing adhesion for subsequent coats and corrosion protection. Often a grey or reddish-brown color. Think of it as the 'glue' between the metal and the paint.
- Base Coat: This layer provides the color and aesthetic appeal. It can be a solid color (single-stage) or a metallic/pearl finish (requiring a clear coat). The base coat is often the layer you are trying to repair with a touch-up pen.
- Clear Coat: A transparent protective layer that adds gloss, UV protection, and scratch resistance. This is the armor for your base coat, protecting it from the elements.
Damage can occur at any of these layers. A deep scratch might penetrate all the way to the primer or even the bare metal, while a minor chip may only affect the clear coat. The depth and severity of the damage will dictate the necessary preparation and application techniques.
The Touch-Up Paint Pen: A Technical Breakdown
A touch-up paint pen is a simple yet ingenious device. It consists of a small reservoir filled with automotive paint (typically the base coat) and an applicator tip. The tip can vary in design, with the most common being:
- Brush Tip: Offers better control for larger chips and scratches. It allows for a more even application and blending.
- Pen Tip (Needle Tip): Ideal for pinpoint accuracy on very small imperfections, like tiny rock chips. It dispenses paint in very small quantities.
The paint flow is usually controlled by a valve or spring-loaded mechanism activated by pressing the tip against the surface. Many pens also feature a clear coat applicator on the opposite end, allowing you to apply a protective layer after the base coat has dried. The viscosity of the paint is crucial; it needs to be thin enough to flow through the applicator but thick enough to provide adequate coverage. Most touch-up paint pens use acrylic lacquer or acrylic enamel paints, which are relatively easy to work with and dry quickly.
The Application Process: A Step-by-Step Guide
Achieving a professional-looking result with a touch-up paint pen requires careful preparation and meticulous application. Here's a detailed breakdown:
Step 1: Preparation is Key
This is arguably the most important step. Proper preparation ensures optimal adhesion and a seamless finish.
- Cleaning: Thoroughly clean the damaged area with soap and water. Remove any dirt, wax, grease, or loose paint flakes. A degreaser like isopropyl alcohol is highly recommended to remove any remaining contaminants.
- Rust Removal (If Necessary): If rust is present, use a rust remover or fine-grit sandpaper (e.g., 400-grit) to carefully remove it. Be gentle to avoid damaging the surrounding paint. Apply a rust converter afterward to prevent further corrosion.
- Masking (Optional): For larger scratches or chips, masking off the surrounding area with painter's tape can help prevent overspray and create a clean, defined edge.
Step 2: Priming (If Necessary)
If the scratch or chip has penetrated to the bare metal, applying a thin coat of primer is crucial for corrosion protection and paint adhesion. Use a separate primer pen or a small brush. Allow the primer to dry completely according to the manufacturer's instructions (typically 30 minutes to an hour). Lightly sand the primed area with fine-grit sandpaper (e.g., 600-grit) to create a smooth surface for the base coat.
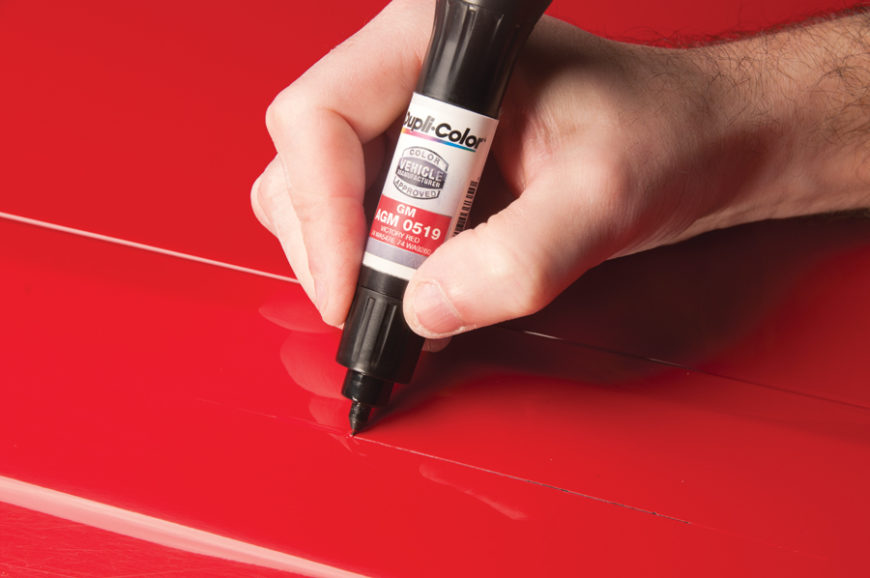
Step 3: Applying the Base Coat
This is where the touch-up paint pen comes into play.
- Shake Well: Thoroughly shake the touch-up paint pen for at least one minute to ensure the paint is properly mixed. This is critical for achieving the correct color match.
- Test Application: Before applying to the damaged area, test the paint flow on a piece of paper or cardboard. This allows you to get a feel for the pen and adjust the pressure accordingly.
- Apply Thin Coats: Apply the paint in thin, even coats, allowing each coat to dry completely before applying the next. Multiple thin coats are far better than one thick coat, which can lead to runs and sags. Allow each coat to dry for approximately 15-30 minutes, depending on the ambient temperature and humidity.
- Overfill Slightly: It's generally recommended to slightly overfill the chip or scratch. This will allow for sanding and leveling in the next step.
Step 4: Sanding and Leveling
This step is crucial for achieving a seamless finish. Wait at least 24 hours after applying the final coat of base coat to allow the paint to fully cure.
- Wet Sanding: Use very fine-grit sandpaper (e.g., 2000-grit, 2500-grit, or even 3000-grit) and a sanding block. Soak the sandpaper in water with a few drops of dish soap. Gently wet sand the touched-up area, blending it into the surrounding paint. Use light pressure and avoid sanding beyond the immediate area of the repair. The goal is to level the touched-up paint with the surrounding surface.
- Polishing: After wet sanding, use a polishing compound and a microfiber cloth to restore the shine and remove any sanding marks. You can also use a polishing machine for faster and more effective results.
Step 5: Applying the Clear Coat (If Necessary)
If your vehicle has a clear coat finish, apply a thin coat of clear coat to the touched-up area. This will protect the base coat and provide a glossy finish. Most touch-up paint pens have a clear coat applicator on the opposite end. Allow the clear coat to dry completely according to the manufacturer's instructions (typically 24 hours). Wet sand and polish the clear coat in the same manner as the base coat.
Step 6: Waxing
After the clear coat has fully cured, apply a coat of wax to protect the repaired area and blend it seamlessly with the surrounding paint. This will also help to prevent future damage.
Common Issues and Maintenance Concerns
- Color Mismatch: Despite using the correct paint code, slight color variations can occur due to fading, oxidation, or differences in paint batches. It's always a good idea to test the paint on an inconspicuous area first.
- Runs and Sags: Caused by applying too much paint in one coat. To fix this, allow the paint to dry completely, then sand down the runs or sags and reapply the paint in thin coats.
- Fish Eyes: Small, circular depressions in the paint caused by contaminants on the surface. Ensure the surface is thoroughly cleaned and degreased before applying the paint.
- Poor Adhesion: Due to inadequate surface preparation. Make sure to properly clean and sand the surface before applying the paint.
- Clogged Pen Tip: Clean the pen tip regularly with a solvent like lacquer thinner to prevent clogging.
Do's and Don'ts / Best Practices
Do's:
- Do use the correct paint code for your vehicle. This can usually be found on a sticker on the driver's side door jamb or in the glove compartment.
- Do work in a well-ventilated area.
- Do wear gloves and eye protection.
- Do apply multiple thin coats rather than one thick coat.
- Do allow each coat to dry completely before applying the next.
- Do wet sand and polish the repaired area for a seamless finish.
Don'ts:
- Don't apply touch-up paint in direct sunlight or extreme temperatures.
- Don't use excessive pressure when applying the paint.
- Don't skip the preparation steps.
- Don't use touch-up paint to repair large areas of damage.
Conclusion
Using an auto touch-up paint pen is a valuable skill for any car owner. While it might not completely replicate a professional paint job, it's a cost-effective and efficient way to address minor paint imperfections, prevent rust, and maintain the overall appearance of your vehicle. By following the steps outlined in this guide and paying close attention to detail, you can achieve surprisingly professional-looking results. Remember, patience and meticulous preparation are key. While these pens are a great solution for small imperfections, for extensive damage, consider consulting with a professional auto body shop.