How To Wet Sand A Car
Is your car's paint looking dull, orange-peeled, or marred by imperfections like scratches and swirl marks? Are you tired of seeing those blemishes reflecting back at you every time you admire your vehicle? The answer could be wet sanding, a process that can dramatically improve your paint finish, resulting in a smooth, glossy, and showroom-worthy appearance. It's important because it allows you to correct imperfections that polishing alone can't remove, setting the stage for a truly exceptional shine. While seemingly daunting, wet sanding, when done correctly, is a valuable technique for both DIY enthusiasts and professional detailers.
Recognizing the Need for Wet Sanding: Common Symptoms
Identifying the need for wet sanding involves recognizing specific imperfections in your car's paint. Here's a detailed list of symptoms indicating that wet sanding could be beneficial:
- Orange Peel: This refers to a textured, bumpy surface that resembles the skin of an orange. It's caused by uneven application or drying of the paint.
- Swirl Marks: These are circular scratches left by improper washing or polishing techniques. They appear as fine, swirling lines under direct light.
- Scratches: Light to moderate scratches, not deep enough to reach the primer, can be effectively removed with wet sanding. This includes scratches from branches, keying, or automated car washes.
- Paint Runs/Sags: These imperfections are caused by applying too much paint in one area, resulting in a dripping or sagging effect.
- Dust Nibbs: These are small particles of dust or debris that get trapped in the paint during application. They appear as tiny bumps on the surface.
- Clear Coat Imperfections: Dulling, fading, or minor imperfections in the clear coat layer can be addressed through wet sanding.
- Uneven Paint Texture After Repairs: If you've recently had body work done, the repaired area might not perfectly match the surrounding paint texture, making it a prime candidate for wet sanding and blending.
Understanding the Root Cause: Why Imperfections Occur
Several factors contribute to the development of paint imperfections, making wet sanding a necessary corrective process. Let's delve into the root causes:
- Factory Paint Application: Even with advanced robotic systems, factory paint jobs aren't always perfect. Variations in paint thickness, environmental conditions, and equipment calibration can lead to orange peel and other imperfections.
- Environmental Factors: Over time, exposure to the elements, such as sunlight, acid rain, and airborne contaminants, can degrade the paint's surface, leading to oxidation and scratches.
- Improper Washing and Polishing: Using abrasive sponges, dirty cloths, or incorrect polishing techniques can inflict swirl marks and scratches on the paint.
- Poor Paint Repair Procedures: Inadequate preparation, improper blending, or incorrect application of clear coat during paint repairs can result in uneven texture and other imperfections.
- Contamination During Painting: Dust, dirt, or other particles settling on the wet paint during application can cause dust nibs and surface irregularities.
- Paint Age and Condition: As paint ages, it becomes more brittle and susceptible to damage. Older paint jobs may require more aggressive wet sanding to restore their luster.
Consequences of Ignoring Paint Imperfections
Ignoring paint imperfections not only detracts from your car's appearance but can also lead to more serious problems down the line. Here's what can happen if you don't address these issues:
- Reduced Resale Value: A car with a dull, scratched, or imperfect paint finish will have a significantly lower resale value than one with a well-maintained paint job.
- Corrosion: Scratches that penetrate the clear coat and reach the base coat can expose the metal underneath to moisture and oxygen, leading to rust and corrosion.
- Paint Degradation: Continued exposure to the elements without proper protection can accelerate the oxidation and fading of the paint, resulting in a dull, lifeless appearance.
- Increased Maintenance Costs: Neglecting minor imperfections can lead to more extensive damage over time, requiring more costly repairs in the future. For example, surface rust, if left untreated, can spread and necessitate panel replacement.
- Aesthetic Displeasure: Let's be honest, nobody wants to drive a car that looks neglected. Addressing paint imperfections restores the beauty and pride in your vehicle.
Recommended Fixes: The Wet Sanding Process
Wet sanding is a meticulous process that requires patience and attention to detail. Here's a step-by-step guide to effectively wet sand your car:
- Preparation: Thoroughly wash and dry your car to remove all dirt and debris. Clay bar the surface to remove any embedded contaminants. Mask off any trim, emblems, or areas you don't want to sand.
- Gather Your Supplies: You'll need:
- Wet/dry sandpaper (various grits, typically starting with 2000-3000 grit for minor imperfections and lower grits like 1500 for heavier orange peel or runs)
- Sanding block
- Spray bottle filled with water and a few drops of car wash soap (as a lubricant)
- Microfiber towels
- Detailing clay
- Compound
- Polishing compound
- Wax or sealant
- Foam polishing pads
- Dual action polisher (optional, but highly recommended)
- Soak the Sandpaper: Submerge the sandpaper in clean water for at least 15-20 minutes before use. This helps to soften the paper and prevent it from clogging.
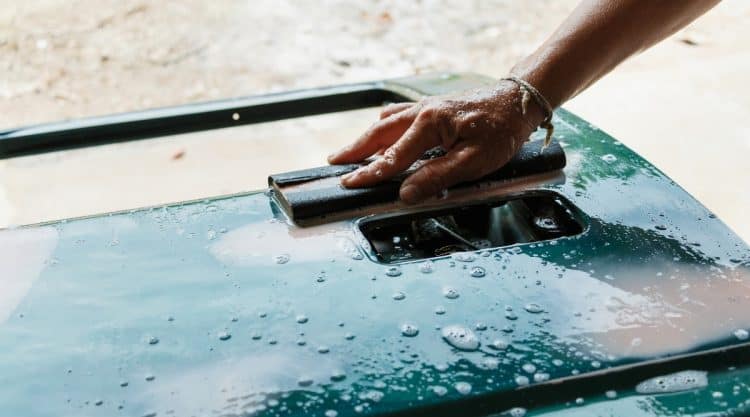
- Wet Sanding: Attach the sandpaper to the sanding block. Spray the area you're sanding and the sandpaper with plenty of water. Use light, even pressure and sand in a back-and-forth motion, overlapping each pass. Avoid sanding in circles. Regularly re-wet the surface to keep it lubricated.
- Inspect Your Work: After a few passes, wipe the area with a clean microfiber towel and inspect your progress. You should see a uniform, hazy appearance. If you're not removing the imperfections, you may need to use a slightly coarser grit of sandpaper. Be careful not to sand too aggressively.
- Repeat Sanding (If Necessary): If you started with a coarser grit, gradually work your way up to finer grits, such as 3000 or even 5000 grit. This will help to refine the surface and minimize sanding marks. Remember to always clean the area thoroughly between grits.
- Compounding: Once you've finished wet sanding, you'll need to remove the sanding marks with a compounding process. Apply a small amount of compound to a foam cutting pad and work it into the paint using a dual-action polisher. Use moderate pressure and overlapping passes.
- Polishing: After compounding, use a polishing compound and a foam polishing pad to refine the surface further and enhance the gloss. Use lighter pressure than with compounding.
- Waxing/Sealing: Finally, apply a coat of wax or sealant to protect the paint and add shine.
Cost Estimates and Shop Advice
The cost of wet sanding can vary depending on the severity of the imperfections, the size of the area being sanded, and whether you choose to DIY or hire a professional. Here's a general breakdown:
- DIY: If you decide to tackle the project yourself, the cost of materials will typically range from $50 to $200, depending on the quality of the products you choose.
- Professional Detailing Shop: Hiring a professional detailing shop to wet sand your car can cost anywhere from $300 to $1500 or more, depending on the size of the vehicle, the extent of the work required, and the shop's rates.
Shop Advice: If you're not comfortable wet sanding your car yourself, it's best to seek the services of a reputable detailing shop with experience in paint correction. Ask for before-and-after photos of their previous work and read online reviews to gauge their reputation.
Important Considerations:
- Paint Thickness: Before wet sanding, it's crucial to know the thickness of your car's paint. Using a paint thickness gauge can help you avoid sanding through the clear coat.
- Clear Coat Condition: If your clear coat is already thin or damaged, wet sanding may not be the best option. Consult with a professional detailer to assess the condition of your paint.
- Proper Lighting: Wet sanding requires good lighting to accurately assess the surface and identify imperfections. Work in a well-lit area or use a detailing light.
While there aren't specific TSBs (Technical Service Bulletins) related directly to wet sanding, many paint manufacturers provide guidelines and recommendations for paint repair and correction procedures. Researching these guidelines can help you understand the best practices for working with your car's specific paint type.
By following these steps and taking the necessary precautions, you can successfully wet sand your car and achieve a stunning, flawless finish that will turn heads wherever you go. Good luck!