How To Wet Sand Car Paint
Achieving a mirror-like finish on your car's paintwork is a goal for many automotive enthusiasts. While polishing can remove minor imperfections, deeper scratches, orange peel, or even dust nibs require a more aggressive approach: wet sanding. This guide delves into the science and art of wet sanding, providing a technical understanding of the process, its benefits, drawbacks, and when it's the right tool for the job.
The Problem: Imperfect Paint
Imagine a freshly painted car. Even with professional application, the surface isn't perfectly smooth at a microscopic level. Orange peel, a texture resembling the skin of an orange, occurs due to the paint's inability to flow out evenly before it cures. Dust particles settling on the wet paint create nibs, small raised bumps. Deeper scratches, perhaps from a careless car wash, mar the surface further. These imperfections scatter light, preventing the paint from reflecting a sharp, clear image. Regular polishing might gloss over these issues but won't truly remove them. This is where wet sanding steps in.
Think of it like leveling a bumpy road. You can try driving slowly and carefully over the bumps (polishing), but the road remains uneven. Wet sanding is like using a grader to shave down the high spots, creating a more uniform surface that's ready to be finished and provide a better ride. Polishing then refines this leveled surface, resulting in a much smoother and shinier finish.
How Wet Sanding Works: A Microscopic View
Wet sanding utilizes abrasive sandpaper in conjunction with water to level imperfections in the paint's clear coat. Unlike dry sanding, the water acts as a lubricant, carrying away sanding debris and preventing the sandpaper from clogging. This lubricant reduces friction and heat, allowing the abrasive to cut more cleanly and evenly. This process allows a greater control during the sanding process while also reducing damage to the sanded surface.
The Mechanics of Abrasion
Sandpaper consists of abrasive particles (typically aluminum oxide, silicon carbide, or ceramic) bonded to a backing material. When the sandpaper is moved across the paint surface, these abrasive particles act as tiny cutting tools, shaving off microscopic layers of the clear coat. The grit number of the sandpaper determines the size of these abrasive particles. A lower grit number (e.g., 400) indicates larger particles and a more aggressive cut, while a higher grit number (e.g., 3000) indicates smaller particles and a finer cut.
The Role of Water
The water serves several crucial functions:
- Lubrication: Reduces friction between the sandpaper and the paint, preventing excessive heat buildup.
- Cooling: Helps to dissipate heat generated during sanding.
- Swarf Removal: Carries away sanding debris (swarf), preventing the sandpaper from clogging and scratching the paint.
- Visual Aid: Allows you to see the progress of your sanding by revealing the leveled areas as they become dull and uniform.
Pros and Cons of Wet Sanding
Like any automotive refinishing technique, wet sanding has its advantages and disadvantages.
Pros:
- Effective Leveling: Excellent for removing orange peel, dust nibs, and deeper scratches.
- Improved Paint Clarity: Creates a significantly smoother surface, resulting in better light reflection and paint clarity.
- Enhanced Gloss: After polishing, wet sanded paint exhibits a deeper, richer gloss.
- Corrects Imperfections: Addresses problems that polishing alone cannot fix.
Cons:
- Risk of Striking Through: If done incorrectly, you can sand through the clear coat and into the base coat, requiring a respray.
- Time-Consuming: Wet sanding is a labor-intensive process that requires patience and attention to detail.
- Requires Skill and Experience: It's easy to make mistakes that can damage the paint if you're not careful.
- Messy: The process generates a significant amount of water and sanding debris.
- Requires Polishing: Wet sanding leaves a dull finish and requires subsequent polishing to restore the gloss.
Use Cases and Manufacturer Examples
Wet sanding is commonly used in several scenarios:
- Paint Correction: Removing imperfections in a car's factory paint or a respray.
- Custom Painting: Achieving a flawless finish on custom paint jobs.
- Show Cars: Preparing cars for automotive shows where a perfect finish is paramount.
- Spot Repairs: Blending in small repairs, such as fixing a scratch or chip.
Several automotive manufacturers employ wet sanding during the production process, particularly for high-end vehicles. For example, Rolls-Royce famously hand-polishes each of its vehicles, often incorporating wet sanding techniques to achieve their signature deep gloss. Similarly, certain Porsche models undergo meticulous paint finishing processes that include wet sanding to correct imperfections and enhance the overall appearance.
The Wet Sanding Process: A Step-by-Step Guide
Before starting, it's important to have the right equipment and a clean working environment. You'll need:
- Wet Sandpaper: A selection of grits, typically ranging from 1200 to 3000.
- Sanding Block: To provide a flat and even sanding surface.
- Spray Bottle with Clean Water: For lubricating the sandpaper and the paint surface.
- Clean Microfiber Towels: For wiping away water and inspecting your progress.
- Detailing Clay: To remove contaminants from the paint surface before sanding.
- Paint Thickness Gauge (Optional): To measure the thickness of the clear coat and avoid sanding through.
Step 1: Preparation
Wash the car thoroughly to remove any dirt or grime. Use detailing clay to remove any embedded contaminants from the paint surface. This is important to prevent these contaminants from scratching the paint during sanding.
Step 2: Assess the Imperfections
Carefully examine the paint surface under good lighting to identify the areas that need to be wet sanded. Use a paint thickness gauge to measure the thickness of the clear coat in these areas. This will help you avoid sanding through the clear coat.
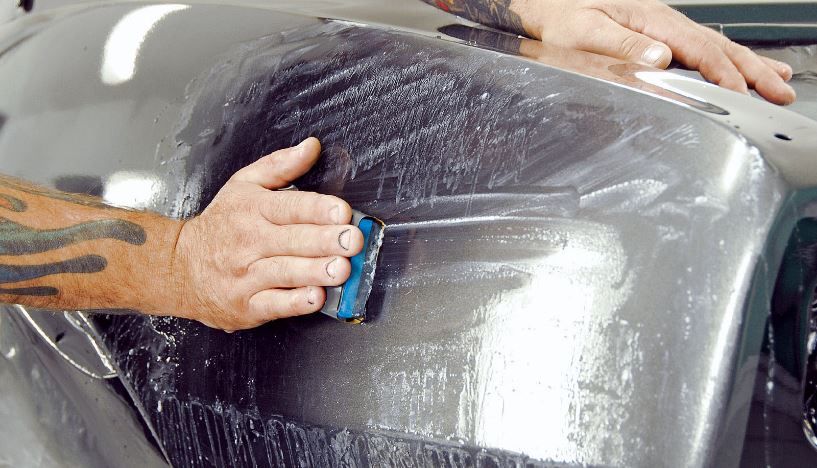
Step 3: Sanding
Start with the least aggressive grit that will effectively remove the imperfections. Typically, 2000 grit is a good starting point for orange peel and minor scratches. For deeper scratches, you may need to start with 1500 or even 1200 grit. Soak the sandpaper in clean water for at least 10 minutes before use. This will soften the paper and improve its cutting action.
Attach the sandpaper to a sanding block. Spray the paint surface and the sandpaper with plenty of water. Use light, even pressure and move the sanding block in a straight line, overlapping each pass by about 50%. Avoid sanding in circles, as this can create swirl marks.
Periodically wipe away the water and inspect your progress. The sanded areas should appear dull and uniform. If you're not removing the imperfections quickly enough, you may need to use a more aggressive grit.
Step 4: Refining
After sanding with the initial grit, move to the next finer grit (e.g., from 2000 to 2500). Repeat the sanding process, ensuring that you remove the scratches left by the previous grit. Continue this process, gradually increasing the grit until you reach 3000. The higher the grit, the finer the scratches will be, making it easier to polish the paint to a high gloss.
Step 5: Drying and Inspection
After sanding with the final grit, thoroughly dry the paint surface with a clean microfiber towel. Inspect the surface under good lighting to ensure that all the imperfections have been removed and that the sanding marks are uniform and fine.
Step 6: Polishing
Wet sanding leaves the paint dull and requires polishing to restore the gloss. Start with a cutting compound and a polishing pad to remove the sanding marks. Follow with a polishing compound and a finishing pad to refine the finish and create a deep gloss. Use a dual-action (DA) polisher for best results and to minimize the risk of holograms. Always follow the manufacturer's instructions for the polishing compounds and pads.
Step 7: Waxing or Sealing
After polishing, apply a wax or sealant to protect the paint and enhance the gloss. This will also help to prevent future scratches and imperfections.
Real-World Insights and Recommendations
Wet sanding is a powerful technique, but it requires careful execution. Here are some recommendations based on real-world use:
- Practice Makes Perfect: Practice on a test panel or an inconspicuous area of your car before tackling the entire vehicle.
- Keep it Clean: Regularly clean the sandpaper and the paint surface to prevent scratches from debris.
- Less is More: Use the least aggressive grit necessary to remove the imperfections. It's always better to sand too little than too much.
- Consistent Pressure: Apply even pressure and avoid concentrating on any one area for too long.
- Take Your Time: Wet sanding is not a process to be rushed. Allow yourself plenty of time and be patient.
- Invest in Quality Products: Use high-quality sandpaper, polishing compounds, and pads for best results.
- Know Your Limits: If you're not comfortable with the process, consider hiring a professional detailer.
By understanding the principles and techniques outlined in this guide, you can confidently approach wet sanding and achieve a truly stunning finish on your car's paintwork. Remember to prioritize safety, take your time, and practice good technique, and you'll be well on your way to a mirror-like shine.