Oil Change What Do I Need
So, you're thinking about tackling your next oil change yourself? Excellent! It's a job that can save you money and gives you a deeper understanding of your vehicle. This guide breaks down exactly what you need to get the job done right, covering everything from tools and materials to safety precautions. Think of this as your comprehensive checklist and refresher course. We're assuming you're past the complete beginner stage; you've likely changed your oil before, but maybe want a more thorough understanding or are looking to refine your process.
Purpose: Why Mastering the Oil Change Matters
Beyond the obvious cost savings, understanding the oil change process offers several benefits:
- Preventative Maintenance: Regular oil changes are arguably the single most important thing you can do to extend the life of your engine. Fresh oil lubricates moving parts, reducing friction and wear.
- Early Problem Detection: Paying attention during an oil change can reveal potential issues like coolant leaks (milky residue), fuel dilution (gas smell in the oil), or excessive metal shavings (indicating wear). Catching these problems early can prevent catastrophic engine failure.
- Increased Confidence: Performing this basic maintenance task yourself builds confidence and empowers you to tackle more complex repairs down the road.
- Customization: You have control over the type of oil and filter used, allowing you to choose products that best suit your vehicle's needs and your driving style.
Key Specs and Main Parts
Before you even crack open your toolbox, gather the essential components:
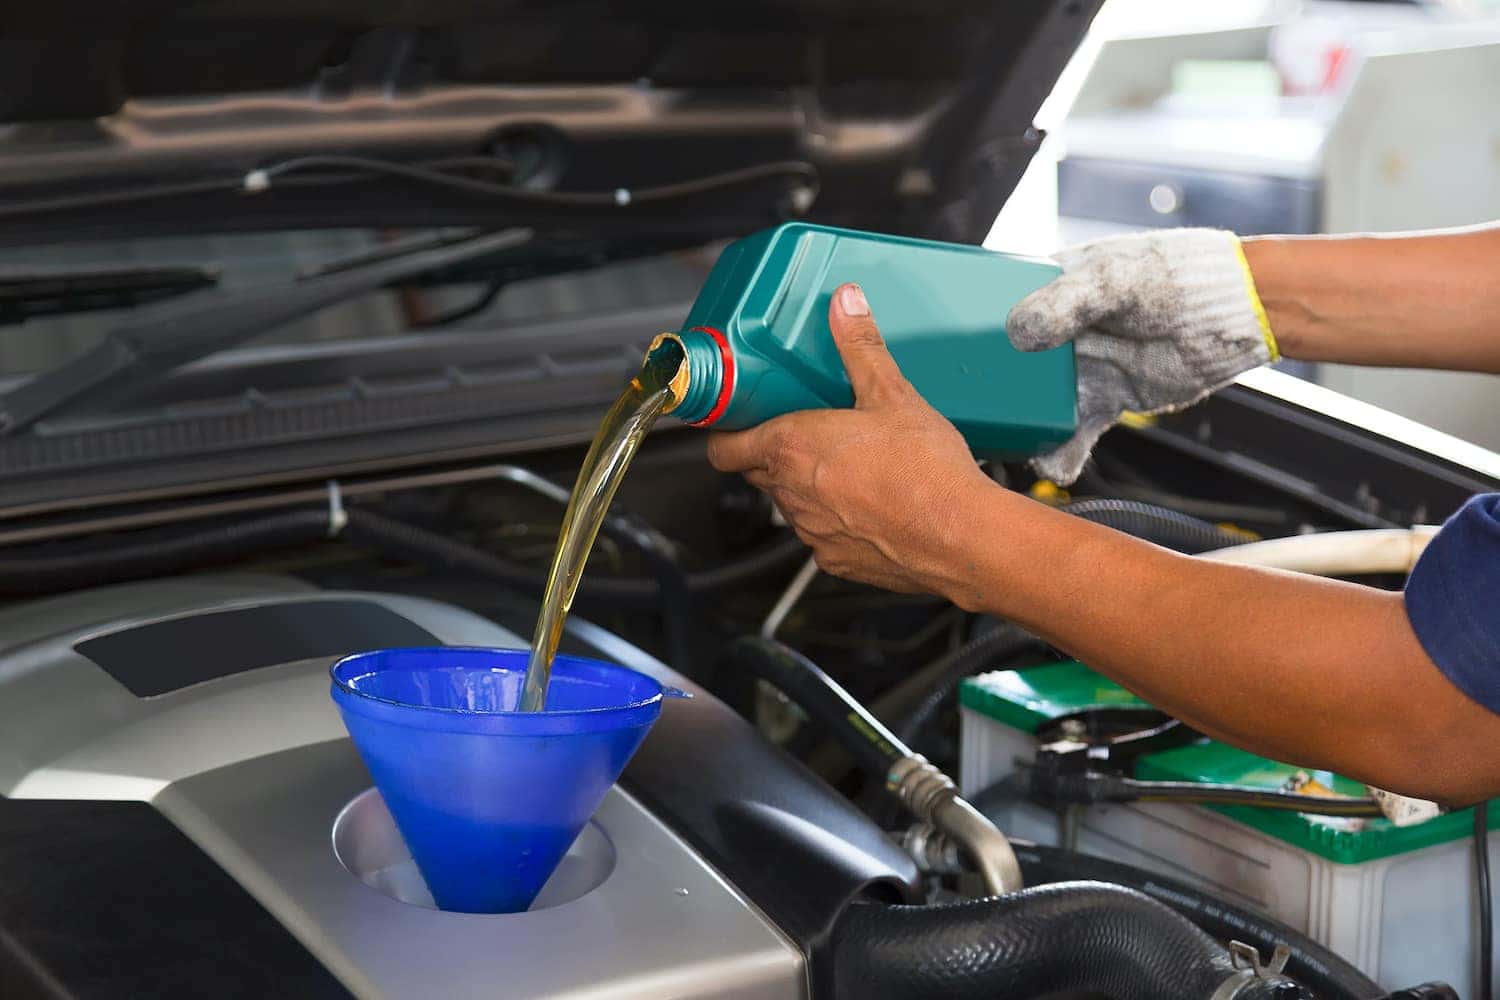
Oil
The correct type and quantity of oil are crucial. Consult your owner's manual or the oil fill cap on your engine. Pay attention to these key specifications:
- Viscosity: This is represented by a code like 5W-30 or 10W-40. The "W" stands for "winter" and indicates the oil's cold-weather performance. The first number is the viscosity at low temperatures, and the second is the viscosity at high temperatures. Using the wrong viscosity can damage your engine, especially in extreme temperatures.
- Oil Type: Choose between conventional, synthetic blend, or full synthetic oil. Synthetic oils generally offer better protection and longer intervals between changes, but they also cost more. The best choice depends on your vehicle's requirements and your budget.
- Quantity: Your owner's manual will specify the oil capacity. It's usually around 4-6 quarts for a typical passenger car engine. Always double-check after filling to ensure you're at the correct level on the dipstick. Overfilling can be just as harmful as underfilling.
Oil Filter
The oil filter removes contaminants from the oil, keeping it clean and effective. Again, consult your owner's manual or a parts store to find the correct filter for your vehicle. Consider these factors:
- Filter Type: Many options are available, including standard, extended-life, and synthetic media filters. Extended-life and synthetic filters offer superior filtration and longer service intervals.
- Thread Size and Diameter: The filter must have the correct threads to properly attach to the engine block.
- Bypass Valve: Some filters have a bypass valve that allows oil to flow unfiltered if the filter becomes clogged. This prevents oil starvation but can allow contaminants to circulate.
Drain Plug Washer/Gasket
This small but vital component seals the drain plug to the oil pan, preventing leaks. Always replace this washer with a new one each time you change the oil. They are often crush washers and are designed for one-time use.
Tools
You'll need the right tools to make the job easier and safer:
- Wrench or Socket for the Drain Plug: The size will vary depending on your vehicle. Using the wrong size can strip the drain plug.
- Oil Filter Wrench: These come in various styles (cap-type, strap-type, etc.) and are designed to remove the oil filter without damaging it.
- Oil Drain Pan: A pan large enough to hold the entire volume of oil.
- Funnel: For pouring the new oil into the engine.
- Jack and Jack Stands (or Ramps): To safely lift the vehicle and provide access to the drain plug. Never work under a vehicle supported only by a jack.
- Gloves: To protect your hands from dirty oil.
- Rags or Shop Towels: For cleaning up spills.
How It Works
The oil change process is relatively straightforward, but understanding the 'why' behind each step helps ensure success:
- Warm Up the Engine: Run the engine for a few minutes to warm the oil. Warm oil flows more easily, carrying away more contaminants. However, be careful – hot oil can burn you.
- Prepare the Vehicle: Safely lift the vehicle using a jack and secure it with jack stands (or use ramps).
- Locate the Drain Plug and Oil Filter: Consult your owner's manual if you're unsure of their locations.
- Position the Drain Pan: Place the drain pan under the drain plug.
- Remove the Drain Plug: Carefully loosen and remove the drain plug, allowing the oil to drain completely. Be mindful as the oil can be hot.
- Remove the Oil Filter: Use the oil filter wrench to loosen and remove the old filter. A small amount of oil will spill when you remove the filter, so have a rag ready.
- Prepare the New Filter: Lightly lubricate the rubber gasket on the new oil filter with fresh oil.
- Install the New Filter: Screw the new filter onto the engine by hand until the gasket makes contact, then tighten it another 1/2 to 3/4 turn, or as specified on the filter. Over-tightening can damage the filter.
- Install the Drain Plug: Install a new drain plug washer/gasket and tighten the drain plug to the specified torque (consult your service manual). Over-tightening can strip the threads in the oil pan.
- Lower the Vehicle: Carefully lower the vehicle.
- Add New Oil: Remove the oil fill cap and pour in the specified amount of new oil using a funnel.
- Check the Oil Level: Use the dipstick to check the oil level. Add more oil if needed to reach the "full" mark.
- Start the Engine: Start the engine and let it run for a few minutes. Check for leaks around the drain plug and oil filter.
- Recheck the Oil Level: Turn off the engine and let it sit for a few minutes to allow the oil to settle. Recheck the oil level and add more if needed.
- Dispose of the Old Oil and Filter Properly: Take them to a recycling center or auto parts store.
Real-World Use: Basic Troubleshooting Tips
- Stripped Drain Plug Threads: If you strip the threads in the oil pan, you'll need to repair or replace the oil pan. As a temporary fix, you can use a slightly larger self-tapping drain plug.
- Oil Filter Stuck: If the oil filter is stuck, try using a different type of oil filter wrench or tapping it lightly with a hammer and chisel.
- Oil Leaks After Change: Double-check the drain plug and oil filter to make sure they are properly tightened. Also, inspect the drain plug washer and oil filter gasket for damage.
- Oil Level Too High: If you overfilled the engine, you'll need to drain some oil. Use a suction pump or carefully loosen the drain plug.
Safety: Highlight Risky Components
Safety is paramount when working on vehicles:
- Hot Oil: Hot oil can cause severe burns. Let the engine cool down slightly before draining the oil. Wear gloves and long sleeves to protect your skin.
- Lifting the Vehicle: Never work under a vehicle supported only by a jack. Always use jack stands or ramps. Ensure the jack and jack stands are rated for the weight of your vehicle.
- Electrical Components: Be mindful of electrical components near the oil filter and drain plug. Avoid spilling oil on them.
- Proper Disposal: Used oil is hazardous waste. Dispose of it properly at a recycling center or auto parts store.
Performing your own oil change is a rewarding experience. By understanding the process and taking the necessary precautions, you can save money, learn about your vehicle, and ensure its longevity. Remember to always consult your vehicle's service manual for specific instructions and torque specifications.
And that’s it! You're now armed with the knowledge to confidently tackle your next oil change. To help further, we have a detailed, downloadable diagram outlining all the components and steps involved. It's a handy reference to keep in your garage. Happy wrenching!