What Are Dome Lights In A Car
Alright, let's dive into the often-overlooked but essential world of dome lights in your car. As an experienced DIYer, you probably know your way around the engine bay, but understanding the interior electrical system, including something as seemingly simple as a dome light, can be invaluable for repairs, modifications, and even just general car knowledge. We'll break down the key specs, components, how it works, and some troubleshooting tips. And yes, we have a detailed wiring diagram available for download – more on that later.
Key Specs and Main Parts
The dome light system, while basic in concept, relies on several interconnected components to function correctly. Let's go over the core elements:
- The Dome Light Fixture Itself: This is the housing that contains the bulb and often includes the lens or cover to diffuse the light. These fixtures can vary greatly in design, from simple single-bulb units to more complex setups with map lights and integrated controls.
- Bulb (Incandescent, LED, or Halogen): The light source. Older vehicles typically use incandescent bulbs, which are inexpensive but relatively inefficient. Modern vehicles increasingly use LED (Light Emitting Diode) bulbs, known for their longevity, low power consumption, and brighter output. Halogen bulbs are also sometimes used, offering a compromise between incandescent and LED technology. The wattage (power consumption) and voltage (typically 12V in automotive applications) are critical specifications.
- Wiring Harness: The network of wires that connects the dome light to the power source, switches, and door sensors. The wire gauge (thickness) is important to ensure it can handle the current draw without overheating.
- Door Jamb Switches: These switches, located on the door frame, detect when a door is opened or closed. They are typically simple normally-closed (NC) switches, meaning they are closed (conducting electricity) when the door is closed and open (interrupting the circuit) when the door is opened. Some vehicles have multiple switches (one for each door), while others use a single switch wired in parallel.
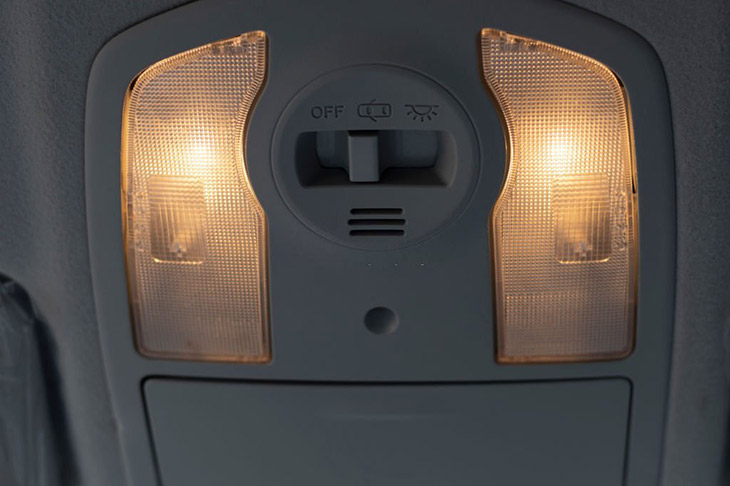
- Dimmer Switch (Optional): Some vehicles feature a dimmer switch for the dome light, allowing you to adjust the brightness level. This is often integrated into the headlight switch or a separate control panel.
- Body Control Module (BCM): In newer vehicles, the dome light is often controlled by the BCM, which is a central computer that manages various electrical functions. The BCM can provide features like delayed dome light shutoff and automatic activation when the key is removed from the ignition.
- Fuse: The fuse protects the dome light circuit from overcurrent. It's a crucial safety component.
Symbols (in a Wiring Diagram)
Understanding the symbols in a dome light wiring diagram is essential for troubleshooting and making modifications. Here's a breakdown of common symbols:
- Solid Lines: Represent wires. The thickness of the line doesn't necessarily indicate wire gauge, but it might be used to distinguish between different types of wires (e.g., power, ground, signal).
- Dashed Lines: Often represent connections within a component or a shielded wire.
- Circles: Can represent various components, such as bulbs, switches, or connectors. The symbol inside the circle will further define the component.
- Squares/Rectangles: Typically represent larger components like the BCM or a fuse box.
- Ground Symbol (often three horizontal lines decreasing in size): Indicates a connection to the vehicle's chassis ground.
- Battery Symbol: Represents the vehicle's battery, the source of power.
- Switch Symbol (a line bridging a gap): Indicates a switch. Different switch types (e.g., SPST, SPDT, DPST, DPDT) will have different symbols. The door jamb switch is generally represented as a normally-closed (NC) switch.
- Fuse Symbol (a wavy line): Represents a fuse.
- Color Codes: Wires are often color-coded to help identify them. Common codes include:
- BK: Black (Ground)
- RD: Red (Power)
- WH: White
- BL: Blue
- GN: Green
- YL: Yellow
- OR: Orange
The diagram will also likely have text labels indicating the function of each wire and component. Pay close attention to these labels – they are crucial for understanding the circuit.
How It Works
The basic operation of a dome light circuit is relatively straightforward. Here's a simplified explanation:
- Power Source: The circuit receives power from the vehicle's battery, typically through a fuse to protect against overcurrent.
- Ground Connection: The dome light fixture needs a good connection to the vehicle's chassis ground to complete the circuit.
- Door Jamb Switch Activation: When a door is opened, the door jamb switch opens, completing the circuit and allowing current to flow to the dome light bulb.
- Manual Switch Activation: Many dome lights also have a manual switch that allows you to turn the light on or off regardless of the door position. This switch typically bypasses the door jamb switches. Some switches also have a "door" setting, which enables the automatic door-activated function.
- BCM Control (in newer vehicles): In vehicles with a BCM, the door jamb switches send a signal to the BCM, which then controls the dome light. This allows for features like delayed shutoff (the light stays on for a few seconds after the door is closed) and automatic activation when the key is removed from the ignition. The BCM can also monitor the current draw and shut off the dome light if it detects a fault.
Real-World Use – Basic Troubleshooting Tips
Here are some common dome light problems and basic troubleshooting steps:
- Dome light doesn't turn on at all:
- Check the fuse. This is the first and easiest step.
- Check the bulb. Make sure it's not burned out.
- Check the ground connection. Ensure the dome light fixture has a good connection to the vehicle's chassis ground.
- Test the power supply to the dome light fixture using a multimeter.
- If it's BCM controlled, you'll need a scan tool to read diagnostic codes.
- Dome light only works when one specific door is opened:
- Suspect the door jamb switch for the other doors. Test them with a multimeter.
- Check the wiring to the door jamb switch.
- Dome light stays on all the time:
- Check the door jamb switches. One may be stuck in the open position.
- The manual switch might be in the "on" position.
- In rare cases, a faulty BCM could be the culprit.
- Dome light is dim:
- Check the battery voltage. Low voltage can cause dim lighting.
- Check the ground connection. A poor ground can restrict current flow.
- The bulb might be old or nearing the end of its lifespan.
Safety – Highlight Risky Components
Working on automotive electrical systems always carries some risk. Here are some key safety precautions to keep in mind:
- Disconnect the Negative Battery Terminal: Always disconnect the negative battery terminal before working on any electrical system. This prevents accidental shorts and potential electrical shocks.
- Work in a Well-Lit Area: Good visibility is crucial for safety and accuracy.
- Use Insulated Tools: Use tools with insulated handles to protect yourself from electrical shock.
- Be Careful with Wiring: Wires can be brittle and prone to damage. Handle them with care and avoid pulling or straining them.
- Fuses are Important: Never bypass a fuse. If a fuse keeps blowing, there's a problem in the circuit that needs to be addressed. Replacing it with a higher amperage fuse is extremely dangerous.
- BCM Risks: If you are working on a vehicle with a BCM, be extremely careful. Incorrect wiring or modifications can damage the BCM, which can be very expensive to replace. Always consult the wiring diagram and follow instructions carefully. Consider having a professional handle BCM-related work.
Understanding your car's dome light system, while seemingly simple, can be surprisingly useful for diagnosing electrical issues and performing basic repairs or upgrades. Remember to always prioritize safety and consult the wiring diagram for your specific vehicle. Speaking of which...
As promised, we have a detailed wiring diagram that covers many common dome light configurations. It's available for download [Link to Diagram Here - Replace with Actual Link]. This diagram will provide even more specific information for your troubleshooting and modification projects. Happy wrenching!