What Can Cause An Oil Leak In Car
Alright, let's dive into the nitty-gritty of oil leaks in your car. As an experienced DIYer, you know that a little preventative maintenance can save you a ton of headache (and money) down the road. Understanding where oil leaks come from, and more importantly, how to diagnose them, is crucial. This guide aims to provide you with that knowledge. We'll cover common culprits, troubleshooting techniques, and safety precautions you need to be aware of.
Why Understanding Oil Leaks Matters
The purpose of understanding oil leaks goes beyond just fixing a problem. It’s about preventative maintenance, increasing your vehicle's lifespan, and, frankly, saving your engine from catastrophic failure. Low oil levels due to a leak can cause severe engine damage, leading to expensive repairs or even a complete engine replacement. Being able to diagnose and address oil leaks early will ensure your engine stays properly lubricated and runs efficiently.
Key Specs and Main Parts Involved in Oil Leaks
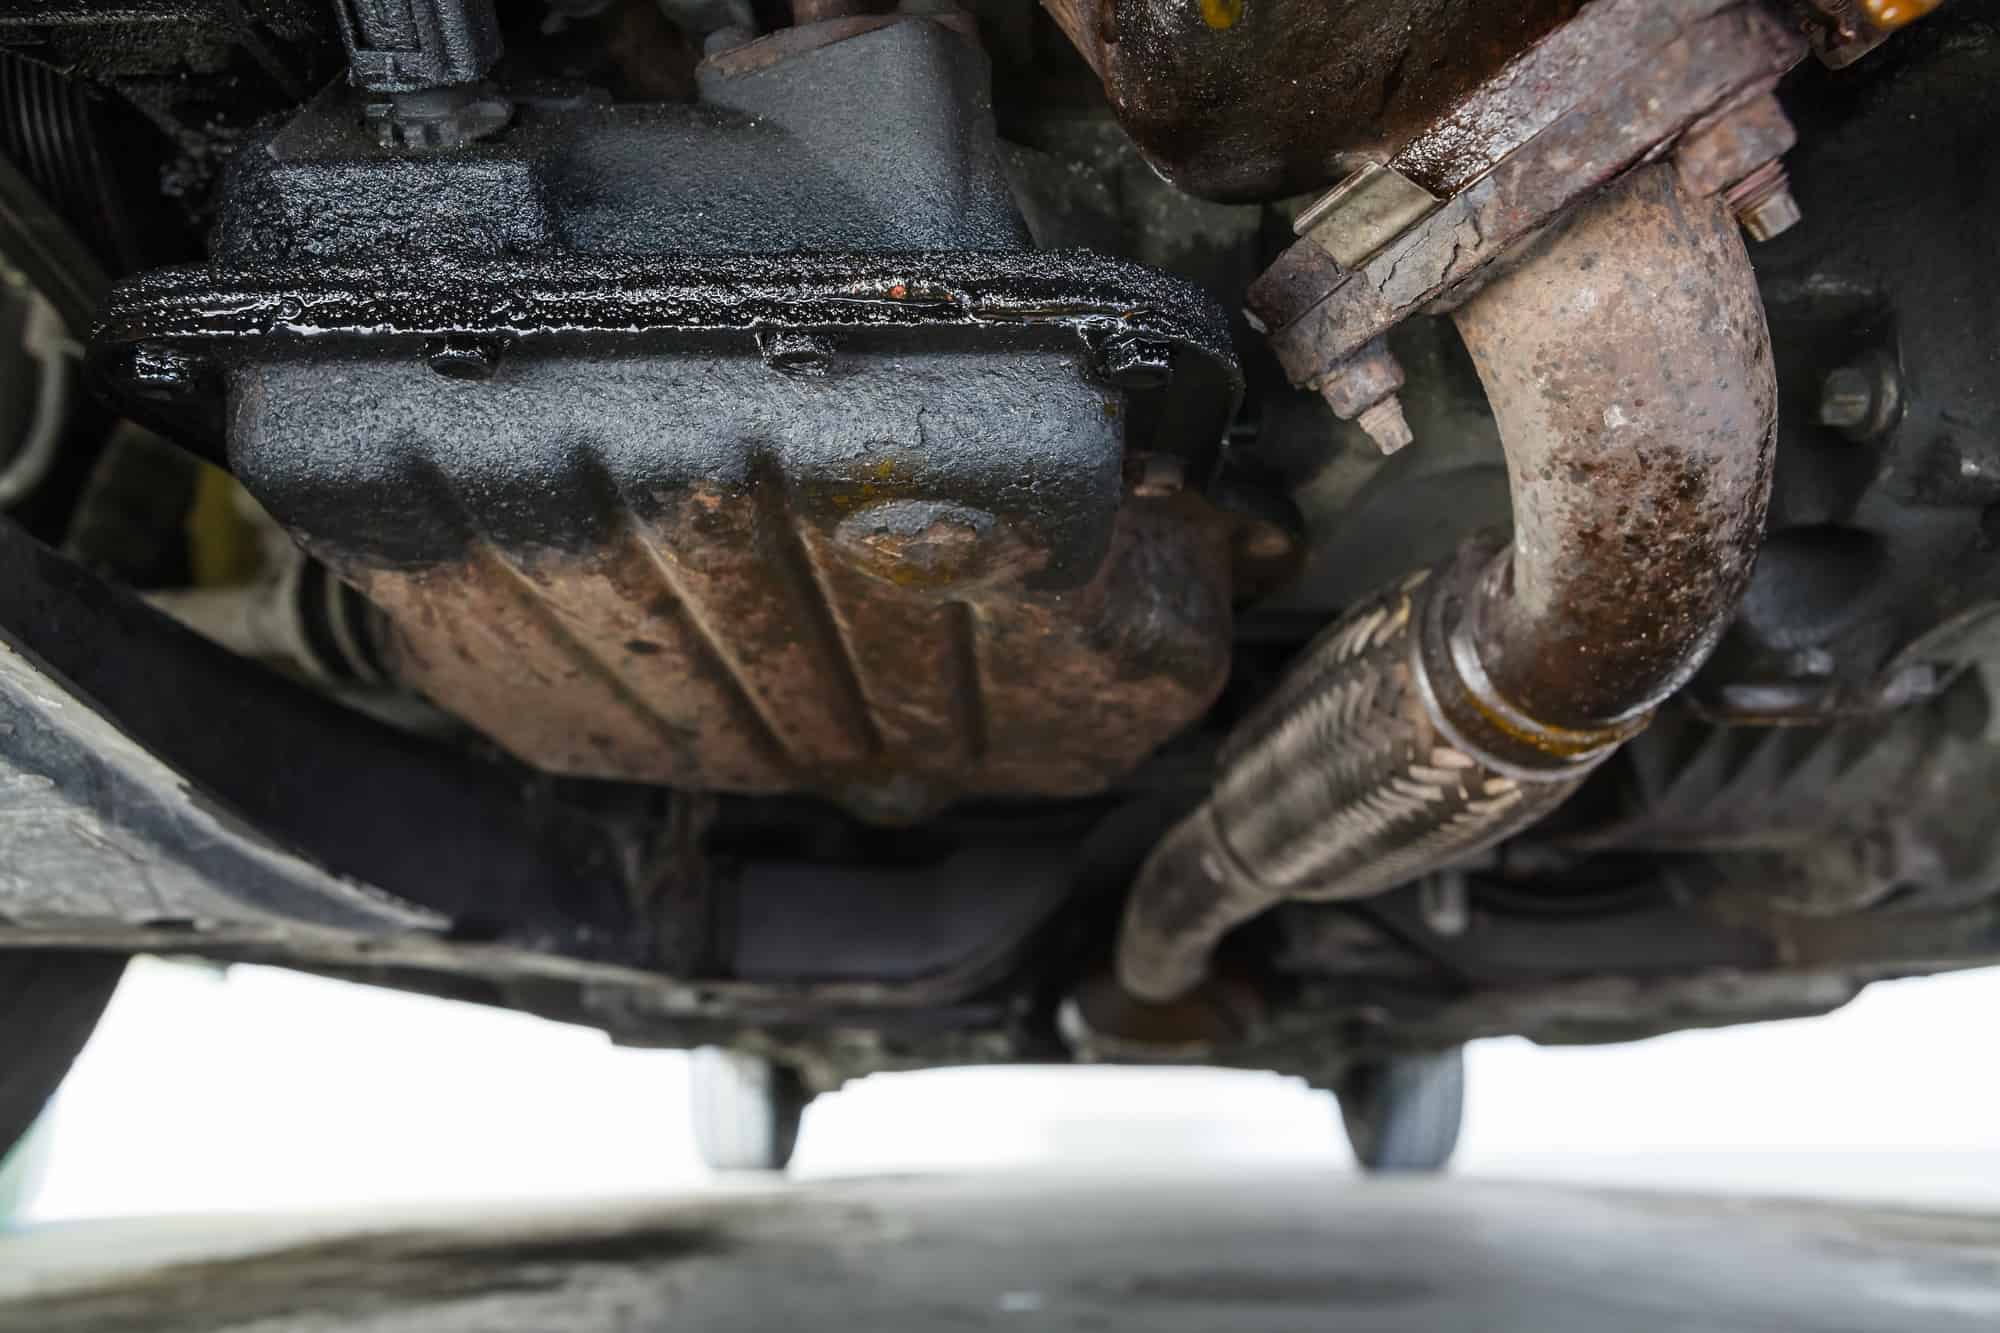
The engine's lubrication system is a complex network. To effectively diagnose leaks, you need to understand the main components:
- Oil Pan: The reservoir at the bottom of the engine that holds the oil. It's sealed to the engine block with a gasket.
- Oil Pump: Driven by the engine, it circulates oil throughout the engine under pressure.
- Oil Filter: Removes contaminants from the oil. Usually a spin-on type.
- Oil Pressure Sensor/Switch: Monitors oil pressure and sends a signal to the dashboard gauge or warning light.
- Valve Cover(s): Covers the top of the cylinder head(s) and are sealed with gaskets.
- Timing Cover: Covers the timing chain or belt and is sealed to the engine block.
- Crankshaft Seals (Front & Rear Main Seals): Seals around the crankshaft where it exits the engine block. The rear main seal is notorious for leaking.
- Camshaft Seals: Seals around the camshaft(s).
- Oil Cooler (if equipped): Helps cool the oil in high-performance or heavy-duty applications.
- Oil Lines/Hoses (if equipped): Connect the oil cooler to the engine.
Understanding the Oil Leak Diagram (Conceptual)
Imagine an image depicting the entire engine block with arrows pointing to common leak locations. Think of it as a roadmap of potential oil leak hotspots.
Symbols and Annotations (Hypothetical)
In a hypothetical diagram, you might see the following conventions:
- Solid Lines: Represent oil lines or seals.
- Dashed Lines: Indicate potential leak paths or areas of weakness.
- Red Color: Highlights areas that are prone to high temperatures or pressures, making them more susceptible to leaks.
- Icons: Small icons might represent specific components like the oil filter or oil pressure sensor.
- Arrows: Indicate the direction of oil flow.
- Callouts: Text boxes provide detailed information about specific components and potential leak causes.
- Numerical Values: Could show recommended torque specifications for bolts during repairs.
How an Engine's Lubrication System Works (And How Leaks Occur)
The lubrication system's primary function is to reduce friction between moving engine parts. The oil pump draws oil from the oil pan and forces it through the oil filter. Filtered oil then travels through galleries within the engine block and cylinder head(s), lubricating critical components like the crankshaft bearings, connecting rod bearings, camshaft bearings, pistons, and valve train. Oil is returned to the oil pan by gravity.
Leaks happen when this closed system is compromised. Common causes include:
- Gasket Deterioration: Over time, gaskets can become brittle, cracked, or deformed due to heat, age, and exposure to chemicals.
- Seal Failure: Seals, especially rubber seals, can harden and shrink, losing their ability to effectively seal.
- Loose Connections: Fittings and connections on oil lines, oil filters, or oil pressure sensors can loosen, allowing oil to seep out.
- Damage to Components: Cracks or damage to the oil pan, valve covers, or other components can create leak paths.
- Over-Tightening: Over-tightening bolts can crush gaskets and seals, leading to leaks. This is especially true for aluminum components.
- High Oil Pressure: A malfunctioning oil pressure regulator can cause excessive oil pressure, stressing seals and gaskets.
- Crankcase Over-Pressure: A clogged PCV (Positive Crankcase Ventilation) valve can cause pressure to build up inside the crankcase, forcing oil past seals.
Real-World Troubleshooting for Oil Leaks
Okay, you've spotted an oil leak. Now what? Here's a basic troubleshooting approach:
- Clean the Engine: Use a degreaser to thoroughly clean the engine. This will make it easier to pinpoint the source of the leak.
- Visual Inspection: Look for wet spots or oil residue around common leak areas: valve covers, oil pan, oil filter, front and rear main seals, timing cover, etc. Use a flashlight to get a better view.
- Check Oil Level: Monitor the oil level regularly to assess the severity of the leak.
- Inspect the Oil Filter: Make sure the oil filter is properly tightened and that the gasket is in good condition. A double gasket is a common DIY mistake that almost always leaks.
- Look for Obvious Damage: Check for cracks or damage to the oil pan, valve covers, or other components.
- Pressure Test (Advanced): A more advanced technique involves using a pressure tester to pressurize the oil system (when the engine is off) to help identify leaks. This requires specialized equipment and should be performed by someone experienced.
- UV Dye Test (Advanced): Add UV dye to the oil and use a UV light to pinpoint the leak's source.
Remember that oil leaks can sometimes be tricky to diagnose. Oil can travel a long distance before dripping, so the source of the leak may not be directly above the puddle. Pay close attention to where the oil is first appearing on the engine.
Safety First! Dealing with Risky Components
Working on your car always involves risks. Here are some specific safety considerations when dealing with oil leaks:
- Hot Exhaust: Avoid touching the exhaust system, especially the exhaust manifold, which can be extremely hot and cause severe burns. Allow the engine to cool down completely before working on it.
- Electrical Components: Disconnect the battery before working on any electrical components, such as the oil pressure sensor.
- Flammable Materials: Oil is flammable. Keep open flames and sparks away from the engine compartment. Clean up any spilled oil immediately.
- Jack Stands: Never work under a vehicle supported only by a jack. Use jack stands to provide secure support.
- Eye Protection: Wear safety glasses to protect your eyes from debris and chemicals.
- Gloves: Wear nitrile gloves to protect your skin from oil and chemicals.
Rear Main Seal: This is often considered the most risky seal to replace because it requires removing the transmission. Incorrect installation can lead to rapid failure and further engine damage.
High-Pressure Oil Lines: On some vehicles, especially diesels, the oil system operates at very high pressures. Be extremely careful when working on these systems, and always relieve the pressure before disconnecting any lines.
Remember to always consult your vehicle's repair manual for specific instructions and torque specifications.
Armed with this information, you're now better equipped to diagnose and address oil leaks in your car. Remember to take your time, be thorough, and prioritize safety. Good luck!
We have a detailed diagram of common oil leak locations available for download. This visual aid can be extremely helpful in pinpointing the source of your leak. Contact us to request the diagram file.