What Comes With An Oil Change
So, you're gearing up for an oil change. Good on you! Regular oil changes are the lifeblood of any engine. But an oil change isn't just about swapping out the old oil for the new. It's a process involving several key components and checks that, when done properly, can significantly extend your engine's lifespan and performance. Let's dive into what *really* comes with an oil change – beyond just the oil itself.
Purpose of Understanding the Oil Change Process
Understanding the anatomy of an oil change and its related components is crucial for a few reasons. Firstly, it empowers you to perform the service yourself, saving money and gaining valuable hands-on experience. Secondly, it allows you to diagnose potential problems that might be lurking beneath the surface. A keen ear and a knowledgeable eye can often catch early signs of engine wear or other issues during the oil change process. Finally, it equips you to make informed decisions about the type of oil and filter you use, optimizing your engine's performance and longevity. This knowledge is particularly valuable if you're a modder or someone who pushes their vehicle to its limits.
Key Specs and Main Parts
At its core, an oil change revolves around these main components:
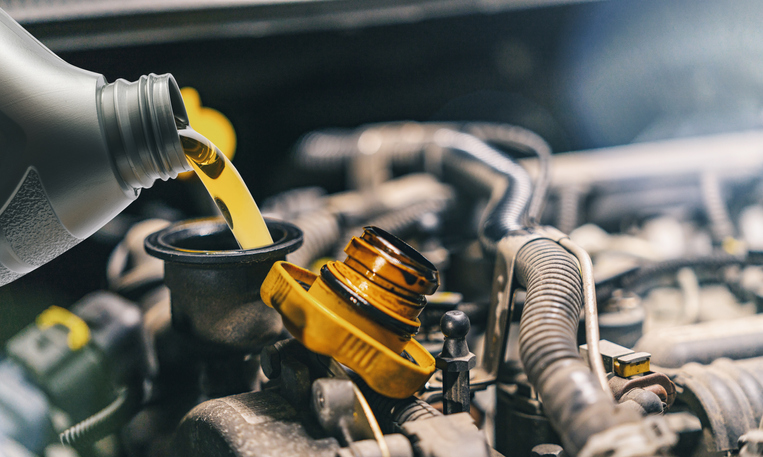
1. Engine Oil
The lifeblood of your engine! Modern engine oils are highly engineered fluids designed to lubricate moving parts, reduce friction, dissipate heat, and carry away contaminants. Specs to consider include:
- Viscosity: This is the oil's resistance to flow, typically expressed as a "weight" like 5W-30 or 10W-40. The "W" stands for Winter, and the numbers indicate the oil's viscosity at cold and hot temperatures, respectively. Consult your owner's manual for the recommended viscosity for your vehicle.
- API Rating: The American Petroleum Institute (API) sets standards for oil quality. Look for ratings like SN Plus or SP, indicating the oil's ability to protect against wear, deposits, and other issues. Newer ratings generally offer better protection.
- Synthetic vs. Conventional: Synthetic oils are chemically synthesized, offering superior performance in terms of high-temperature stability, wear protection, and extended drain intervals. Conventional oils are refined from crude oil and are generally less expensive. A blend is the best of both worlds but not the best option, it combines Synthetic and Conventional oils.
2. Oil Filter
The oil filter is the kidney of your engine. It removes contaminants – dirt, metal particles, and other debris – from the oil, preventing them from circulating through the engine and causing wear. Key specs include:
- Micron Rating: This indicates the size of particles the filter can capture. Lower micron ratings mean finer filtration.
- Filter Media: Different filters use different materials (e.g., paper, synthetic fibers) to trap contaminants. Synthetic media generally offer better filtration and longer service life.
- Bypass Valve: A critical component that allows oil to bypass the filter if it becomes clogged, preventing oil starvation to the engine.
3. Drain Plug
The drain plug is the access point for removing the old oil from the oil pan. It usually has a crush washer to create a tight seal and prevent leaks. Always replace the crush washer with a new one during each oil change.
4. Crush Washer
The crush washer is the seal for the drain plug. It's a small, often copper or aluminum, ring that deforms slightly when the drain plug is tightened, creating a leak-proof seal. Reusing an old crush washer can lead to leaks and potential engine damage.
5. Oil Pan
The oil pan is the reservoir that holds the engine oil. It's typically located at the bottom of the engine. Baffles inside the pan help prevent oil sloshing and ensure a consistent oil supply to the oil pump.
How It Works
The oil change process is relatively straightforward:
- Warm-up the Engine: Running the engine for a few minutes warms the oil, making it flow more easily and allowing contaminants to suspend within it.
- Locate and Remove the Drain Plug: Position a drain pan under the oil pan, then carefully remove the drain plug using the appropriate wrench. Be prepared for a gush of oil!
- Remove the Oil Filter: Using an oil filter wrench, loosen and remove the old oil filter. Be careful, as the filter will contain oil.
- Prepare the New Oil Filter: Lightly lubricate the rubber gasket on the new oil filter with fresh oil. This helps create a good seal.
- Install the New Oil Filter: Screw the new oil filter onto the engine by hand until the gasket makes contact, then tighten it an additional ¾ to 1 full turn, as indicated on the filter.
- Install the Drain Plug: Install a new crush washer onto the drain plug, then screw the plug back into the oil pan and tighten it to the specified torque (refer to your vehicle's service manual). Over-tightening can damage the threads.
- Fill with New Oil: Remove the oil filler cap and pour in the correct amount of new oil, as specified in your owner's manual. Use a funnel to avoid spills.
- Check the Oil Level: After filling, check the oil level using the dipstick. Add more oil as needed to reach the "full" mark.
- Start the Engine: Start the engine and let it run for a few minutes, checking for any leaks around the drain plug and oil filter.
- Re-Check the Oil Level: After the engine has run for a few minutes, turn it off and let it sit for a few minutes to allow the oil to drain back into the oil pan. Then, re-check the oil level and add more if necessary.
Real-World Use – Basic Troubleshooting Tips
Even with careful execution, problems can sometimes arise during an oil change. Here are a few common troubleshooting tips:
- Drain Plug Stripped: If you strip the threads on the oil pan or drain plug, you may need to re-tap the threads or replace the oil pan. A temporary fix might involve using an oversized drain plug.
- Oil Filter Leaks: Ensure the oil filter gasket is properly seated and tightened. If the leak persists, the filter may be defective.
- Low Oil Pressure After Change: This could indicate a clogged oil filter, an incorrect oil filter, or a more serious engine problem. Consult a mechanic immediately.
- Oil Level Too High: Overfilling the oil can cause foaming and reduced lubrication. Drain the excess oil until the level is correct.
Safety – Highlight Risky Components
Several aspects of an oil change require caution:
- Hot Oil: Engine oil can be extremely hot, especially immediately after running the engine. Allow the engine to cool down slightly before draining the oil to avoid burns.
- Used Oil Disposal: Used engine oil is a hazardous waste. Dispose of it properly at a designated recycling center or auto parts store. Never pour it down the drain or onto the ground.
- Jack Stands: If you need to lift your vehicle to access the drain plug or oil filter, always use jack stands to support the vehicle. Never work under a vehicle supported only by a jack.
- Tools: Using the incorrect tool or a worn-out tool can lead to damaged components or injuries. Always use the correct wrench size and ensure your tools are in good condition.
By understanding the components and processes involved in an oil change, you can confidently perform this essential maintenance task and keep your engine running smoothly for years to come. Remember to consult your vehicle's owner's manual for specific recommendations and torque specifications.
We've got a detailed diagram breaking down the entire oil change system available for you. This visual aid will further clarify the relationships between the various components and help you troubleshoot any issues you might encounter. You can download it by clicking [link to download - placeholder]. Happy wrenching!