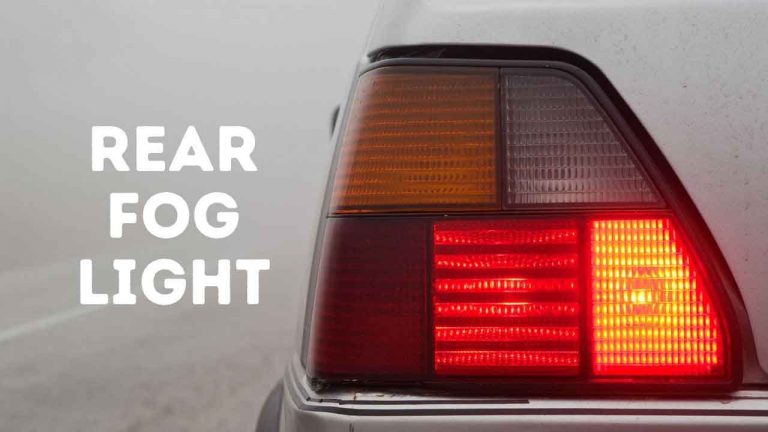
What Do Fog Lights Look Like
Let's talk fog lights. You see them on cars all the time, but do you really *know* what they look like, inside and out? More importantly, could you troubleshoot them or even install a set yourself? This article will break down the anatomy of fog lights, from their purpose to common issues, focusing on understanding their technical specifications. We're talking about understanding the systems diagrammatically – crucial for repairs, upgrades, or even just impressing your buddies with your automotive knowledge.
Key Specs and Main Parts of a Fog Light System
A fog light system, while seemingly simple, consists of several key components working in harmony. Understanding each piece is the first step to mastering the whole system.
The Fog Light Housing and Lens
The housing is the physical enclosure that protects the light source and reflectors. It's typically made of durable plastic or metal, designed to withstand road debris and weather. The lens, often made of polycarbonate or glass, is shaped and designed to focus the light emitted by the bulb. Its color—usually white or amber—plays a vital role in light penetration during foggy conditions.
Key Specs:
- Material: Consider impact resistance (polycarbonate vs. glass) and corrosion resistance (type of plastic or metal used).
- Dimensions: Matching the fog light's size to your vehicle's mounting points is crucial.
- Lens Color: Affects light wavelength and penetration through fog.
- IP Rating: Indicates the level of protection against dust and water ingress (e.g., IP67, IP68). Higher numbers mean better protection.
The Light Source: Bulbs and LEDs
The heart of the fog light is the light source itself. Historically, halogen bulbs were common, but LEDs are increasingly prevalent due to their energy efficiency, longevity, and brighter output.
Key Specs:
- Bulb Type/LED Type: H3, H11, LED arrays, etc. Understanding the specific type is essential for replacement.
- Wattage: Determines the power consumption and light output. Higher wattage generally means brighter light, but also higher heat.
- Lumen Output: A measure of the total amount of light emitted.
- Color Temperature (Kelvin): Describes the "warmth" or "coolness" of the light. Lower Kelvin values (e.g., 3000K) are warmer and yellower, which are often preferred for fog lights.
- Operating Voltage: Usually 12V for automotive applications.
The Reflector
The reflector, typically located behind the bulb, is a crucial element in directing the light output. It's designed to capture and redirect the light emitted by the bulb, shaping the beam pattern for optimal visibility. Quality reflectors are often parabolic or ellipsoidal in shape. Over time they can degrade causing diminished fog light performance.
Wiring Harness, Relay, and Switch
The wiring harness connects the fog lights to the vehicle's electrical system. A relay acts as an intermediary switch, allowing a low-current switch inside the cabin to control the high-current circuit powering the fog lights. This prevents excessive load on the dashboard switch and protects the electrical system.
Key Specs:
- Wire Gauge: Indicates the thickness of the wires. Thicker wires can handle higher currents.
- Relay Amperage Rating: Must be sufficient to handle the current draw of the fog lights.
- Switch Type: Momentary or latching, depending on the desired functionality.
Symbols and Diagram Interpretation
Electrical diagrams use standardized symbols to represent components. Here's a breakdown of common symbols you'll encounter when looking at a fog light wiring diagram:
- Straight Lines: Represent wires. Thicker lines often indicate wires that carry higher current.
- Circles with an 'X' inside: Typically represent light bulbs.
- Rectangles: Can represent various components, including relays and switches. Look for labels within the rectangle to identify the specific component.
- Zigzag Lines: Usually represent resistors.
- Ground Symbol (usually three horizontal lines decreasing in size): Indicates a connection to the vehicle's chassis ground.
Colors: Wire colors are also standardized. For example:
- Red: Usually indicates a positive (+) power wire.
- Black: Usually indicates a ground (-) wire.
- Other colors (blue, yellow, green, etc.) are used for various signal and control wires.
By learning these symbols, you can trace the flow of electricity through the fog light circuit, understand how each component interacts, and identify potential points of failure.
How It Works: The Fog Light Circuit
The fog light circuit is relatively straightforward. When you activate the fog light switch, it energizes the relay coil. This closes the relay contacts, allowing current to flow from the battery, through a fuse (for protection), through the relay contacts, to the fog lights, and finally to ground. The fuse is a crucial safety component – it's a thin wire that melts and breaks the circuit if too much current flows, preventing damage to other components and potentially a fire. Understanding this basic flow is crucial for troubleshooting.
Real-World Use: Basic Troubleshooting Tips
Here are some common fog light problems and how to diagnose them:
- Fog lights don't turn on at all: Check the fuse first! Then, check the relay. You can often swap the fog light relay with another relay of the same type to see if the relay is the problem. Use a multimeter to check for voltage at the fog light connector. If there's no voltage, trace the wiring back to the relay and switch, looking for breaks or loose connections.
- One fog light works, the other doesn't: This usually indicates a problem with the bulb, the wiring to that specific fog light, or the fog light itself. Swap bulbs to see if the problem follows the bulb. If not, check the wiring and ground connection to that fog light.
- Fog lights are dim: This could be due to a corroded ground connection, a weak bulb, or low voltage at the battery. Clean the ground connection and check the battery voltage with a multimeter.
Important Note: Always disconnect the battery's negative terminal before working on electrical components to prevent shorts and electrical shock.
Safety: Risky Components
The automotive electrical system, while generally safe, can be dangerous if not handled properly. The battery is capable of delivering high currents, which can cause severe burns or even death. Always disconnect the negative terminal before working on any electrical component.
Capacitors, sometimes found in aftermarket lighting systems, can store electrical charge even after the power is disconnected. Handle them with care and discharge them properly before touching them.
Working with high-intensity discharge (HID) or LED lighting systems requires extra caution. These systems often operate at high voltages, and improper handling can be dangerous.
Never work on electrical systems while standing in water or on a wet surface.
Conclusion
Understanding the anatomy and operation of fog lights empowers you to diagnose problems, perform basic repairs, and even upgrade your vehicle's lighting system. By familiarizing yourself with the components, wiring diagrams, and safety precautions, you can confidently tackle fog light projects. Furthermore, knowledge of specifications such as Kelvin temperatures, lumen output, and IP ratings allows for more informed purchase decisions.
To further assist you, we have a detailed fog light wiring diagram available for download. This diagram provides a visual representation of the entire system, including component locations and wire colors, aiding in troubleshooting and repairs. Feel free to reach out if you have further questions.