What Do You Need To Change Oil
Alright, let's talk oil changes. As an experienced DIYer, you already know the importance of regular oil changes for maintaining your engine's health and longevity. This article will delve into the specifics of what you need to perform a successful oil change, focusing on understanding the tools, components, and procedures involved. We'll break down everything in a clear, concise manner, like I would if you were standing next to me in the shop.
Purpose - Mastering the Art of the Oil Change
Why should you care about mastering the oil change? Beyond the obvious (keeping your engine running smoothly), understanding the process empowers you to diagnose potential problems, customize your oil selection for optimal performance, and save a significant amount of money on maintenance. Furthermore, it's a foundational skill for more complex automotive repairs. A thorough understanding of this fundamental procedure will not only save you money but also teach you valuable troubleshooting skills.
Key Specs and Main Parts
An oil change isn't just about draining and refilling. It involves several critical components, each with its own specifications. Let's break them down:
- Oil Filter: This component removes contaminants from your engine oil. Different engines require different filter sizes and thread types. The filter's micron rating indicates the size of particles it can capture. A lower micron rating means finer filtration. Always consult your vehicle's manual for the correct filter specification. You'll also want to note the filter's torque specification when installing, usually printed on the filter itself.
- Engine Oil: The lifeblood of your engine. Choosing the right viscosity (e.g., 5W-30, 10W-40) is crucial. The 'W' stands for 'winter' and indicates the oil's cold-weather performance. The second number represents the oil's viscosity at operating temperature. Using the wrong viscosity can negatively impact engine performance and even cause damage. Synthetic oils offer superior protection and longevity compared to conventional oils but are generally more expensive. Consult your owner's manual for the manufacturer's recommended oil type and viscosity.
- Drain Plug: This is the bolt that seals the oil pan. It usually has a crush washer that needs to be replaced with each oil change to ensure a proper seal. Torque specifications are essential here. Over-tightening can strip the threads in the oil pan, leading to costly repairs. Under-tightening can cause leaks. Always use a torque wrench and consult your vehicle's service manual for the correct torque value.
- Crush Washer/Seal: As mentioned above, this little ring is vital. It deforms slightly when the drain plug is tightened, creating a tight seal. Using the same crush washer repeatedly can lead to leaks.
- Oil Pan: The reservoir that holds the engine oil. Inspect it for dents or damage that could compromise its integrity.
- Oil Filler Cap: This is where you add new oil after draining the old oil and replacing the filter. Make sure it's properly sealed after refilling.
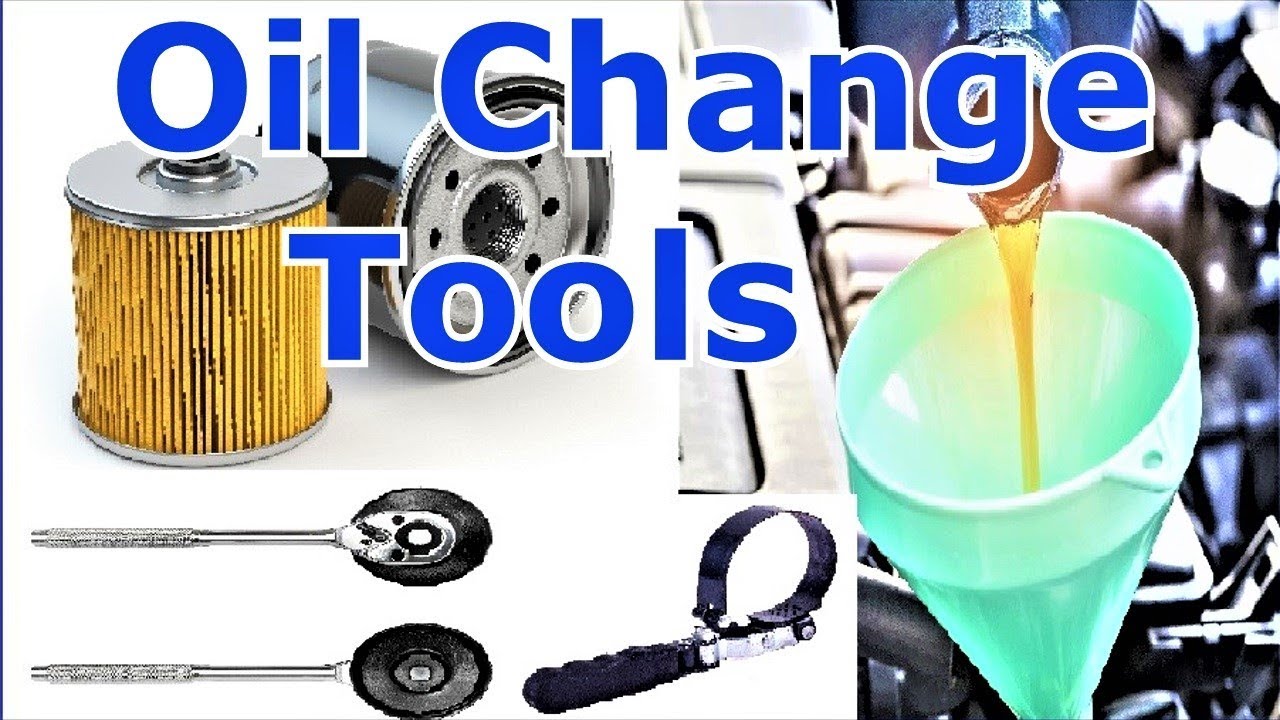
Essential Tools:
- Wrench or Socket Set: For removing the drain plug and oil filter cap (if applicable).
- Oil Filter Wrench: For removing and installing the oil filter. Various types exist (cap-type, strap-type, etc.). Choose the one that best fits your filter and access.
- Torque Wrench: Absolutely crucial for tightening the drain plug and oil filter to the correct specifications.
- Drain Pan: A container to collect the used oil.
- Funnel: For cleanly pouring new oil into the engine.
- Rags or Shop Towels: For wiping up spills.
- Gloves: To protect your hands.
- Jack and Jack Stands (if needed): To safely raise the vehicle for access to the drain plug and oil filter. Safety is paramount here. Never work under a vehicle supported only by a jack.
How It Works
The oil change process is straightforward, but attention to detail is key:
- Prepare the Vehicle: Warm up the engine slightly (a few minutes is enough). Warm oil flows more easily. Secure the vehicle on level ground. If necessary, use a jack and jack stands to safely raise the vehicle. Again, safety first!
- Locate and Remove the Drain Plug: Position the drain pan under the drain plug. Use the correct size wrench or socket to loosen and remove the drain plug. Be careful, the oil will be hot! Allow the oil to drain completely.
- Replace the Crush Washer: Once the oil has drained, inspect the drain plug and replace the crush washer with a new one.
- Reinstall the Drain Plug: Tighten the drain plug to the manufacturer's specified torque using a torque wrench.
- Remove and Replace the Oil Filter: Locate the oil filter and use an oil filter wrench to loosen and remove it. Before installing the new filter, lightly lubricate the rubber gasket with fresh oil. This helps ensure a good seal.
- Install the New Oil Filter: Screw on the new oil filter by hand until the gasket makes contact with the engine. Then, tighten it according to the instructions printed on the filter (usually a specific fraction of a turn). Again, use a torque wrench if a torque specification is provided.
- Add New Oil: Remove the oil filler cap and use a funnel to pour in the correct amount of new oil, as specified in your vehicle's owner's manual.
- Check the Oil Level: Use the dipstick to check the oil level. Add more oil if necessary, until the level is between the minimum and maximum marks.
- Start the Engine: Start the engine and let it run for a few minutes. Check for leaks around the drain plug and oil filter.
- Recheck the Oil Level: After the engine has run for a few minutes, turn it off and let it sit for a few minutes. Then, recheck the oil level using the dipstick. Add more oil if necessary.
- Dispose of Used Oil Properly: Take the used oil to a recycling center or auto parts store for proper disposal.
Real-World Use – Basic Troubleshooting Tips
Even with careful preparation, problems can arise. Here are a few common scenarios:
- Stripped Drain Plug Threads: This is a nightmare scenario. If the threads are only slightly damaged, you might be able to use a slightly larger drain plug or a self-tapping drain plug. If the damage is severe, you may need to replace the oil pan. Prevention is key: always use a torque wrench!
- Leaking Drain Plug or Oil Filter: Double-check that the drain plug and oil filter are tightened to the correct torque. Ensure that the crush washer is new and properly seated. If the leak persists, inspect the oil filter gasket for damage.
- Difficulty Removing the Oil Filter: Use a penetrating oil to loosen the filter. If that doesn't work, you may need to use a specialized oil filter wrench that can grip the filter more securely. As a last resort, you can puncture the filter with a screwdriver and use it as a lever, but be extremely careful not to damage the engine.
- Incorrect Oil Level Reading: Ensure the vehicle is on a level surface. Wait a few minutes after shutting off the engine before checking the oil level.
Safety – Highlight Risky Components
Oil changes are generally safe, but these are crucial safety considerations:
- Hot Oil: Be extremely careful when draining the oil, as it can be very hot and cause burns. Wear gloves and avoid direct contact.
- Lifting the Vehicle: Never work under a vehicle supported only by a jack. Always use jack stands. Ensure the jack stands are properly positioned on a solid, level surface.
- Used Oil Disposal: Used oil is a hazardous material. Do not pour it down the drain or into the environment. Dispose of it properly at a recycling center or auto parts store.
In conclusion, performing your own oil changes is a rewarding and cost-effective way to maintain your vehicle. By understanding the components involved, following the correct procedures, and prioritizing safety, you can confidently tackle this essential maintenance task. Remember to always consult your vehicle's service manual for specific instructions and torque specifications.
We have a detailed diagram of a typical engine lubrication system available for download. This visual aid can further enhance your understanding of the oil flow and the function of each component. Let me know if you want to review it!