What Does A Radiator Cap Do
Hey gearheads! Let's dive deep into something seemingly simple, but crucial for your engine's health: the radiator cap. It's more than just a piece of metal on top of your radiator; it's a precisely engineered component that plays a vital role in your cooling system's performance. We're going to explore its purpose, construction, operation, troubleshooting, and safety aspects. Knowing this stuff will definitely help you diagnose cooling problems, potentially save money on repairs, and gain a better understanding of your car's inner workings. And remember, we've got a detailed diagram available for download at the end of this article – it’s a great visual aid to complement what we're covering here.
Key Specs and Main Parts
At first glance, a radiator cap looks pretty basic, but it's a small marvel of engineering. Let's break down the essential components and specifications:
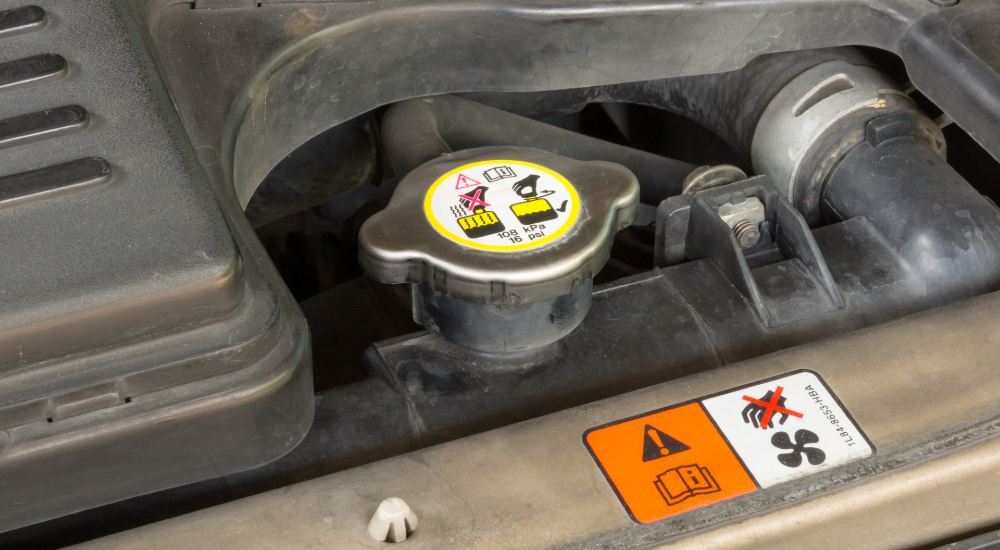
- Pressure Rating: This is arguably the most critical spec. It's usually stamped right on the cap (e.g., "16 PSI"). This indicates the maximum pressure the cap can hold before releasing coolant. Using the wrong pressure rating can lead to serious problems, either causing hoses to burst from excessive pressure or allowing the coolant to boil prematurely.
- Materials: Radiator caps are typically made from stamped steel or molded plastic (for non-pressure areas) with rubber or silicone seals. The spring is typically made of spring steel. The quality of these materials directly impacts the cap's lifespan and ability to maintain a proper seal.
- Spring: A crucial component that maintains the system pressure. The spring is calibrated to open at the specified pressure rating, allowing excess pressure to vent.
- Seals (Main Seal and Vacuum Seal): The main seal prevents coolant from leaking out under pressure. The vacuum seal (smaller seal) allows coolant to be drawn back into the radiator as the engine cools and creates a vacuum. These seals are usually made of rubber or silicone, and their condition is paramount for proper operation.
- Valve Seat: The surface against which the main seal presses to maintain pressure. Corrosion or damage here can lead to leaks.
- Overflow Tube Connection: A port that connects to the overflow reservoir (also called a coolant recovery tank). This allows excess coolant to flow out of the radiator when the pressure exceeds the cap's rating, and for coolant to be drawn back in during cooldown.
Think of it like this: the pressure rating is the critical value, the spring provides the force, and the seals keep everything contained. A failure in any of these areas affects the entire cooling system.
How It Works
The radiator cap's function is based on fundamental principles of thermodynamics and fluid dynamics. Let's break it down step-by-step:
- Pressure Regulation: As the engine warms up, the coolant temperature rises. The increased temperature causes the coolant to expand. Because the cooling system is closed (sealed by the radiator cap), this expansion creates pressure. The radiator cap is designed to maintain this pressure at a specific level (e.g., 16 PSI).
- Boiling Point Elevation: Increasing the pressure of a liquid raises its boiling point. This is crucial in the cooling system because it prevents the coolant from boiling at normal operating temperatures. For every pound of pressure increase, the boiling point of water rises by approximately 3°F (1.67°C). So, a 16 PSI cap raises the boiling point of the coolant significantly, preventing it from turning into steam inside the engine. Steam is a poor conductor of heat and could cause overheating.
- Pressure Relief: When the pressure inside the cooling system exceeds the cap's rating, the spring compresses, allowing the main seal to lift off the valve seat. This opens a passage for coolant to flow out through the overflow tube and into the overflow reservoir.
- Vacuum Relief: As the engine cools down, the coolant contracts, creating a vacuum inside the cooling system. If the vacuum becomes too strong, it could collapse radiator hoses. To prevent this, the radiator cap has a smaller vacuum valve. When the vacuum reaches a certain point, this valve opens, allowing coolant to be drawn back from the overflow reservoir into the radiator. This maintains the system's proper coolant level.
In short, the radiator cap pressurizes the system to raise the boiling point, vents excess pressure to the overflow reservoir, and draws coolant back in during cooldown. It's a continuous cycle of pressure management.
Symbols and Interpretation of a Typical Cooling System Diagram
Understanding the symbols in a cooling system diagram is key to effective troubleshooting and repair. While symbols can vary slightly, here are some common conventions:
- Solid Lines: Typically represent coolant hoses or pipes carrying liquid coolant. Thicker lines might indicate larger diameter hoses.
- Dashed Lines: Often used to represent vent lines or overflow tubes, indicating passages for vapor or coolant under lower pressure.
- Radiator Icon: A stylized representation of the radiator itself, usually showing the core and tanks.
- Engine Block Icon: Represents the engine block, often showing coolant passages within the block.
- Water Pump Icon: A symbol indicating the location of the water pump, usually depicted with a rotating impeller symbol.
- Thermostat Housing Icon: Shows the location of the thermostat, which controls coolant flow to the radiator.
- Arrows: Indicate the direction of coolant flow.
- Color Coding: Some diagrams use colors to differentiate between hot and cold coolant lines. For example, red might indicate hot coolant flowing from the engine, while blue might indicate cooler coolant flowing to the engine.
When interpreting a diagram, pay close attention to the arrow directions and the connections between components. This will help you visualize the coolant's path through the system and identify potential points of failure, such as blocked hoses, faulty thermostats, or leaky radiators.
Real-World Use – Basic Troubleshooting
Knowing how the radiator cap works allows you to diagnose common cooling system problems. Here are some troubleshooting tips:
- Coolant Loss: If you consistently need to add coolant, check the radiator cap first. A worn-out seal can leak coolant, especially when the engine is hot and the system is under pressure. Look for coolant stains around the cap.
- Overheating: A faulty radiator cap can prevent the system from reaching its designed pressure, lowering the coolant's boiling point and leading to overheating.
- Collapsed Radiator Hoses: This can happen if the vacuum valve in the cap is stuck closed, preventing coolant from being drawn back into the radiator during cooldown.
- Overflow Reservoir Issues: If the overflow reservoir is constantly overflowing, it could indicate that the cap is releasing pressure too easily, or that the engine is overheating due to other issues.
- Visual Inspection: Regularly inspect the radiator cap for cracks, corrosion, or a damaged seal. Replace it if you see any signs of wear. A simple pressure test using a cooling system pressure tester can confirm proper operation.
Important Note: Never remove the radiator cap when the engine is hot! The system is under pressure, and removing the cap can cause a scalding spray of hot coolant. Wait until the engine has cooled down completely before attempting to remove the cap.
Safety Considerations
The cooling system operates under significant pressure and contains hot coolant, so safety is paramount:
- Hot Coolant: As mentioned above, never remove the radiator cap when the engine is hot. Serious burns can result. Always allow the engine to cool down completely.
- System Pressure: Be aware that even after the engine has cooled down, some residual pressure may remain in the system. Carefully release the pressure by slowly turning the radiator cap to the first stop (if applicable) to vent any remaining pressure before fully removing it.
- Eye Protection: Wear safety glasses when working on the cooling system to protect your eyes from coolant splashes.
- Dispose of Coolant Properly: Coolant is toxic. Do not pour it down drains or onto the ground. Collect it in a sealed container and dispose of it properly at a recycling center or hazardous waste disposal facility.
- Check for Leaks: After working on the cooling system, thoroughly check for leaks. A small leak can quickly lead to coolant loss and overheating.
Remember, taking precautions can prevent injuries and ensure a safe working environment.
Understanding the radiator cap and its function is crucial for maintaining a healthy cooling system. It's a small part with a big job. By following these guidelines and regularly inspecting your cooling system, you can prevent overheating and extend the life of your engine. To help you further, we have a detailed cooling system diagram available for download. It provides a visual representation of all the components and their interconnections, making it easier to understand the system's overall operation. Happy wrenching!