What Does At Check Light Mean
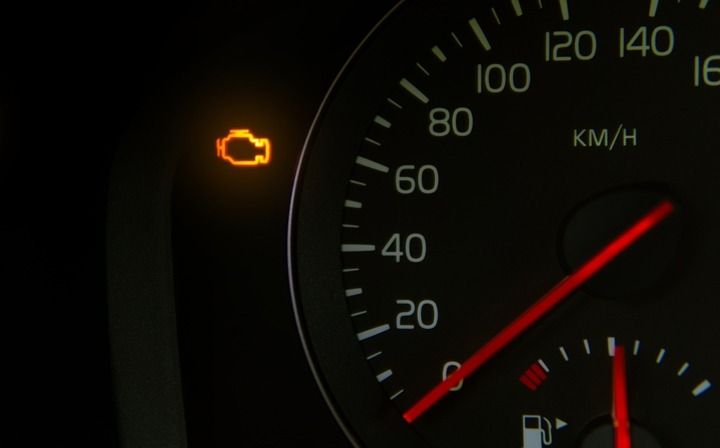
So, your "Check Engine" light is on. Or maybe it's a "Service Engine Soon" indicator. Either way, that little glowing icon on your dashboard is trying to tell you something important. But what exactly? While a diagnostic scan tool is always the best first step, understanding the common culprits behind that light can save you time, money, and a lot of frustration. This article will break down the typical reasons why that warning light illuminates, and how to approach diagnosing the problem like a seasoned technician.
Purpose of Understanding Diagnostic Systems
Let's be clear: this isn't about becoming a certified mechanic overnight. The goal here is to empower you with the knowledge to make informed decisions about your vehicle. Understanding the underlying principles of the engine management system and the trouble codes it generates allows you to:
- Perform basic troubleshooting: Identify potential problems before they escalate into costly repairs.
- Communicate effectively with your mechanic: Provide accurate information and avoid unnecessary work.
- Decide whether to DIY or seek professional help: Assess the complexity of the repair and your own capabilities.
- Maintain your vehicle proactively: Address minor issues before they trigger the check engine light.
Consider this knowledge as an investment in your vehicle's long-term health and your own peace of mind.
Key Specs and Main Parts of the Engine Management System
The "Check Engine" light is your car's way of alerting you to a problem within its sophisticated engine management system (EMS), also known as the Powertrain Control Module (PCM) or Engine Control Unit (ECU). This system is responsible for controlling and monitoring various engine functions to optimize performance, fuel efficiency, and emissions. Key components of the EMS include:
- Sensors: These devices monitor various engine parameters, such as:
- Oxygen (O2) sensors: Measure the oxygen content in the exhaust gas to ensure proper air-fuel mixture.
- Mass Airflow (MAF) sensor: Measures the amount of air entering the engine.
- Manifold Absolute Pressure (MAP) sensor: Measures the pressure in the intake manifold.
- Crankshaft Position (CKP) sensor: Monitors the position and speed of the crankshaft.
- Camshaft Position (CMP) sensor: Monitors the position of the camshaft.
- Throttle Position Sensor (TPS): Monitors the position of the throttle plate.
- Engine Coolant Temperature (ECT) sensor: Monitors the temperature of the engine coolant.
- Actuators: These devices control various engine functions based on the signals from the PCM, such as:
- Fuel injectors: Meter and inject fuel into the engine cylinders.
- Ignition coils: Generate the high voltage needed to ignite the air-fuel mixture.
- Idle Air Control (IAC) valve: Regulates the amount of air entering the engine at idle.
- Evaporative Emission (EVAP) system components: Control the venting of fuel vapors.
- Powertrain Control Module (PCM/ECU): The "brain" of the system, processing data from the sensors and controlling the actuators.
Think of it like this: the sensors are the eyes and ears of the EMS, the PCM is the brain, and the actuators are the muscles. When something goes wrong with any of these components, it can trigger the "Check Engine" light.
How It Works: Diagnostic Trouble Codes (DTCs)
When a sensor detects a reading outside of its expected range, or an actuator fails to perform as commanded, the PCM stores a Diagnostic Trouble Code (DTC). These DTCs are standardized across the automotive industry and provide a clue as to the nature of the problem. Your trusty OBD-II scanner is designed to retrieve these codes.
Here’s a typical DTC structure:
Example: P0171
- P: Indicates a Powertrain code (related to engine or transmission). Other letters include B (Body), C (Chassis), and U (Network).
- 0: Indicates a generic or standard code (SAE). A "1" would indicate a manufacturer-specific code.
- 1: Indicates the system or area of concern. In this case, "1" indicates fuel and air metering.
- 71: Specifies the specific fault within that system. In this case, "System Too Lean (Bank 1)".
The PCM uses complex algorithms and pre-programmed parameters to determine if a fault exists. It's not just a simple on/off switch; it's a sophisticated monitoring system.
Real-World Use: Basic Troubleshooting Tips
Okay, your scanner has retrieved a DTC. Now what?
- Record the code and its description: Write it down. Don't rely on your memory.
- Research the code: Use online resources (reputable automotive forums, repair databases) to understand the possible causes and common fixes for that specific DTC. A great resource is a service manual for your particular vehicle, as these manuals typically offer flowcharts for specific DTCs.
- Inspect the obvious: Check for loose gas caps (a very common cause of EVAP system codes), vacuum leaks (listen for hissing sounds), disconnected sensors, and damaged wiring.
- Consider recent work: Did the light come on shortly after a recent repair or maintenance? If so, the issue might be related to that work.
- Monitor live data: Use your scanner to monitor real-time data from sensors like the O2 sensors, MAF sensor, and fuel trims. This can help you identify the root cause of the problem. For example, high positive fuel trim values can indicate a vacuum leak or a lean condition.
- Clear the code and retest: After addressing the suspected problem, clear the code and drive the vehicle. If the code returns, the issue is still present.
Important Note: Clearing a DTC can sometimes erase valuable diagnostic information. In some cases, the PCM needs to relearn certain parameters after a repair. Consult your vehicle's service manual for specific relearning procedures.
Safety: Risky Components and Best Practices
Working on automotive systems can be dangerous. Always prioritize safety and take necessary precautions:
- Disconnect the battery: Before working on any electrical components, disconnect the negative battery cable to prevent shorts and electrical shock.
- Work in a well-ventilated area: Avoid breathing exhaust fumes or gasoline vapors.
- Use proper tools: Use the correct tools for the job to avoid damaging components or injuring yourself.
- Be careful around hot engine components: Allow the engine to cool down before working on it.
- Fuel System: Exercise extreme caution when working on the fuel system. Fuel is highly flammable, and even small leaks can pose a fire hazard. Relieve fuel pressure before disconnecting any fuel lines.
- High-Voltage Ignition Systems: Be extremely careful when working with ignition coils and spark plugs. These components generate very high voltage, which can be lethal.
If you're unsure about any aspect of the repair, seek professional assistance from a qualified mechanic. It's better to be safe than sorry!
This information provides a solid foundation for understanding the "Check Engine" light and approaching diagnostic troubleshooting. Remember, patience and methodical troubleshooting are key to finding the root cause of the problem. Armed with this knowledge, you'll be better equipped to keep your car running smoothly and avoid costly repairs.
We have a comprehensive diagnostic diagram available for download. This diagram provides a visual overview of the engine management system and its key components, which can be incredibly helpful during the troubleshooting process. It includes sensor locations, wiring schematics, and common fault areas. Contact us to get access to download link.