What Is A Standard Oil Change
So, you're ready to tackle a standard oil change yourself? Excellent! It's a fundamental maintenance task that every car owner should understand, and with the right knowledge, tools, and approach, it's something you can confidently handle. This article breaks down everything you need to know about a standard oil change, covering the "why," "what," and "how" from a practical, DIY perspective.
Purpose of an Oil Change
Before we dive into the nitty-gritty, let's understand why we even bother with oil changes. The purpose is multi-faceted, but boils down to these key points:
- Lubrication: Engine oil coats all the moving parts inside your engine, reducing friction and wear. Without proper lubrication, these parts would grind against each other, leading to catastrophic failure.
- Cooling: Oil absorbs heat from the engine's internal components and carries it away, helping to regulate engine temperature.
- Cleaning: As oil circulates, it picks up contaminants like dirt, metal particles, and combustion byproducts. These contaminants, if left unchecked, can cause engine damage. The oil filter traps these particles, preventing them from circulating.
- Corrosion Prevention: Oil helps to protect engine parts from corrosion caused by moisture and acids.
- Sealing: Oil helps seal the gaps between piston rings and cylinder walls, ensuring proper compression and efficient combustion.
Over time, oil degrades and loses its ability to perform these functions effectively. It becomes thicker (especially with conventional oils), accumulates contaminants, and loses its viscosity. This is why regular oil changes are essential for maintaining engine health and extending its lifespan.
Key Specs and Main Parts
A standard oil change involves replacing the old engine oil and the oil filter. Here's a breakdown of the key components and specifications:
Main Parts:
- Engine Oil: The lifeblood of your engine. Different engines require different oil viscosities (thickness) and API (American Petroleum Institute) service ratings. Consult your owner's manual for the correct specification. Common viscosities include 5W-30, 10W-30, and 0W-20. Synthetic, semi-synthetic, and conventional oils are available, each with different performance characteristics and price points.
- Oil Filter: This crucial component filters out contaminants from the oil. Oil filters come in various sizes and designs, but they all perform the same basic function. Use the correct oil filter specified for your vehicle. Using the wrong filter can lead to improper filtration or even oil leaks.
- Drain Plug: Located at the bottom of the oil pan, the drain plug allows you to drain the old oil. It usually has a crush washer that should be replaced with each oil change to ensure a tight seal.
- Crush Washer (or Sealing Washer): This soft metal ring is placed between the drain plug and the oil pan to create a tight seal and prevent leaks. Always use a new crush washer when reinstalling the drain plug.
Key Specs:
- Oil Capacity: This is the amount of oil your engine needs. Consult your owner's manual or a reliable online resource for the correct oil capacity. Overfilling or underfilling the oil can damage your engine.
- Torque Specification for Drain Plug: The drain plug needs to be tightened to a specific torque to ensure a proper seal without damaging the oil pan threads. Use a torque wrench to achieve the correct torque. Typically, this is between 20-30 ft-lbs, but always verify the correct specification for your vehicle.
- Oil Filter Torque: Some oil filters require a specific torque for proper installation, while others are simply hand-tightened until the gasket makes contact, then tightened an additional ¾ to 1 full turn. Refer to the filter's instructions.
How It Works: The Oil Change Process
The basic process of an oil change involves these steps:
- Preparation: Gather your tools and materials. This includes the correct oil and filter, a wrench for the drain plug and filter, a drain pan, a funnel, gloves, and safety glasses. Warm up the engine slightly (but not too hot – you should be able to comfortably touch the oil pan). Warming the oil helps it flow more easily.
- Draining the Old Oil: Locate the drain plug on the oil pan. Position the drain pan underneath the plug. Carefully loosen the drain plug with the appropriate wrench and remove it. Let the old oil drain completely. This can take 15-30 minutes.
- Replacing the Oil Filter: While the oil is draining, locate and remove the old oil filter. Lightly lubricate the gasket of the new oil filter with fresh oil. Screw the new filter onto the engine, tightening it to the manufacturer's specifications (usually hand-tight plus a specific fraction of a turn).
- Reinstalling the Drain Plug: Once the oil has completely drained, clean the drain plug and install a new crush washer. Tighten the drain plug to the correct torque specification using a torque wrench. Over-tightening can damage the oil pan!
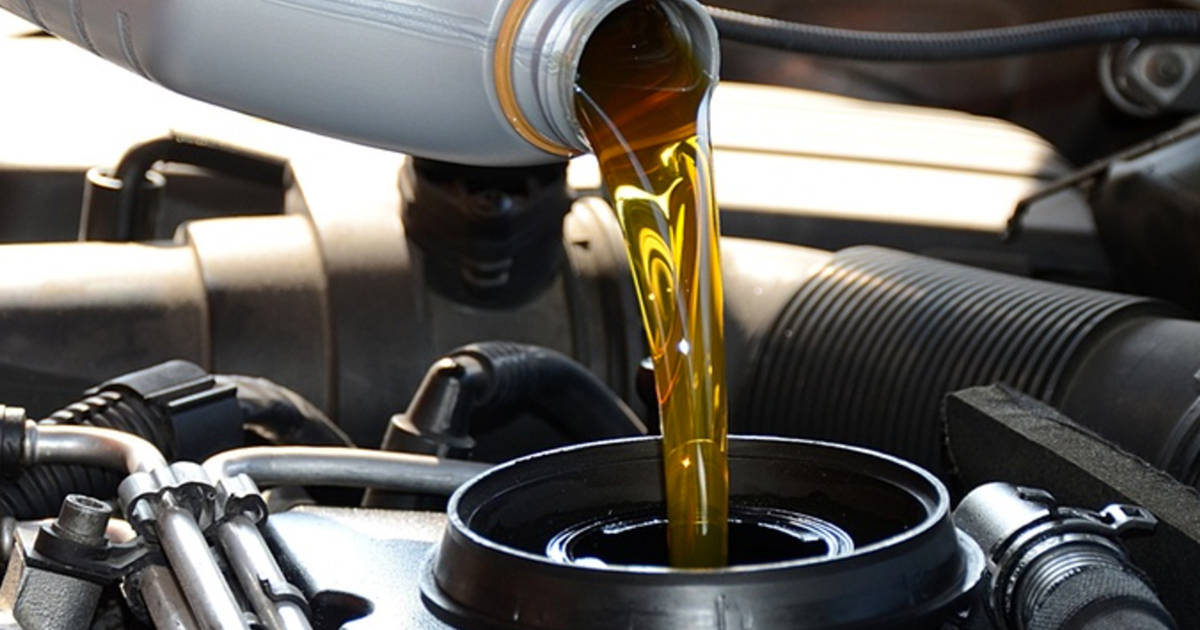
- Adding New Oil: Locate the oil fill cap on the engine. Remove the cap and insert a funnel. Pour in the correct amount of new oil as specified in your owner's manual.
- Checking the Oil Level: After adding the oil, replace the oil fill cap. Start the engine and let it run for a few minutes. Check for any leaks around the drain plug and oil filter. Turn off the engine and let it sit for a few minutes to allow the oil to settle. Then, check the oil level using the dipstick. Add more oil if necessary to reach the "full" mark.
- Resetting the Oil Life Monitor: Many modern vehicles have an oil life monitoring system. Follow the instructions in your owner's manual to reset the system after an oil change.
- Disposing of Used Oil: Properly dispose of the used oil at a recycling center or auto parts store. Do not pour used oil down the drain or into the ground.
Real-World Use: Basic Troubleshooting Tips
- Oil Leak After Change: Double-check the drain plug and oil filter for tightness. Ensure the crush washer was replaced and properly seated. If the leak persists, inspect the oil pan and filter adapter for damage.
- Difficulty Removing Oil Filter: Use an oil filter wrench to get a better grip. If the filter is stuck, try puncturing it with a screwdriver to relieve pressure (be careful!).
- Stripped Drain Plug Threads: This is a common problem caused by over-tightening. Consider using a thread repair kit or, in severe cases, replacing the oil pan. A temporary fix might involve using a self-tapping drain plug.
- Incorrect Oil Level: Always double-check the oil level after adding new oil. Overfilling can lead to aeration of the oil and reduced lubrication. Underfilling can lead to engine damage.
Safety Considerations
Working on your car involves inherent risks. Here are some important safety precautions to keep in mind:
- Hot Oil: Be extremely careful when draining hot oil. It can cause severe burns. Allow the engine to cool down slightly before draining the oil.
- Jack Stands: Never work under a vehicle that is only supported by a jack. Always use jack stands to securely support the vehicle.
- Eye Protection: Wear safety glasses to protect your eyes from flying debris and splashes of oil.
- Gloves: Wear gloves to protect your hands from oil and chemicals.
- Proper Ventilation: Work in a well-ventilated area to avoid inhaling harmful fumes.
- Disposal: Dispose of used oil and filters responsibly.
Important Note: The oil filter contains oil even after removal. Place it in a plastic bag or container to prevent spills.