What Is Dome Light In Car
Alright, let's dive deep into the world of automotive dome lights. Specifically, we're going to dissect the electrical diagram for your car's interior lighting, focusing on the dome light circuit. Why bother? Understanding this diagram is crucial for a variety of reasons. Whether you're chasing down a pesky short circuit, planning an upgrade to LED lighting, diagnosing why your dome light stays on even when the doors are closed, or simply satisfying your curiosity about how your car works, this knowledge is invaluable. It empowers you to troubleshoot problems and potentially save money on costly repairs.
Key Specs and Main Parts
The dome light system, while seemingly simple, involves several key components working in harmony. Understanding these components and their roles is the first step toward mastering the electrical diagram.
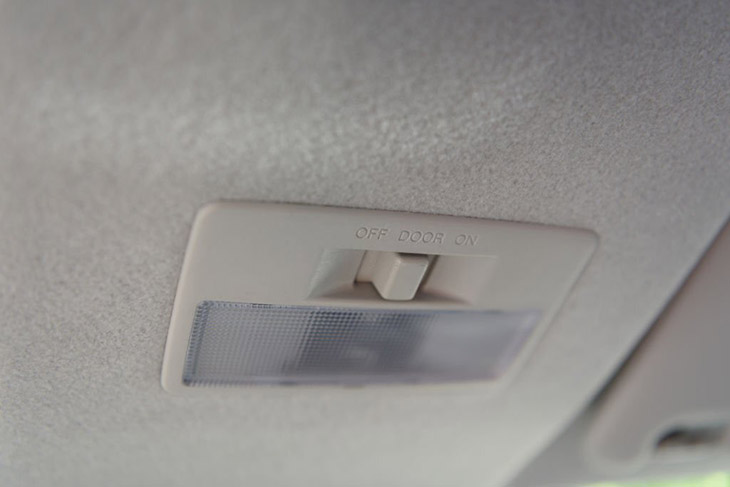
- Dome Light Fixture: This is the physical housing that contains the bulb (or LED array in modern cars) and the lens that diffuses the light. It usually includes a switch that allows you to manually turn the light on and off, or select a "door" setting, which activates the light when a door is opened.
- Bulb/LED Array: The illumination source. Older cars typically use incandescent bulbs (e.g., festoon or wedge-base types), while newer vehicles employ LED arrays for improved efficiency and lifespan.
- Door Jamb Switches (a.k.a. Courtesy Light Switches): These are spring-loaded switches located in the door jamb (the frame surrounding the door opening). When the door is closed, the switch is depressed, breaking the circuit. When the door is opened, the switch is released, completing the circuit and turning on the dome light. Most cars have multiple door jamb switches connected in parallel.
- Wiring Harness: The network of wires that connects all the components together. This harness includes the power wire (usually connected to the battery through a fuse), the ground wire, and the control wires that run to the door jamb switches and the dome light's manual switch.
- Fuse: A critical safety device that protects the circuit from overcurrents. If a short circuit occurs, the fuse will blow, interrupting the flow of electricity and preventing damage to the wiring and components. The fuse rating (e.g., 5A, 10A) is important to note if you're replacing it.
- Body Control Module (BCM): In many modern vehicles, the BCM acts as a central control unit for various electrical functions, including interior lighting. The door jamb switches might send a signal to the BCM, which then controls the dome light's activation. This allows for features like delayed dome light shut-off after the door is closed.
- Relay (Optional): In some vehicles, a relay is used to switch the dome light on and off. The door jamb switches control the relay, which then controls the higher current flow to the dome light.
Symbols - Deciphering the Electrical Diagram
Electrical diagrams use a standardized set of symbols to represent different components. Understanding these symbols is essential for interpreting the diagram accurately.
- Straight Lines: Represent wires. Thicker lines often indicate heavier gauge wires, capable of carrying more current.
- Dashed Lines: May represent wires that are shielded or wires that are part of a data bus network.
- Ground Symbol: Usually looks like a series of decreasing horizontal lines or an inverted triangle. Indicates the connection to the vehicle's chassis, which serves as the return path for the electrical current.
- Battery Symbol: A long line and a short line, representing the positive and negative terminals, respectively.
- Fuse Symbol: A squiggly line or a rectangle with a line through it.
- Switch Symbol: A break in the line with a hinged lever. The position of the lever indicates whether the switch is open (circuit broken) or closed (circuit complete).
- Resistor Symbol: A zig-zag line.
- Diode Symbol: A triangle pointing to a vertical line. Important if you are using LED bulbs.
- Light Bulb Symbol: A circle with an "X" inside.
- Relay Symbol: A coil representing the relay's electromagnet and a switch representing the contacts that are opened or closed by the relay.
- Color Codes: Wires are often color-coded to help identify them. The diagram will typically include a key that explains the color codes (e.g., BLK = Black, RED = Red, WHT = White, GRN = Green, BLU = Blue, YEL = Yellow).
Note: Specific symbols can vary slightly depending on the manufacturer and the age of the vehicle, but the basic principles remain the same. Consult the diagram's legend for clarification.
How It Works
The basic operating principle of the dome light circuit is simple. Power flows from the battery, through a fuse, to the dome light. The dome light is then grounded, completing the circuit and causing the bulb to illuminate.
The magic happens in how the circuit is switched. The door jamb switches are wired in parallel. This means that any one of them being open (door open) will complete the circuit and turn on the light. When all doors are closed, all the switches are depressed, breaking the circuit and turning off the light.
The manual switch on the dome light fixture allows you to override the door jamb switches and turn the light on or off regardless of the door position. In the "door" position, the manual switch simply connects the dome light to the door jamb switch circuit. In the "on" position, it bypasses the door jamb switches and directly connects the dome light to power. In the "off" position, it disconnects the dome light from both the door jamb switches and the direct power source.
In cars with a BCM, the door jamb switches typically send a low-voltage signal to the BCM. The BCM then controls a relay (or a solid-state switch) that actually powers the dome light. This allows for features like delayed dome light shut-off, where the light stays on for a few seconds after the door is closed. The BCM can also dim the dome light gradually.
Real-World Use - Basic Troubleshooting Tips
Here are some common dome light problems and how to troubleshoot them using the electrical diagram:
- Dome light doesn't work at all:
- Check the fuse. A blown fuse is the most common cause. Replace it with a fuse of the correct amperage rating.
- Check the bulb. Even LED bulbs can fail.
- Use a multimeter to check for voltage at the dome light fixture. If there's no voltage, trace the wiring back to the fuse box, looking for breaks or loose connections.
- If you have a BCM, check for voltage at the output of the BCM that controls the dome light.
- Dome light stays on all the time:
- Check the door jamb switches. One of them may be stuck in the "open" position or have a broken wire. Visually inspect the switches and test them with a multimeter for continuity when pressed and released.
- Check the manual switch on the dome light fixture. It may be stuck in the "on" position.
- In cars with a BCM, the BCM may be malfunctioning or receiving a faulty signal from one of the door jamb switches.
- Dome light flickers:
- Check for loose connections in the wiring harness, especially at the bulb socket and the door jamb switches.
- The bulb socket may be corroded. Clean it with a wire brush or replace it.
Safety - Handle with Care
Working with automotive electrical systems can be dangerous. Here are some safety precautions to keep in mind:
- Disconnect the battery: Before working on any electrical circuit, disconnect the negative terminal of the battery to prevent accidental shocks or short circuits.
- Use insulated tools: Use tools with insulated handles to protect yourself from electric shock.
- Be careful with wires: Avoid cutting or damaging wires. If you need to splice a wire, use proper connectors and ensure that the connection is secure and well-insulated.
- Be aware of airbags: The dome light circuit may be located near airbag components. Exercise extreme caution when working in this area to avoid accidentally triggering an airbag deployment. Airbags are very dangerous if deployed accidentally.
- Never replace a fuse with a higher amperage rating: Doing so can overload the circuit and cause a fire.
- If you're not comfortable working with electrical systems, seek professional help: It's always better to be safe than sorry.
Remember to always consult your vehicle's specific wiring diagram for accurate information about your car's dome light circuit. We have a general wiring diagram file available for download, which can be a helpful reference point for common dome light systems.
Good luck and stay safe!