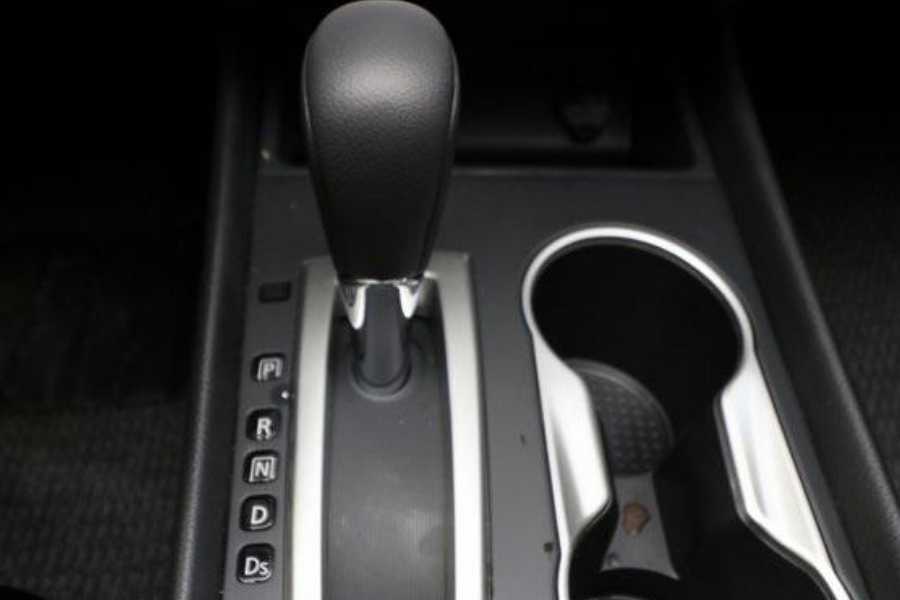
What Is Ds In Nissan Altima
Alright, let's talk about "Ds" in the context of your Nissan Altima. This isn’t about a single component, but rather a collective term encompassing several diagrams and systems related to diagnostic services and systems. Understanding these diagrams is crucial for everything from basic maintenance to advanced troubleshooting and even performance modifications. Think of it as the roadmap to your Altima's electronic nervous system.
Purpose of "Ds" Diagrams
These diagrams, often bundled together or accessible through dedicated diagnostic software, serve several critical purposes:
- Diagnostics: The primary purpose is to diagnose faults within the vehicle's electronic control units (ECUs) and associated systems. They show sensor locations, wiring routes, and connector pinouts.
- Repair: Once a fault is diagnosed, these diagrams help you pinpoint the faulty component and trace wiring issues that may be causing the problem.
- Modification: If you're planning any aftermarket modifications, understanding these systems is absolutely essential to avoid damaging sensitive electronics. For example, tapping into the wrong wire for a boost gauge could fry your ECU.
- Learning: Even if you're not currently facing a problem, studying these diagrams provides invaluable insight into how your car operates.
Key Specs and Main Parts Illustrated
The specific content of "Ds" diagrams will vary slightly depending on the Altima model year and engine configuration, but generally, you'll find information pertaining to the following:
Powertrain Control Module (PCM)
The PCM, also sometimes referred to as the Engine Control Module (ECM), is the brain of your engine. The diagrams illustrate its inputs (sensors) and outputs (actuators). Common components shown in relation to the PCM include:
- Crankshaft Position Sensor (CKP)
- Camshaft Position Sensor (CMP)
- Mass Airflow Sensor (MAF)
- Oxygen Sensors (O2S)
- Throttle Position Sensor (TPS)
- Fuel Injectors
- Ignition Coils
Transmission Control Module (TCM)
For automatic transmissions, the TCM controls shift points, torque converter lockup, and other transmission-related functions. Diagrams will show sensors like input and output speed sensors, as well as actuators controlling shift solenoids and the torque converter clutch.
Body Control Module (BCM)
The BCM manages various body functions, including lighting, power windows, door locks, and security systems. Diagrams will show wiring routes and connections for these systems.
Anti-lock Braking System (ABS) Control Module
The ABS module controls the anti-lock braking system. The diagrams illustrate wheel speed sensors, hydraulic control unit, and associated wiring.
Airbag Control Module (ACM)
The ACM controls the airbag system. These diagrams are very important for safety, and only a qualified technician should be working with this system.
Symbols and Conventions
Understanding the symbols used in these diagrams is crucial for interpreting the information correctly. Here are some common conventions:
- Lines: Solid lines typically represent wiring, while dashed lines may indicate shielding or signal pathways. The thickness of the line can sometimes indicate the wire gauge.
- Colors: Wire colors are usually indicated using abbreviations (e.g., "BLU" for blue, "GRN" for green, "BLK" for black). Knowing the wire color can save you a lot of time when tracing a circuit.
- Connectors: Connectors are represented by various symbols, often a square or rectangle with pins indicated. Connector diagrams are critical for identifying the correct pin for testing.
- Grounds: Ground symbols indicate a connection to the vehicle's chassis ground. Different ground symbols might represent different types of grounds (e.g., signal ground vs. chassis ground).
- Resistors: Represented by a jagged line.
- Capacitors: Represented by two parallel lines.
- Diodes: Represented by a triangle pointing to a vertical line.
- Fuses and Relays: These are essential components in any car's electrical system, represented by their standard electrical symbols.
How It Works – A Simplified View
Imagine a simplified example: the MAF sensor circuit. The "Ds" diagram would show the MAF sensor connected to the PCM. It would indicate the voltage supply wire (usually 5V), the ground wire, and the signal wire carrying information about the amount of air entering the engine. By testing the voltage and signal at different points in the circuit (using a multimeter), you can determine if the MAF sensor is functioning correctly or if there's a problem with the wiring. The PCM uses the MAF sensor data to calculate the correct amount of fuel to inject for optimal combustion.
The PCM constantly monitors signals from various sensors. If a sensor reading falls outside of the expected range, the PCM will store a Diagnostic Trouble Code (DTC). You can retrieve these codes using an OBD-II scanner. The "Ds" diagrams will then help you pinpoint the source of the problem and guide you through the troubleshooting process. Some diagrams include charts illustrating the correct range of signals for each sensor.
Real-World Use – Basic Troubleshooting
Let's say your Altima throws a code related to the crankshaft position sensor (P0335). Here's how you could use "Ds" diagrams:
- Identify the Sensor: Locate the CKP sensor on the diagram.
- Trace the Wiring: Follow the wiring from the sensor to the PCM, noting the wire colors and connector locations.
- Test the Voltage: Use a multimeter to check for proper voltage at the sensor connector. The diagram will often indicate the expected voltage.
- Check Continuity: Use a multimeter to check for continuity (a complete circuit) in the wiring between the sensor and the PCM.
- Inspect Connectors: Visually inspect the connectors for corrosion or damage.
If you find a break in the wiring, a corroded connector, or incorrect voltage readings, you've likely found the source of the problem. Remember to clear the DTC after making repairs.
Safety Precautions
Working with automotive electronics can be dangerous. Here are some crucial safety precautions:
- Disconnect the Battery: Always disconnect the negative battery terminal before working on any electrical components to prevent short circuits and potential damage to the electrical system.
- Airbag System: The airbag system is extremely sensitive. Never probe or tamper with airbag wiring unless you are a qualified technician. Accidental airbag deployment can cause serious injury. Refer to the official service manual for airbag disabling procedures.
- High Voltage: Be aware of potentially high-voltage components, especially in hybrid or electric vehicles.
- Use Proper Tools: Use a high-quality multimeter and other diagnostic tools to avoid damaging sensitive electronics.
- Consult the Service Manual: Always refer to the official Nissan Altima service manual for specific procedures and torque specifications.
Remember, if you're unsure about any aspect of the troubleshooting process, it's always best to consult with a qualified mechanic.
We have access to a comprehensive collection of these "Ds" diagrams for various Nissan Altima models. Contact us and specify your model year and trim level, and we can provide you with the relevant documentation to download.