What Is Full Synthetic Oil Change
So, you're thinking about making the switch to full synthetic oil, or maybe you're just curious about what all the hype is about? That's great! Understanding your car's lubrication system is crucial for performance and longevity. This article dives deep into the world of full synthetic oil changes, covering everything from the purpose of synthetic oil to practical tips and safety considerations. We'll break down the technical aspects in a way that's easy to understand, even if you're not a seasoned mechanic.
Purpose of Using Full Synthetic Oil
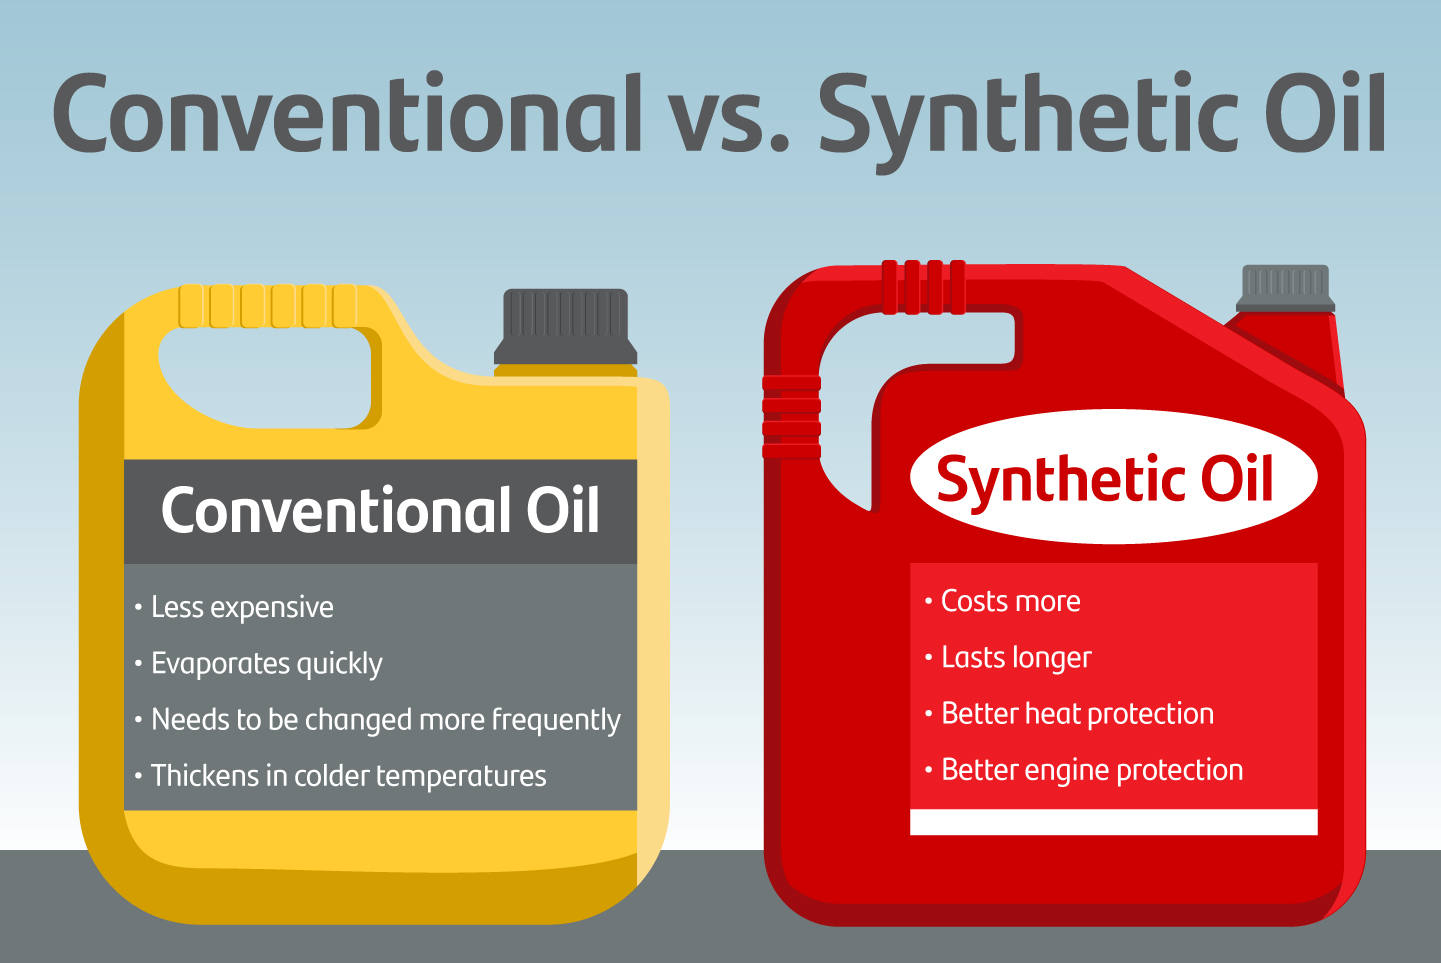
Why should you care about full synthetic oil? It boils down to performance and protection. Unlike conventional oil, which is derived directly from crude oil, synthetic oil is engineered. This engineering allows for:
- Enhanced Lubrication: Synthetic oil molecules are more uniform in size and shape, leading to better lubrication and reduced friction, especially at extreme temperatures.
- Improved Thermal Stability: Synthetic oil can withstand higher temperatures without breaking down or forming sludge. This is vital for turbocharged engines and high-performance vehicles.
- Superior Oxidation Resistance: Oxidation causes oil to thicken and lose its lubricating properties. Synthetic oil is far more resistant to oxidation, extending oil change intervals.
- Better Cold-Start Performance: At low temperatures, conventional oil can thicken significantly, making it harder for the engine to start and causing increased wear. Synthetic oil maintains its fluidity, ensuring quicker and smoother starts.
- Reduced Engine Wear: The combination of better lubrication, thermal stability, and oxidation resistance translates to significantly reduced engine wear and tear over the long term.
Ultimately, using full synthetic oil can extend the life of your engine and improve its overall performance. It's an investment that often pays for itself through increased fuel efficiency and reduced maintenance costs.
Key Specs and Main Parts of an Oil Change
Understanding the components involved in an oil change is crucial for a successful DIY job. Here’s a rundown of the key players:
- Full Synthetic Oil: The lifeblood of your engine. Choose the correct viscosity grade (e.g., 5W-30, 10W-40) as specified in your vehicle's owner's manual. Viscosity refers to the oil's resistance to flow. A "W" indicates it's suitable for winter use.
- Oil Filter: This critical component removes contaminants from the oil, preventing them from circulating through the engine. Use a high-quality filter designed for synthetic oil.
- Drain Plug: Located at the bottom of the oil pan, this plug allows you to drain the old oil. Ensure you have the correct wrench size for removal and tightening.
- Drain Plug Washer/Gasket: This small component seals the drain plug to prevent leaks. It's crucial to replace it with a new one each time you change your oil.
- Oil Filter Wrench: This tool helps you remove and install the oil filter. There are various types available, so choose one that fits your filter.
- Funnel: This makes pouring new oil into the engine much easier and cleaner.
- Drain Pan: A container to catch the old oil. Make sure it's large enough to hold the entire volume of oil in your engine.
- Rags/Shop Towels: Essential for cleaning up spills and drips.
- Jack and Jack Stands (if needed): Depending on your vehicle, you may need to lift it to access the drain plug. Always use jack stands for safety.
Beyond these components, you'll also need basic tools like wrenches, a torque wrench (for tightening the drain plug to the correct specification), and potentially gloves to protect your hands.
Understanding the Oil Change Process
The diagram of an oil change would typically illustrate the following steps:
- Locating the Components: Showing the location of the oil filter, drain plug, and oil fill cap on a typical engine.
- Draining the Old Oil: Illustrating the proper placement of the drain pan and the removal of the drain plug.
- Replacing the Oil Filter: Showing the removal of the old filter and the installation of the new one, including pre-lubricating the new filter's gasket.
- Reinstalling the Drain Plug: Emphasizing the importance of using a new washer/gasket and tightening the plug to the correct torque specification.
- Adding New Oil: Showing the proper method for adding the correct amount of new oil to the engine using a funnel.
- Checking the Oil Level: Illustrating how to use the dipstick to check the oil level and adding more oil if necessary.
Symbols within the diagram would likely use arrows to indicate direction of flow or movement, color coding to differentiate between old and new oil, and potentially icons to represent tools or components. For example, a red arrow might indicate the flow of dirty oil, while a green arrow represents the flow of clean oil.
How It Works: The Engine Lubrication System
Your engine's lubrication system is a carefully orchestrated process. The oil pump, driven by the engine, draws oil from the oil pan and circulates it through the engine's internal components. Here's a breakdown:
- Oil Pump: Pressurizes the oil and sends it through the system.
- Oil Filter: Removes contaminants from the oil.
- Main Bearings: Lubricates the crankshaft main bearings, which support the crankshaft.
- Connecting Rod Bearings: Lubricates the connecting rod bearings, which connect the pistons to the crankshaft.
- Piston Walls: Lubricates the piston walls, allowing the pistons to move smoothly within the cylinders.
- Cylinder Head: Lubricates the valve train components, such as the camshaft, rocker arms, and valves.
- Oil Pan: The reservoir for the oil.
As the oil circulates, it picks up contaminants like dirt, metal particles, and combustion byproducts. The oil filter traps these contaminants, preventing them from causing wear and damage. Over time, the oil degrades and loses its lubricating properties, which is why regular oil changes are essential. Synthetic oil's superior resistance to degradation means it can maintain its protective qualities for longer periods than conventional oil.
Real-World Use: Basic Troubleshooting Tips
Even with the best preparation, things can sometimes go wrong. Here are a few common issues and how to address them:
- Oil Leak After Oil Change: Double-check the drain plug and oil filter. Make sure the drain plug is tightened to the correct torque specification and the oil filter is properly installed and tightened. A loose drain plug or filter is the most common cause of leaks.
- Difficulty Removing the Oil Filter: Use an oil filter wrench to get a better grip. If the filter is stuck, try puncturing it with a screwdriver and using it as a lever (be careful not to damage the engine).
- Stripped Drain Plug: This is a serious problem that requires professional repair. Avoid over-tightening the drain plug in the future. Consider using a torque wrench to ensure proper tightening. You might be able to use a slightly oversized self-tapping drain plug as a temporary fix, but a proper repair is recommended.
- Low Oil Pressure After Oil Change: This could indicate a problem with the oil pump or a blockage in the oil lines. Stop driving the vehicle immediately and consult a mechanic. Using the wrong oil filter can sometimes cause this issue, so double check that you used the correct one.
Safety Considerations
Working on your car can be dangerous if you're not careful. Here are some key safety precautions:
- Always use jack stands: Never work under a vehicle supported only by a jack. Jack stands are essential for safety.
- Wear safety glasses: Protect your eyes from flying debris and splashing oil.
- Wear gloves: Protect your hands from hot oil and sharp edges.
- Dispose of used oil properly: Used oil is hazardous waste and should be recycled at a designated collection center. Do NOT pour it down the drain or into the ground.
- Work in a well-ventilated area: Exhaust fumes from the engine can be harmful.
- Be careful of hot surfaces: The engine and exhaust system can be extremely hot, even after the engine has been turned off. Allow them to cool down before working on the car.
- Battery Disconnect: While not always necessary for an oil change, if you're unsure or working near electrical components, disconnect the negative battery terminal to prevent accidental shorts.
Risky components during an oil change include the hot engine parts (exhaust manifold, engine block), the potential for oil spills, and the risk of the vehicle falling off the jack.
By understanding these concepts and following these safety guidelines, you can confidently perform a full synthetic oil change on your vehicle and reap the benefits of improved engine performance and longevity. Remember to always consult your vehicle's owner's manual for specific recommendations and torque specifications.
We have a detailed diagram available for download that visually illustrates the oil change process, including component locations, oil flow paths, and key safety considerations. This diagram can be a valuable resource for both learning and performing your own oil changes.