What Is Included In Oil Change
Alright, let's talk about something fundamental to keeping your ride running smoothly: the oil change. It's more than just draining the old goo and slapping in some new stuff. As someone who likes to get their hands dirty, you probably know this, but let's dive deep into what really happens during an oil change, so you're armed with the knowledge to do it right, diagnose problems, and even understand why dealerships charge what they do.
Purpose of an Oil Change
The primary purpose of an oil change is threefold: lubrication, cooling, and cleaning. Let's break each one down:
- Lubrication: Engine oil creates a thin film between moving parts like the pistons, connecting rods, crankshaft, and camshaft. This film reduces friction, which reduces wear and tear, and prevents metal-to-metal contact that could lead to catastrophic engine failure. Think of it like this: without oil, your engine would seize up faster than a rusty bolt in saltwater.
- Cooling: While the coolant system handles the bulk of engine cooling, oil also plays a crucial role. As it circulates, it absorbs heat from the engine components, especially in areas the coolant can't reach effectively. This helps prevent overheating and keeps the engine operating at its optimal temperature.
- Cleaning: Engine oil acts as a detergent, picking up contaminants like dirt, dust, metal shavings (from wear), and combustion byproducts (soot and unburned fuel). These contaminants are then carried to the oil filter, which traps them, preventing them from circulating and causing further damage. Over time, the oil becomes saturated with these contaminants, reducing its ability to lubricate and clean effectively.
Ignoring oil changes leads to a cascade of problems: increased friction, accelerated wear, reduced fuel efficiency, overheating, sludge buildup (which restricts oil flow), and ultimately, engine failure. It's the cheapest insurance you can buy for your engine's longevity. Regular oil changes based on your manufacturer's recommendations are absolutely critical.
Key Specs and Main Parts
Understanding the components involved in an oil change is essential. Here's a rundown of the key parts and their specs to consider:
- Engine Oil: The lifeblood of your engine. Choosing the correct viscosity (e.g., 5W-30, 10W-40) is crucial and depends on your engine type, climate, and driving conditions. Refer to your owner's manual or a reputable oil selection guide. There are also different types of oil – conventional, synthetic blend, and full synthetic – each offering varying levels of protection and longevity. Synthetic oils generally offer superior performance and longer drain intervals but come at a higher cost.
- Oil Filter: This is the gatekeeper, responsible for trapping contaminants. Oil filters come in various sizes and designs. Some are spin-on canisters, while others are cartridge filters located inside a housing. Always use a filter that meets or exceeds the manufacturer's specifications for your engine. Look for filters with good filtration efficiency (measured in microns) and adequate flow capacity. Bypass valves are also important; these allow oil to flow even if the filter becomes clogged, preventing oil starvation (though unfiltered oil is still better than no oil at all in an emergency).
- Drain Plug: Located at the bottom of the oil pan, the drain plug allows you to drain the old oil. They typically have a crush washer (usually copper or aluminum) that seals the plug against the oil pan. Always replace the crush washer with a new one each time you change the oil to prevent leaks. Torque the drain plug to the specified torque value using a torque wrench. Overtightening can damage the oil pan threads, leading to costly repairs.
- Oil Pan: This is the reservoir that holds the engine oil. It's located at the bottom of the engine.
- Oil Filter Wrench: A specialized wrench designed to grip and loosen or tighten the oil filter.
- Torque Wrench: Essential for tightening the drain plug and, in some cases, the oil filter to the correct torque specification.
- Funnel: For pouring new oil into the engine without spilling.
How It Works: The Oil Change Procedure
The oil change process is relatively straightforward, but attention to detail is crucial:
- Warm Up the Engine: Run the engine for a few minutes to warm the oil. This makes it flow more easily and helps suspend contaminants for better draining. Be careful; the exhaust components will get hot.
- Prepare for Draining: Position a drain pan under the drain plug.
- Remove the Drain Plug: Use the correct size wrench to loosen the drain plug. Be prepared for the oil to gush out. Let the oil drain completely – this can take 15-30 minutes.
- Remove the Oil Filter: Use an oil filter wrench to loosen and remove the old oil filter. Be prepared for some oil spillage here as well. Lightly lubricate the rubber gasket of the new oil filter with fresh oil before installing it. Spin the filter on by hand until the gasket makes contact with the engine, then tighten it another ¾ to 1 full turn as specified on the filter. Some filters have specific torque requirements, so check the instructions.
- Reinstall the Drain Plug: Clean the drain plug and install a new crush washer. Tighten the drain plug to the specified torque value (typically around 25-35 Nm or 18-26 lb-ft, but consult your service manual).
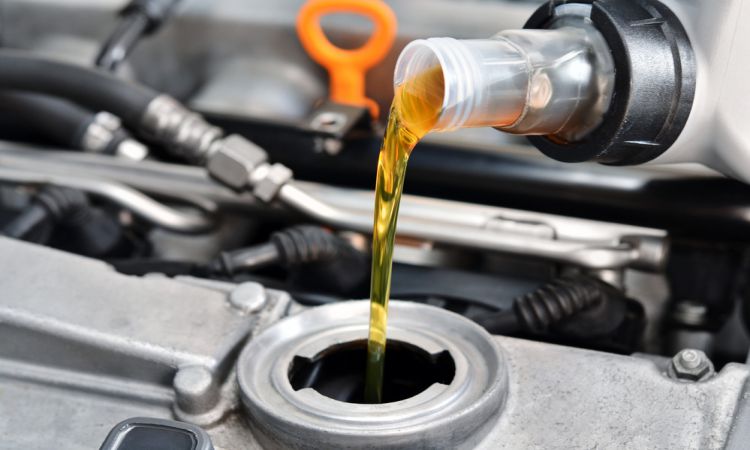
- Add New Oil: Locate the oil fill cap on the engine. Use a funnel to pour in the correct amount of new oil, as specified in your owner's manual. It's better to start with slightly less than the recommended amount and then top it off after checking the oil level.
- Check the Oil Level: Use the dipstick to check the oil level. The oil level should be between the minimum and maximum marks on the dipstick.
- Start the Engine: Start the engine and let it run for a few minutes. Check for leaks around the drain plug and oil filter.
- Recheck the Oil Level: Turn off the engine and let it sit for a few minutes to allow the oil to drain back into the oil pan. Recheck the oil level with the dipstick and add more oil if necessary.
- Dispose of the Old Oil and Filter Properly: Take the used oil and filter to a recycling center or auto parts store for proper disposal.
Real-World Use: Basic Troubleshooting
Low Oil Pressure: A common issue after an oil change can be low oil pressure. This could be due to several factors, including:
- Incorrect Oil Filter: Using the wrong oil filter can restrict oil flow.
- Air Pocket: An air pocket in the oil system can cause temporary low oil pressure. Try revving the engine gently a few times to purge the air.
- Oil Leak: A leak around the drain plug or oil filter can cause a drop in oil pressure.
Oil Leaks: Check for leaks around the drain plug, oil filter, and oil pan gasket. Retighten the drain plug and oil filter if necessary. If the leak persists, you may need to replace the crush washer or oil pan gasket.
Incorrect Oil Level: Always double-check the oil level after an oil change. Overfilling or underfilling can damage the engine.
Safety Considerations
Safety is paramount when working on your car. Here are some key safety precautions to take during an oil change:
- Hot Exhaust: Be extremely careful around the exhaust system, as it can get very hot. Allow the engine to cool down slightly before starting the oil change.
- Jack Stands: Never work under a car supported only by a jack. Use jack stands to provide stable support.
- Eye Protection: Wear safety glasses to protect your eyes from splashing oil.
- Gloves: Wear gloves to protect your hands from oil and chemicals.
- Proper Disposal: Dispose of used oil and filters properly. Do not pour oil down the drain or into the environment.
Remember, the oil filter and the area around the exhaust are the riskiest components in this process. Be extra cautious.
By understanding these components and following the proper procedures, you can confidently perform an oil change and keep your engine running smoothly for years to come. Remember to always consult your vehicle's service manual for specific instructions and torque specifications.
We have a detailed oil change diagram available that visually represents all the components and steps discussed in this article. This diagram can be a valuable resource for visualizing the oil change process and identifying potential issues. You can download the diagram here.