What Size Hose To Bleed Brakes
Choosing the right size hose for bleeding your brakes is crucial for achieving a firm pedal and safe stopping power. Too small, and you'll struggle to draw fluid efficiently. Too large, and you might introduce air into the system or have difficulty creating a proper seal. This guide will walk you through the key considerations and best practices for selecting the appropriate brake bleeding hose.
Why This Matters: Brake Bleeding Fundamentals
Whether you're performing routine maintenance, replacing brake components like calipers or brake lines, or troubleshooting a spongy brake pedal, bleeding your brakes is a necessary skill. Air trapped in the hydraulic brake system compresses, reducing the system's ability to transmit force from your foot to the brake pads. Effective brake bleeding removes this air, restoring optimal braking performance and ensuring your safety. Using the correct hose size is a fundamental aspect of achieving a successful bleed.
Key Specs and Main Parts
Let's break down the key specifications and components involved:
Hose Inner Diameter (ID)
The ID of the hose is the most critical factor. It determines the flow rate of brake fluid and the ability to create a proper seal around the bleeder screw. A hose with too small of an ID will restrict fluid flow and make bleeding difficult. A hose with too large of an ID may not seal properly around the bleeder screw, allowing air to be drawn back into the system.
Hose Outer Diameter (OD)
The OD of the hose is less critical than the ID, but it should be suitable for the tools you're using, such as a hose clamp or a one-way check valve. A hose that's too thick might be difficult to attach to these components.
Hose Material
Brake fluid is corrosive, so it's essential to use a hose made from a material that's resistant to it. Common materials include:
- Vinyl: A common and inexpensive option, but it can become brittle over time, especially with exposure to heat.
- Silicone: More resistant to heat and brake fluid than vinyl. A more durable option.
- Rubber: Provides good flexibility and resistance to chemicals, but can degrade over time.
- EPDM Rubber: Excellent heat and chemical resistance, making it the most durable choice for brake bleeding.
Bleeder Screw
The bleeder screw (also called a bleeder valve) is located on each brake caliper or wheel cylinder. It's the point where you release the old brake fluid and air. The size and thread pitch of the bleeder screw can vary depending on the vehicle. Typically, you’ll see metric sizes such as 10mm x 1.0 or 8mm x 1.25.
Collection Container
You'll need a container to collect the old brake fluid. A clear container allows you to see the fluid and identify any air bubbles or contaminants.
One-Way Check Valve (Optional)
A one-way check valve prevents brake fluid and air from flowing back into the caliper during the bleeding process. These valves are not mandatory, but they can make bleeding easier, especially when performing a one-person bleed.
Choosing the Right Hose Size: The Goldilocks Principle
The ideal hose size typically falls within a small range, striking a balance between flow rate and sealing effectiveness. A very common and generally recommended inner diameter (ID) for brake bleeding hoses is 3/16 inch (approximately 4.75mm). This size provides a good balance for most passenger vehicles.
However, always double-check the specific requirements for your vehicle. Some older vehicles, or those with larger brake systems, may benefit from a slightly larger ID, such as 1/4 inch (approximately 6.35mm). Consult your vehicle's service manual or a reputable online forum for recommendations specific to your make and model.
Important: The OD is important for the fitting of a hose over the bleeder. It should be as snug as possible for a good seal and that the bleeder does not come off during operation.
How It Works: The Bleeding Process
The basic principle of brake bleeding involves forcing old brake fluid and air out of the system. The process generally involves the following steps:
- Preparation: Locate the bleeder screws on each caliper or wheel cylinder. Clean the area around the bleeder screw to prevent dirt from entering the system.
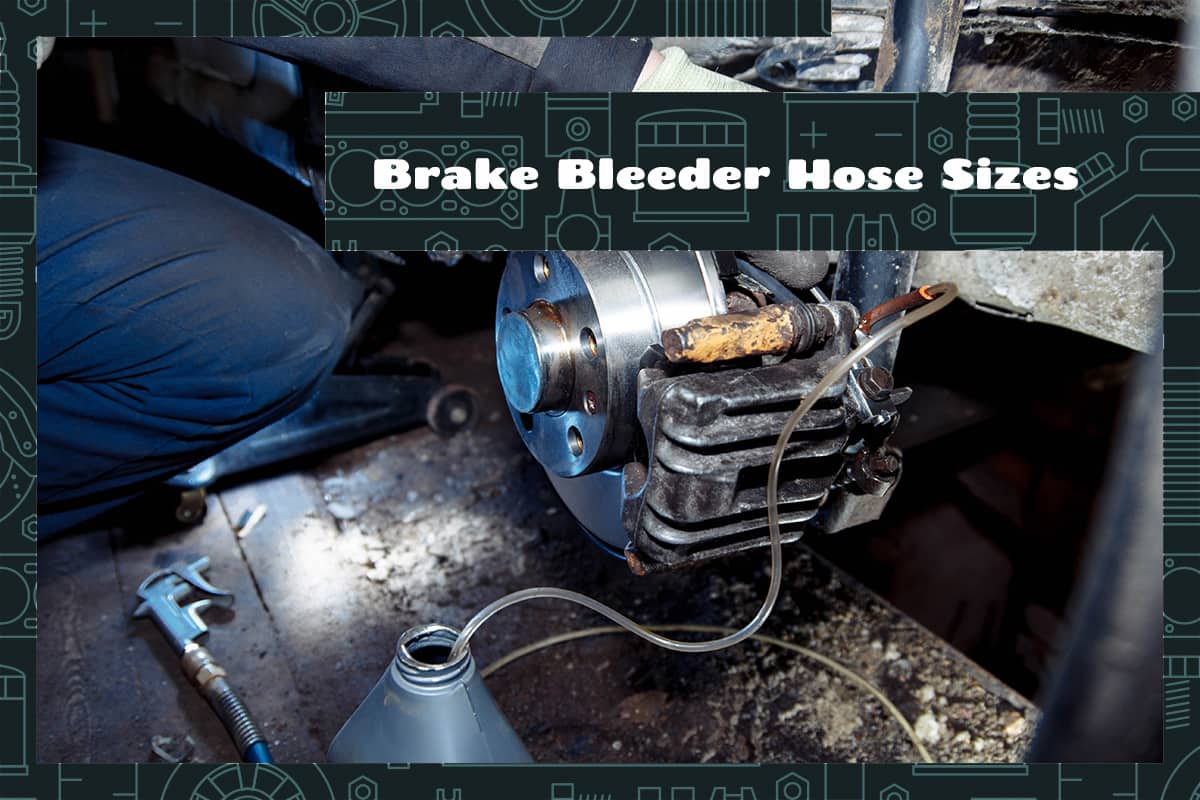
- Connecting the Hose: Attach one end of the hose to the bleeder screw. Make sure the hose fits snugly and creates a good seal. If using a one-way check valve, install it in the hose, ensuring it's oriented correctly to allow fluid to flow out of the caliper but not back in.
- Opening the Bleeder Screw: Use a wrench to slightly loosen the bleeder screw. Typically, a quarter to half turn is sufficient.
- Pumping the Brakes: Have an assistant slowly pump the brake pedal several times, holding it down on the last stroke. While the pedal is held down, open the bleeder screw to allow fluid and air to flow out. Close the bleeder screw before releasing the brake pedal.
- Repeat: Repeat the pumping and bleeding process until no air bubbles are visible in the fluid flowing through the hose.
- Tightening: Once no more air is visible, secure the bleeder screw.
- Repeat for All Calipers: Repeat this process for each bleeder, starting with the one furthest from the master cylinder.
- Fluid Check: Periodically check the brake fluid level in the master cylinder reservoir and top it off as needed to prevent air from being drawn into the system. Never let the master cylinder run dry!
Real-World Use: Troubleshooting Tips
Even with the right hose size, you might encounter issues during the bleeding process. Here are some common problems and their potential solutions:
- Air Bubbles Continue: If you keep seeing air bubbles even after repeated bleeding, check for leaks in the brake lines or fittings. Also, inspect the master cylinder for internal leaks.
- Spongy Pedal Persists: A spongy pedal after bleeding can indicate a more serious problem, such as a faulty master cylinder or a warped rotor.
- Bleeder Screw is Stuck: If the bleeder screw is stuck, try soaking it with penetrating oil for several hours before attempting to loosen it. If it still won't budge, consider replacing the caliper.
- Fluid Not Flowing: Ensure the bleeder screw is actually open. If it is, and no fluid is flowing, there might be a blockage in the brake line.
Safety Considerations
Brake fluid is corrosive and can damage painted surfaces. Wear eye protection and gloves when working with brake fluid. Clean up any spills immediately with water. The brake system is critical to vehicle safety. If you're unsure about any aspect of the bleeding process, consult a qualified mechanic.
Warning: Do not allow brake fluid to contact your skin or eyes. In case of contact, rinse immediately with plenty of water.
Caution: Be careful not to over-tighten the bleeder screws, as this can damage the threads in the caliper.
Diagram Download
For a visual aid, we've prepared a detailed diagram of a typical brake bleeding setup. This diagram illustrates the hose connections, bleeder screw location, and fluid flow path. You can download the diagram to assist you in your brake bleeding endeavors.