What Size Tubing To Bleed Brakes
Brake bleeding is a crucial maintenance procedure for any vehicle, ensuring optimal braking performance and safety. Selecting the correct tubing size for this process is essential for a successful and efficient bleed. This article will guide you through the intricacies of choosing the right tubing, covering the technical aspects and practical considerations.
Purpose of Correct Tubing Size
Using the appropriate tubing size when bleeding your brakes directly impacts several key areas:
- Efficiency: The right size provides a snug fit on the bleeder screw, preventing air from being drawn back into the system during the bleeding process.
- Seal Integrity: Correct tubing avoids over-tightening or stripping the bleeder screw threads, which can occur if the tubing is too loose and requires excessive clamping.
- Clear Observation: Transparent tubing allows you to visibly monitor the fluid being expelled, making it easy to identify air bubbles.
- Cleanliness: Proper tubing directs the brake fluid into a collection container, preventing spills and potential damage to paint or other sensitive components.
Key Specs and Main Parts
Tubing Material
Brake bleeding tubing is typically made from clear vinyl or silicone. Vinyl is a cost-effective option, while silicone offers better heat resistance and flexibility. Choose a material compatible with brake fluid (DOT 3, DOT 4, DOT 5, or DOT 5.1 depending on your vehicle’s specifications). Always verify compatibility to prevent deterioration of the tubing.
Inner Diameter (ID)
The ID of the tubing is the critical dimension. The most common sizes for brake bleeder screws are 3/16-inch (4.76mm) and 1/4-inch (6.35mm). However, bleeder screw sizes can vary depending on the vehicle make and model. It is advisable to measure the bleeder screw or consult your vehicle's service manual to determine the exact size.
Outer Diameter (OD)
The OD is less crucial but can affect how easily the tubing connects to a catch container or bleeder bottle. Ensure the OD is compatible with your chosen collection method.
Wall Thickness
A thicker wall provides greater durability and prevents the tubing from collapsing under suction if you're using a vacuum bleeder. However, excessively thick walls can reduce flexibility. A good balance is key.
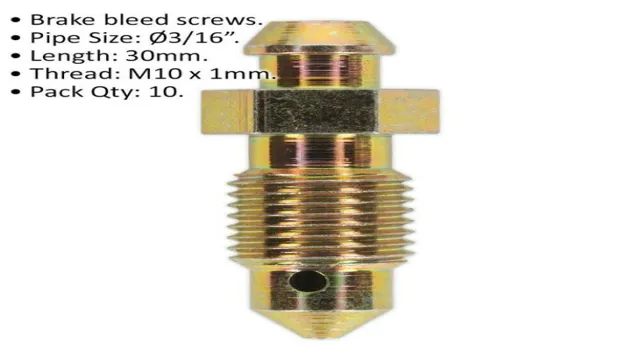
Bleeder Screw
The bleeder screw, also known as a bleeder valve, is a small valve located on each brake caliper or wheel cylinder. It allows you to release trapped air and old brake fluid from the brake lines.
Catch Container/Bleeder Bottle
A container to collect the old brake fluid as it is bled from the system. This prevents spills and environmental contamination. Many commercially available bleeder bottles incorporate a one-way valve to prevent backflow of air.
How It Works: The Bleeding Process
Brake bleeding involves forcing old fluid and air out of the brake lines by opening the bleeder screw while applying pressure to the brake pedal (or using a pressure bleeder). The general process is as follows:
- Preparation: Ensure the master cylinder is full of fresh brake fluid. Connect the correct size tubing to the bleeder screw. Place the other end of the tubing into a catch container partially filled with brake fluid. This prevents air from being drawn back in.
- Loosening: Using a wrench of the correct size (usually 8mm, 10mm, or 11mm), carefully loosen the bleeder screw. Be cautious not to overtighten or strip the screw threads. Apply penetrating oil if necessary, allowing it to soak for several minutes before attempting to loosen the screw.
- Bleeding: Have an assistant slowly depress the brake pedal several times, holding it down on the last stroke. While the pedal is depressed, open the bleeder screw. You should see fluid (and potentially air bubbles) flow through the tubing into the catch container.
- Closing: Before your assistant releases the brake pedal, close the bleeder screw. This prevents air from being sucked back into the system.
- Repeat: Repeat steps 3 and 4 until the fluid flowing through the tubing is clear and free of air bubbles.
- Tightening: Once the bleeding is complete, tighten the bleeder screw to the manufacturer's specified torque. Do not overtighten!
- Repeat for all wheels: Repeat the entire process for each brake caliper or wheel cylinder, following the correct bleeding sequence (usually starting with the wheel furthest from the master cylinder).
Real-World Use: Basic Troubleshooting Tips
Here are some common issues encountered during brake bleeding and how to address them:
- No Fluid Flow: Ensure the master cylinder is full and the bleeder screw is sufficiently open. Check for any kinks or obstructions in the brake lines or tubing. If you're using a pressure bleeder, verify that it's properly pressurized.
- Air Bubbles Persist: Check for loose connections or leaks in the brake lines or at the bleeder screw. Re-bleed the affected brake several times. If the problem persists, you may have a more serious issue, such as a faulty master cylinder or ABS module.
- Stripped Bleeder Screw: If the bleeder screw is stripped, you may need to replace the caliper or wheel cylinder. There are also bleeder screw repair kits available, but these are not always reliable.
- Bleeder Screw Won't Loosen: Apply penetrating oil and allow it to soak for several minutes. Use a six-point socket or wrench to avoid rounding off the bleeder screw. If it still won't budge, carefully apply heat with a heat gun (avoid open flame) to help loosen the corrosion.
Safety Precautions
Brake fluid is corrosive and can damage paint and other surfaces. Wear gloves and eye protection when working with brake fluid. Clean up any spills immediately with water.
- Brake Fluid Hazards: Brake fluid can damage painted surfaces and irritate skin and eyes. Always wear gloves and eye protection.
- Bleeder Screw Torque: Overtightening bleeder screws can strip the threads, leading to costly repairs. Use a torque wrench and follow manufacturer specifications.
- Contamination: Never allow dirt or other contaminants to enter the brake system. This can damage the master cylinder, calipers, and ABS module.
Risky Components
The master cylinder and the ABS module are critical and expensive components. Avoid running the master cylinder dry, as this can introduce air into the entire system, making bleeding more difficult. Exercise extreme caution when working around the ABS module, as it contains delicate electronic components. Improper handling can damage the module, requiring costly replacement. Never disconnect ABS components unless you're absolutely certain of the procedure.
Choosing the correct tubing size for bleeding your brakes is a small but crucial detail that can significantly impact the success of the procedure. By understanding the specifications and considerations outlined in this article, you can ensure a safe and effective brake bleeding process.
We have a detailed diagram that illustrates the brake bleeding process, including tubing connections and the proper bleeding sequence. It's a valuable resource that can further enhance your understanding. Contact us to download the file.