What You Need To Do An Oil Change
So, you're ready to tackle an oil change yourself? Excellent! It's one of the most crucial maintenance tasks you can perform to keep your engine running smoothly and prolong its lifespan. While it might seem straightforward, doing it right requires understanding the tools, fluids, and procedures involved. This article dives deep into what you need for a successful oil change, offering insights for the experienced DIYer.
Purpose: Keeping Your Engine Alive and Kicking
Changing your oil regularly is essential for several reasons. The primary purpose is to lubricate the engine's moving parts, reducing friction and wear. As oil circulates, it also picks up contaminants like dirt, metal shavings, and combustion byproducts. Over time, these contaminants degrade the oil's lubricating properties and can even cause damage to engine components. Regular oil changes remove these contaminants and replenish the oil with fresh, clean lubricant, ensuring optimal engine performance and longevity. Furthermore, clean oil helps to dissipate heat, preventing overheating and protecting critical engine components. Neglecting oil changes can lead to sludge buildup, reduced fuel efficiency, increased engine wear, and eventually, catastrophic engine failure. It's a relatively inexpensive task that yields significant long-term benefits.
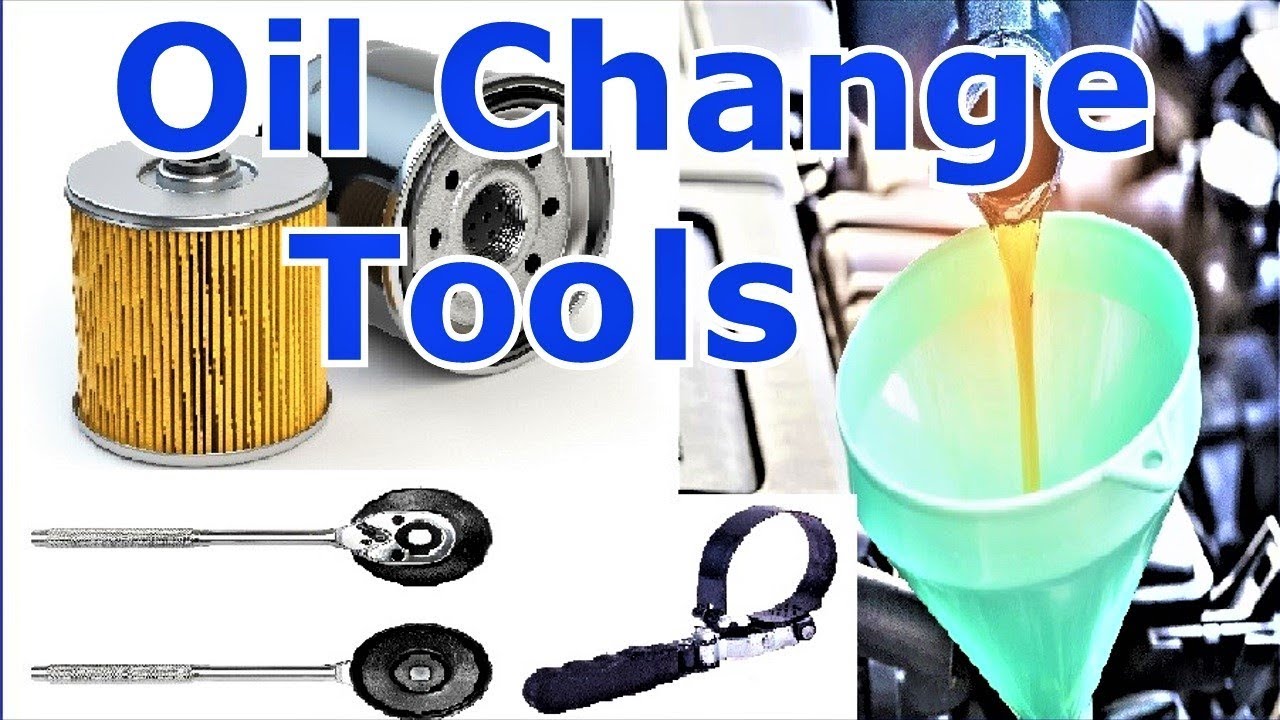
Key Specs and Main Parts: The Essential Inventory
Before you even think about crawling under your car, gather everything you need. Here's a breakdown of the essential items, including key specs to consider:
- New Engine Oil: This is arguably the most important component. Check your owner's manual or a reliable online resource (like the oil manufacturer's website) for the correct oil viscosity (e.g., 5W-30, 10W-40) and API rating (e.g., SN, SP). Using the wrong viscosity can lead to inadequate lubrication, especially in extreme temperatures. The API rating indicates the oil's ability to protect against engine wear and deposits. Use the manufacturer recommended oil to ensure peak performance.
- New Oil Filter: The oil filter removes contaminants from the oil as it circulates. Choose a filter that meets or exceeds the OEM (Original Equipment Manufacturer) specifications. Micron rating is a key spec – it indicates the size of particles the filter can trap. A lower micron rating means finer filtration. Also, consider the filter's flow rate to ensure adequate oil supply to the engine. High-quality filters often have better filtration media, construction, and backflow prevention.
- Oil Filter Wrench: These come in various styles (cap-type, strap-type, claw-type). Select the one that fits your specific oil filter size. Some oil filters have wrench flats on the end, where you can use a standard wrench or socket.
- Wrench for the Drain Plug: This will be a socket or box-end wrench of the correct size. Refer to your vehicle's repair manual to confirm the size of the drain plug.
- Drain Pan: A container to catch the old oil. Choose a pan with sufficient capacity to hold the entire volume of used oil from your engine. A pan with a spout makes disposal easier.
- Funnel: To pour the new oil into the engine without spilling.
- Jack and Jack Stands: Never work under a vehicle supported only by a jack. Jack stands provide crucial safety and stability. Ensure they are rated for the weight of your vehicle.
- Wheel Chocks: Place these behind the wheels to prevent the car from rolling.
- Gloves: Nitrile or latex gloves protect your hands from oil and grime.
- Rags or Shop Towels: For wiping up spills. Microfiber towels are excellent for this.
- Torque Wrench (Optional, but recommended): For tightening the drain plug and oil filter to the specified torque. Overtightening can damage the threads or the filter seal.
- New Drain Plug Washer (if required): Some vehicles use a crush washer that should be replaced with each oil change.
- Wheel nut wrench: To take the wheel off to get to the drain plug or the oil filter.
How It Works: The Step-by-Step Process
The oil change process itself involves a series of well-defined steps. First, you'll want to warm up your engine slightly. This helps the oil flow more freely, carrying contaminants out with it. However, do not overheat the engine. A warm engine is what you are aiming for. Then, safely lift the vehicle using a jack and secure it with jack stands. Locate the oil drain plug on the oil pan, and position the drain pan underneath. Carefully loosen and remove the drain plug, allowing the old oil to drain completely. While the oil is draining, remove the old oil filter. Lightly lubricate the rubber gasket on the new oil filter with fresh oil and install it, tightening it by hand according to the instructions on the filter (usually about ¾ to 1 full turn after the gasket makes contact). Once the oil has completely drained, install a new drain plug washer (if applicable) and reinstall the drain plug, tightening it to the specified torque. Lower the vehicle and add the correct amount of new oil using a funnel. Check the oil level with the dipstick and add more oil as needed to reach the proper level. Finally, start the engine and check for leaks around the drain plug and oil filter. Reset the oil life monitoring system (if equipped) and dispose of the used oil properly at a recycling center.
Real-World Use: Basic Troubleshooting Tips
Even with careful planning, issues can arise. Here are some common problems and solutions:
- Drain Plug Stuck: If the drain plug is stubbornly stuck, try using a penetrating oil and let it soak for a while. Avoid using excessive force, as you could damage the oil pan. If all else fails, consult a professional mechanic.
- Oil Filter Stuck: A stuck oil filter can be frustrating. Try using a different type of oil filter wrench, or tap the filter with a hammer to loosen it. As a last resort, you can carefully puncture the filter with a screwdriver and use it as a lever to unscrew the filter. Be prepared for a mess.
- Oil Leak After Change: Double-check that the drain plug and oil filter are properly tightened. Inspect the drain plug washer for damage and replace if necessary. If the leak persists, there may be a problem with the oil pan or filter housing.
- Oil Level Too High: If you overfill the engine with oil, it can cause serious damage. Drain the excess oil until the level is correct.
Safety: Respecting the Risks
Working on your car involves inherent risks. Here are crucial safety precautions:
- Secure the Vehicle: Always use jack stands when working under a vehicle. Never rely solely on a jack. Use wheel chocks to prevent rolling.
- Hot Exhaust: Be careful not to touch the exhaust system after the engine has been running. It can be extremely hot.
- Hot Oil: Used engine oil can be hot. Wear gloves and be cautious when draining the oil.
- Proper Ventilation: Work in a well-ventilated area to avoid breathing harmful fumes.
- Eye Protection: Wear safety glasses to protect your eyes from splashes and debris.
- Dispose of Oil Properly: Used engine oil is a hazardous waste. Do not pour it down the drain or onto the ground. Take it to a recycling center or auto parts store for proper disposal.
This guide provides a comprehensive overview of what you need to change your oil effectively. By understanding the purpose, components, and procedures involved, you can confidently perform this maintenance task and keep your engine running smoothly for years to come. Remember to always consult your vehicle's owner's manual for specific recommendations and torque specifications. This will help you get it right every time.