
12 Volt Voltage Regulator Wiring Diagram
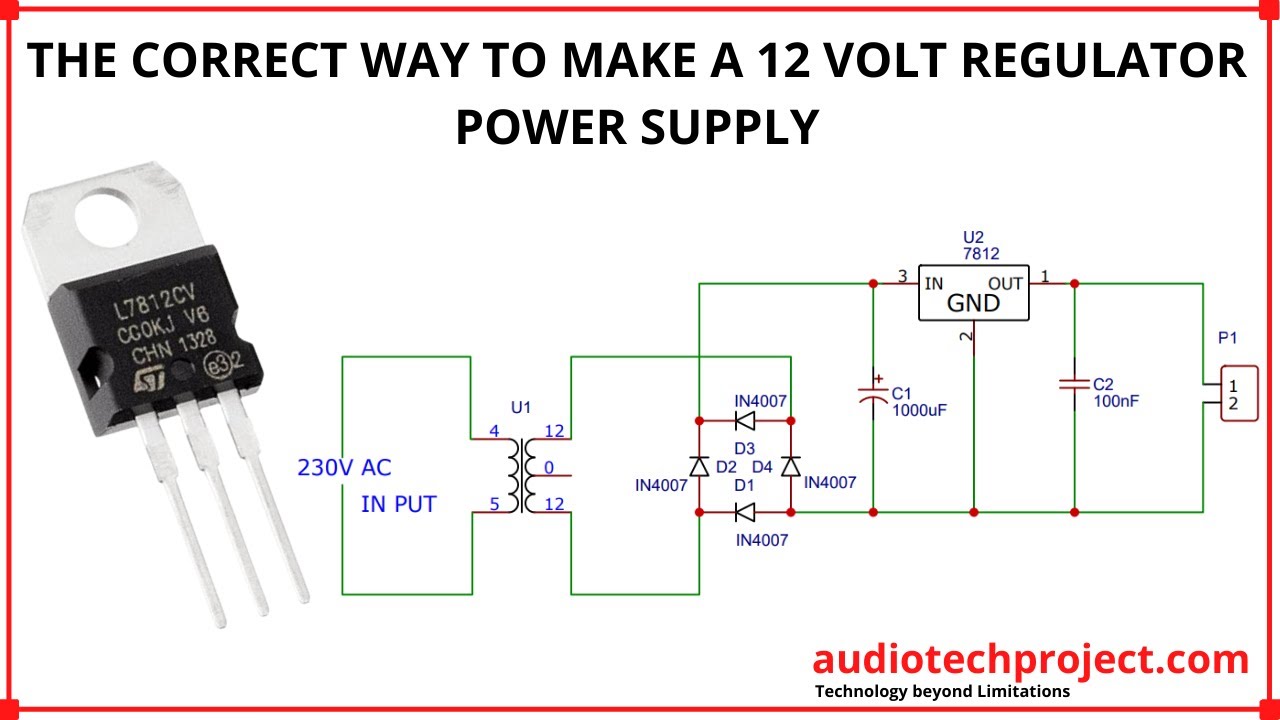
Let's dive into the world of 12-volt voltage regulators! Understanding their wiring diagrams is crucial for any seasoned DIYer, modder, or even a budding automotive mechanic. Whether you're troubleshooting charging issues, customizing your ride, or simply expanding your automotive knowledge, a solid grasp of these diagrams will prove invaluable. We're going to break down the components, symbols, and operational principles in a way that’s both technically accurate and easy to digest.
Purpose of a 12-Volt Voltage Regulator Wiring Diagram
Why bother learning about these diagrams? Simple. They're your roadmap to understanding, diagnosing, and repairing the charging system. Without it, you’re poking around blindly. This knowledge empowers you to:
- Diagnose charging system failures: Identify if the alternator, regulator, or wiring is faulty.
- Perform repairs: Replace a faulty regulator or repair damaged wiring with confidence.
- Undertake modifications: Upgrade your charging system for higher amperage demands or install aftermarket components.
- Learn about automotive electrical systems: Deepen your understanding of how a car's electrical system works, allowing you to tackle more complex projects.
Key Specifications and Main Parts
Before we jump into the diagram itself, let's identify the core components and understand their specs. A typical 12-volt voltage regulator circuit, as used in most modern vehicles, consists of:
- Alternator: The heart of the charging system, converting mechanical energy (from the engine) into electrical energy (AC), which is then rectified to DC. Its amperage output is a key spec (e.g., 60A, 100A, 150A).
- Voltage Regulator: This is the brains of the operation. Its primary function is to maintain a stable 12-14.7 volts DC output, preventing overcharging and protecting sensitive electrical components. Internal (integrated into the alternator) or external regulators are both common.
- Battery: Acts as a reservoir for electrical energy and provides power when the engine isn't running or when electrical demand exceeds the alternator's output. Its CCA (Cold Cranking Amps) and Ah (Ampere-hour) rating are important specs.
- Wiring Harness: The nervous system, connecting all components with wires of specific gauges (thickness) to handle the current flow.
- Fuses/Fusible Links: Safety devices that protect the circuit from overcurrent conditions. They're rated in Amps (e.g., 10A, 20A, 30A).
- Ground Connections: Critical for completing the circuit; ensures a return path for the current.
- Ignition Switch: A switch that provides power to the voltage regulator and other components when the ignition is turned on.
Understanding the Wiring Diagram Symbols
A voltage regulator wiring diagram might look intimidating at first, but it's simply a symbolic representation of the electrical circuit. Let’s decode the common symbols:
- Lines: Represent wires. Thicker lines generally indicate wires with higher current-carrying capacity (thicker gauge).
- Colors: Each color represents a specific wire, often with a standardized coding (e.g., Red = Battery, Black = Ground, Yellow = Ignition). Always consult the vehicle's service manual for specific color codes.
- Symbols for Components: Each component (resistors, capacitors, diodes, transistors, etc.) has a specific schematic symbol.
- Circles: Often represent connection points or terminals.
- Ground Symbol: Typically looks like three lines decreasing in size, indicating a connection to the vehicle's chassis (ground).
- Battery Symbol: Series of long and short parallel lines.
- Alternator Symbol: Usually contains a sine wave within a circle.
- Fusible Link Symbol: A line with a loop in the middle.
Important Tip: Always refer to the specific wiring diagram for your vehicle's make, model, and year. General diagrams can be helpful, but specific diagrams are crucial for accurate troubleshooting and repair.
How It Works: A Simplified Explanation
Here's the basic flow of electricity in a typical 12-volt charging system:
- The engine turns the alternator.
- The alternator generates AC voltage, which is then converted to DC voltage.
- The voltage regulator senses the battery's voltage.
- If the battery voltage is low, the regulator allows more current to flow from the alternator to the battery.
- If the battery voltage is high (nearing full charge), the regulator reduces the current flow from the alternator.
- This constant adjustment ensures the battery is properly charged without overcharging, and that the vehicle's electrical system has the voltage it needs to operate properly.
The voltage regulator controls the field current in the alternator. By varying the field current, it controls the alternator's output voltage. If the field current increases, the output voltage increases, and vice versa. Some regulators also have a voltage sensing wire that directly monitors the battery voltage to improve regulation accuracy.
Real-World Use: Basic Troubleshooting Tips
Armed with a wiring diagram, you can tackle common charging system problems. Here are a few basic troubleshooting tips:
- No Charge: Check the fuses. If a fuse is blown, replace it with one of the correct amperage rating. If it blows again immediately, there's a short circuit. Use the wiring diagram to trace the circuit and find the short. Check ground connections for corrosion.
- Overcharging: An overcharging battery is dangerous! It can damage the battery and other electrical components. The voltage regulator is the prime suspect. Use a multimeter to measure the voltage at the battery terminals while the engine is running. It should be within the specified range (typically 13.5-14.7 volts). If it's higher, the regulator is likely faulty.
- Battery Not Holding Charge: While not directly related to the voltage regulator, a faulty charging system can contribute to this problem. A battery that is constantly undercharged or overcharged will have a shorter lifespan. Get the battery load tested before replacing it. Then, check the regulator and alternator output.
- Using a Multimeter: Learn how to use a multimeter (voltmeter, ammeter, ohmmeter) to test voltage, current, and resistance. It's an essential tool for diagnosing electrical problems. Refer to your multimeter's user manual for instructions.
Safety First!
Working with automotive electrical systems can be dangerous. Here are some important safety precautions:
- Disconnect the Battery: Always disconnect the negative battery cable before working on the electrical system to prevent accidental shorts and electrical shocks.
- Use Proper Tools: Use insulated tools specifically designed for automotive electrical work.
- Avoid Working in Wet Conditions: Water conducts electricity, increasing the risk of electric shock.
- Handle Batteries Carefully: Batteries contain sulfuric acid, which is corrosive. Wear safety glasses and gloves when working with batteries.
- Identify High-Current Components: Be aware of components that carry high currents, such as the alternator, starter motor, and battery cables. These components can generate heat and pose a burn hazard.
Remember: The alternator's output is high voltage and high amperage. Shorting the alternator's output can cause serious damage to the electrical system and potentially start a fire.
Conclusion
Understanding 12-volt voltage regulator wiring diagrams is a valuable skill for any automotive enthusiast. By familiarizing yourself with the components, symbols, and operational principles, you can confidently diagnose and repair charging system problems, saving time and money. Always prioritize safety and consult the specific wiring diagram for your vehicle. Happy wrenching!
And remember, we have a sample wiring diagram available for download! It will help reinforce everything we've discussed here. Simply [provide a way for the reader to access or request the diagram - e.g., "click here to download," "contact us for the diagram," or "look for the link in the comments below"].