2013 Nissan Altima 2.5 Belt Diagram
For the seasoned DIYer, maintaining a vehicle like the 2013 Nissan Altima 2.5L requires a good understanding of its systems. One crucial component is the serpentine belt system. Having a reliable belt diagram at your disposal is invaluable for various reasons, from routine maintenance to diagnosing and rectifying issues with your car's accessories. This article serves as a comprehensive guide to understanding the 2013 Nissan Altima 2.5L serpentine belt diagram, breaking down its components, functionality, and practical applications.
Purpose of a Serpentine Belt Diagram
A serpentine belt diagram is your roadmap to understanding the belt routing. Its purpose extends beyond simple belt replacement. It’s useful for:
- Maintenance and Inspection: Identifying the proper belt path ensures correct installation after inspection or replacement.
- Troubleshooting: Diagnosing issues such as squealing noises or accessory malfunctions (power steering, air conditioning, charging system) can be significantly aided by understanding the belt's role.
- Repair: When replacing a failing component (e.g., the alternator), the diagram will guide you through the proper belt removal and reinstallation procedure.
- Learning: Familiarizing yourself with the engine layout and accessory drive system.
Key Specs and Main Parts of the 2013 Altima 2.5L Serpentine Belt System
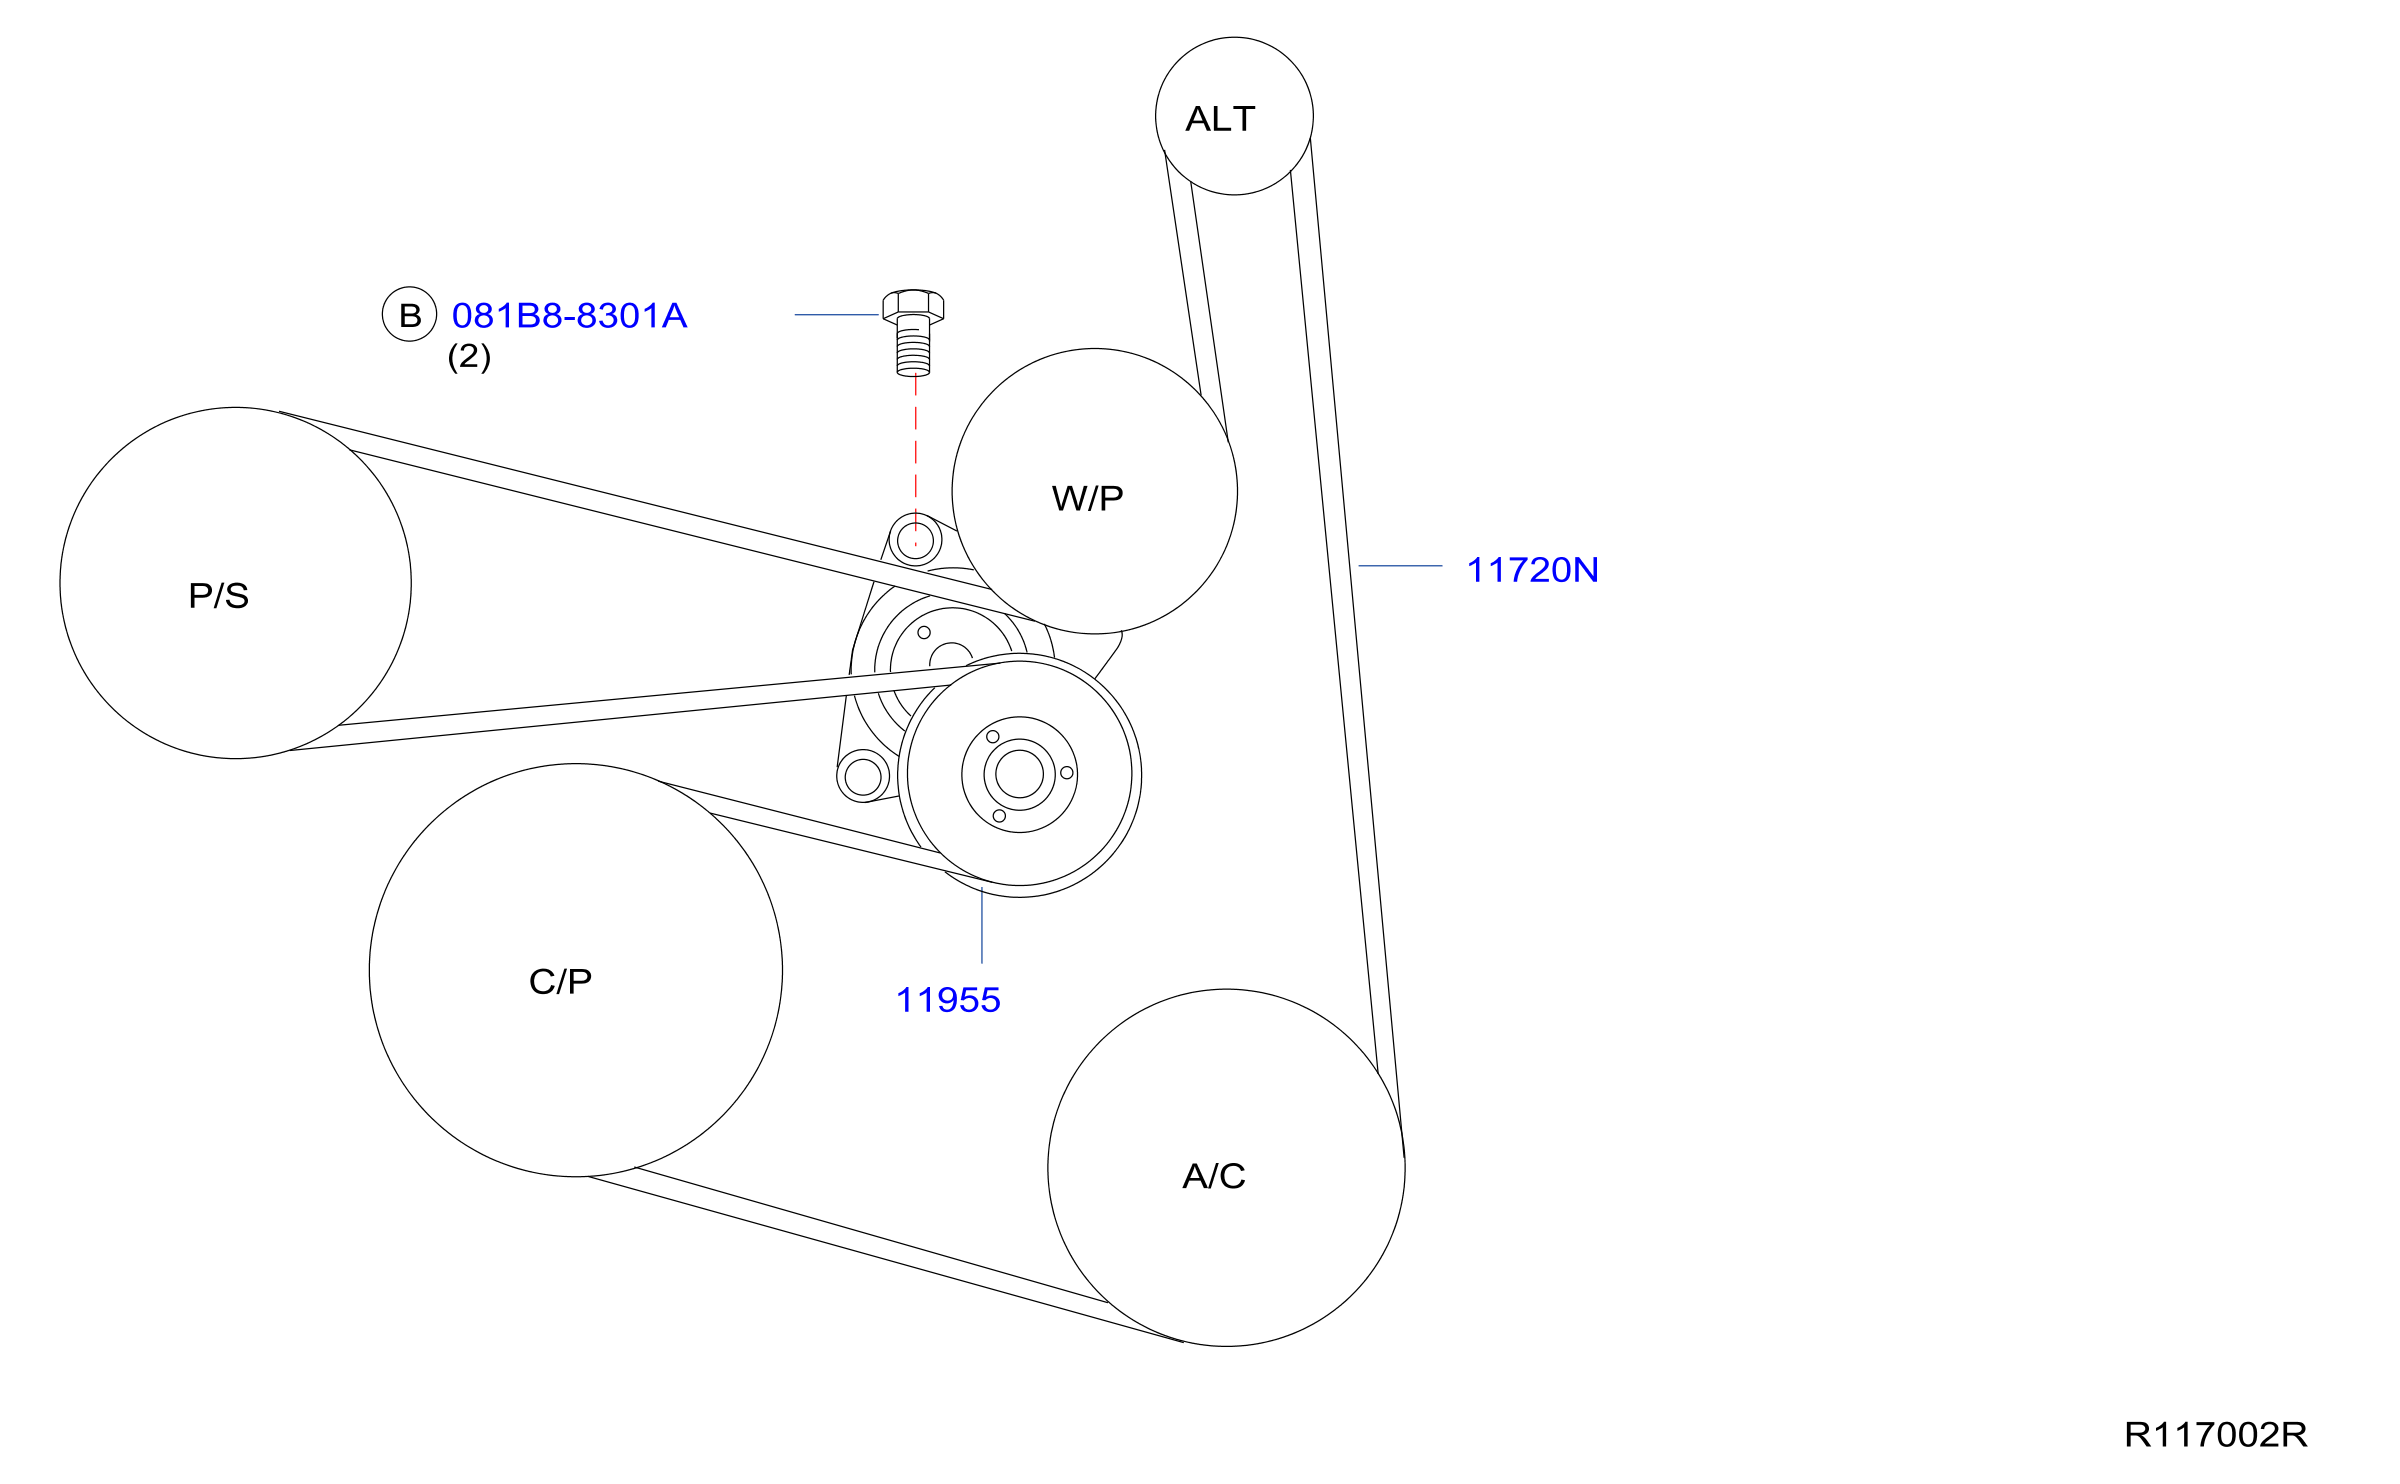
The 2013 Nissan Altima 2.5L utilizes a single serpentine belt to drive multiple engine accessories. Understanding the components involved is crucial for effective troubleshooting and repair.
Main Components:
- Serpentine Belt: A long, continuous belt made of reinforced rubber, responsible for transferring power from the crankshaft to the various accessories. Look for cracking, fraying, or glazing as signs of wear.
- Crankshaft Pulley (Damper): Located at the bottom of the engine, this pulley receives power directly from the engine's crankshaft and drives the serpentine belt.
- Alternator Pulley: Drives the alternator, responsible for charging the battery and powering the vehicle's electrical system.
- Power Steering Pump Pulley: Drives the power steering pump, providing hydraulic assistance for steering.
- Air Conditioning Compressor Pulley: Drives the AC compressor, responsible for cooling the cabin.
- Idler Pulleys: Smooth, bearing-equipped pulleys that guide the belt and maintain proper tension and routing. They don’t drive any specific accessory.
- Tensioner Pulley: A spring-loaded pulley that maintains the correct tension on the serpentine belt. Crucially important for preventing slippage and ensuring optimal accessory performance. The tensioner often incorporates a mechanism for easy belt removal and installation (typically a square or hexagonal hole to accept a wrench).
Belt Length: While specifics can vary slightly based on the exact model, a typical serpentine belt for the 2013 Altima 2.5L engine is usually around 85-87 inches long. Always verify the correct part number with your vehicle's VIN to ensure proper fitment.
Symbols and Conventions in the Serpentine Belt Diagram
Belt diagrams aren't complex, but understanding the symbols makes them even easier to use:
- Solid Lines: Represent the path of the serpentine belt. The thickness of the line doesn't usually denote anything specific.
- Pulleys: Typically represented as circles. Some diagrams may label each pulley with abbreviations like "ALT" for Alternator, "P/S" for Power Steering, "A/C" for Air Conditioning, "CRANK" for Crankshaft, "IDL" for Idler, and "TENS" for Tensioner.
- Arrows: Indicate the direction of rotation of each pulley. This is particularly important when verifying the belt routing.
- Tensioner Location: The tensioner pulley is usually identified with a spring symbol or an arrow indicating the direction in which it applies tension to the belt.
How the Serpentine Belt System Works
The serpentine belt system is a marvel of engineering simplicity and efficiency. The crankshaft pulley, powered directly by the engine, drives the serpentine belt. This belt, in turn, wraps around various accessory pulleys, transferring rotational energy to each component. The tensioner pulley ensures the belt maintains proper tension, preventing slippage and optimizing the performance of each accessory. The order in which the belt wraps around the pulleys is strategically designed to distribute the load and maximize efficiency. A properly tensioned and routed belt is crucial for the reliable operation of the Altima's vital systems.
Real-World Use and Basic Troubleshooting
A serpentine belt diagram is most useful during troubleshooting. Here are a few common issues and how the diagram helps:
- Squealing Noise: A squealing noise often indicates a slipping belt. Use the diagram to inspect the belt's condition and tension. Check for cracks, glazing, or excessive wear. Ensure the tensioner is functioning correctly. A weak tensioner spring can cause belt slippage.
- Accessory Malfunction: If the power steering, air conditioning, or charging system isn't working properly, the belt could be the culprit. Verify the belt is properly routed and has sufficient tension. Check that the pulley for the affected accessory is rotating.
- Belt Replacement: When replacing the belt, use the diagram to ensure the new belt is routed correctly. Incorrect routing can damage the belt or accessories. It can also lead to the accessories not working properly.
Example Scenario: You notice your Altima's power steering is intermittent. Consulting the diagram, you confirm the serpentine belt drives the power steering pump. You then inspect the belt and find it is loose and glazed. Using the diagram as a reference, you can relieve tension on the tensioner pulley, remove the old belt, and install a new one, ensuring it follows the correct path as illustrated. After proper tensioning, your power steering should be restored.
Safety Considerations
Working on the serpentine belt system can be dangerous if proper precautions aren't taken. Always disconnect the negative battery cable before working on the system to prevent accidental starting of the engine. Be mindful of the following:
- Moving Parts: The engine must be OFF when working near the serpentine belt. Even a brief engine start can cause serious injury.
- Hot Components: The engine and exhaust components can be extremely hot. Allow the engine to cool completely before working on the serpentine belt system.
- Tensioner Spring: The tensioner spring is under significant pressure. Use the correct tool and technique to relieve tension to prevent injury.
- Sharp Edges: Be cautious of sharp edges on pulleys and other engine components. Wear gloves to protect your hands.
High-Risk Components: The crankshaft pulley and the tensioner pulley pose the highest risk. The crankshaft pulley is directly connected to the engine's rotating assembly, and the tensioner spring can release suddenly if not handled carefully. Be particularly careful when working near these components.
Having a readily available and accurate serpentine belt diagram is an indispensable tool for maintaining your 2013 Nissan Altima 2.5L. It allows you to confidently diagnose problems, perform maintenance, and ensure the reliable operation of your vehicle's accessory drive system.
We have a high-resolution PDF file of the 2013 Nissan Altima 2.5L Serpentine Belt Diagram available for download. This detailed diagram will provide you with a clear visual aid for all your maintenance and repair needs. Please [insert link or instructions here on how to obtain the file].