1994 Chevy Silverado Wiring Harness Diagram
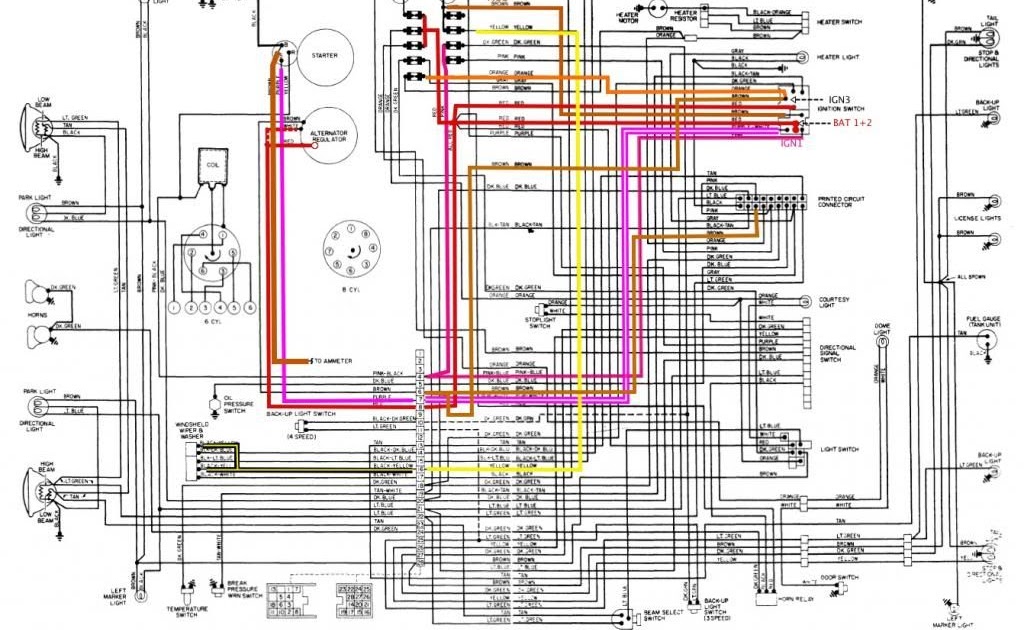
The 1994 Chevy Silverado. A workhorse, a classic, and a vehicle that many DIYers still cherish. But even the most reliable truck can face electrical gremlins. That's where the wiring harness diagram comes in. This isn't just a pretty picture; it's your roadmap to understanding, troubleshooting, and even modifying your Silverado's electrical system.
Purpose of the 1994 Chevy Silverado Wiring Harness Diagram
Why bother with a wiring diagram? Simple: without it, you're flying blind when dealing with electrical issues. Think of it as the schematic for your truck's nervous system. The diagram serves several crucial purposes:
- Troubleshooting Electrical Problems: A non-working headlight? A malfunctioning sensor? The diagram helps you trace the circuit, pinpointing the faulty component or broken wire.
- Repairing Damaged Wiring: Accidents happen. A frayed wire or a cut harness can cause all sorts of havoc. The diagram shows you how the wiring should be connected, allowing you to make proper repairs.
- Installing Aftermarket Accessories: Adding a new stereo, lights, or other electrical accessories requires tapping into the existing wiring. The diagram helps you identify the correct wires to connect to, preventing damage to your truck's electrical system.
- Understanding Your Truck's Electrical System: Even if everything's working perfectly, studying the diagram gives you a deeper understanding of how your Silverado's electrical system is designed and functions.
- Diagnosing Computer-Related Issues: Many of the sensors and actuators on the 1994 Silverado are connected to the truck's computer (the Powertrain Control Module or PCM). The wiring diagram shows how these components are connected, which is essential for diagnosing computer-related problems.
Key Specs and Main Parts
Before diving in, let's discuss some key aspects and components of the 1994 Silverado's wiring system. The 1994 Silverado uses a 12-volt DC electrical system, standard for most vehicles. This means all the components are designed to operate on 12 volts of direct current.
Here's a breakdown of the major parts you'll encounter in the wiring diagram:
- Power Distribution: Starting from the battery, the diagram shows how power is distributed throughout the truck via fuses, circuit breakers, and relays. These are the safety nets of the electrical system, protecting components from overloads.
- Engine Management System: This section covers the wiring for the engine's sensors (like the Mass Airflow Sensor or MAF, Oxygen Sensors, and Crankshaft Position Sensor), actuators (like the fuel injectors and ignition coil), and the PCM.
- Transmission System: For automatic transmissions, the diagram illustrates the wiring for the transmission control module (TCM) and its associated sensors and solenoids.
- Body Electrical: This includes wiring for lights (headlights, taillights, turn signals), interior lights, power windows, power locks, and the instrument panel.
- Charging System: This part shows the wiring for the alternator, which recharges the battery while the engine is running.
- Starting System: This includes the wiring for the starter motor and the solenoid, which are responsible for cranking the engine.
- Grounding Points: Crucially important, these points show where the electrical system connects to the vehicle's chassis for a return path to the battery. Poor grounding can cause a multitude of electrical problems.
Understanding Wiring Diagram Symbols
Wiring diagrams use a standardized set of symbols to represent electrical components and connections. Understanding these symbols is essential for interpreting the diagram correctly.
- Lines: Solid lines represent wires. Dashed lines may represent shielded wires or connections to ground. The thickness of the line usually doesn't represent wire gauge.
- Colors: Wires are often color-coded in the diagram. Common colors include red (power), black (ground), blue, green, yellow, and white. The color code helps you identify the correct wire in the harness. For instance, a red wire with a white stripe (Red/White) might indicate a specific power source.
- Components: Symbols represent various electrical components. A zigzag line represents a resistor, a circle with an "X" represents a lamp (light bulb), a rectangle represents a relay, and a capacitor is typically represented with two parallel lines.
- Connectors: Connectors are shown as blocks or circles with numbers or letters inside. These indicate the specific connector that joins different sections of the wiring harness.
- Ground Symbols: Different symbols represent different types of ground connections. A series of decreasing lines connected to a point is a common ground symbol.
- Fuses and Circuit Breakers: Fuses are typically represented by a small rectangle with a line through it, while circuit breakers may have a more complex symbol.
It is crucial to consult the diagram's legend to understand all the symbols used.
How It Works: Tracing a Circuit
The key to using a wiring diagram is tracing circuits. Let's say you're troubleshooting a non-functional turn signal.
- Locate the Turn Signal Circuit: Find the section of the diagram that covers the turn signals.
- Identify the Components: Locate the turn signal switch, the flasher unit (relay), the turn signal bulbs, and any relevant fuses.
- Trace the Power Flow: Follow the power flow from the battery (via a fuse) to the turn signal switch. Then, follow the wiring from the switch to the flasher unit, and from the flasher unit to the turn signal bulbs.
- Look for Breaks: As you trace the circuit, look for any breaks in the wiring, such as open fuses, corroded connectors, or damaged wires. Use a multimeter to test for voltage and continuity. Continuity means that electricity can flow uninterrupted through a wire.
- Consult Ground Points: Ensure all related ground points are clean and securely connected. A faulty ground can mimic a multitude of electrical problems.
Real-World Use: Basic Troubleshooting Tips
Here are some practical tips for using the wiring diagram for troubleshooting:
- Start Simple: Check the fuses first. A blown fuse is often the easiest fix.
- Use a Multimeter: A multimeter is an essential tool for electrical troubleshooting. It can measure voltage, current, and resistance.
- Inspect Connectors: Corroded or loose connectors are a common cause of electrical problems. Clean and tighten any suspicious connectors. Use dielectric grease to prevent future corrosion.
- Check Ground Points: Make sure all ground points are clean and securely connected to the chassis.
- Isolate the Problem: If you're unsure where the problem lies, try isolating the circuit by disconnecting components one at a time.
- Refer to Technical Service Bulletins (TSBs): TSBs are issued by manufacturers to address common problems. They may provide valuable information about known issues with the 1994 Silverado's electrical system.
Safety Precautions
Working with automotive electrical systems can be dangerous. Here are some important safety precautions:
- Disconnect the Battery: Always disconnect the negative battery cable before working on the electrical system. This prevents accidental shorts and shocks.
- Avoid Working on Live Circuits: If possible, avoid working on circuits with the battery connected. If you must work on a live circuit, use extreme caution and wear appropriate safety gear.
- Be Careful with Airbags: The 1994 Silverado is equipped with airbags. Be extremely careful when working near the airbag control module or wiring. Accidental deployment of an airbag can cause serious injury. Disconnecting the battery and waiting several minutes before working on the airbag system is generally recommended (consult your Silverado's service manual for specific procedures).
- Fuel System: Be extremely cautious when working near fuel system components (fuel pump, fuel injectors). Fuel is highly flammable.
- Wear Safety Glasses: Protect your eyes from flying debris and chemicals.
- Use Insulated Tools: Use insulated tools to prevent electrical shocks.
Remember that even seemingly simple electrical problems can have complex causes. If you're not comfortable working on the electrical system, it's best to consult a qualified mechanic.
Having access to the 1994 Chevy Silverado wiring harness diagram is a game-changer for anyone looking to understand, repair, or modify their truck's electrical system. We have a digital copy of the diagram available for download. It's a valuable resource that can save you time, money, and frustration when dealing with electrical issues.