1997 Jeep Wrangler Wiring Diagram Pdf
The 1997 Jeep Wrangler TJ wiring diagram is an essential tool for anyone tackling electrical repairs, modifications, or even just trying to understand how the various systems in their Jeep function. This isn't just some pretty picture; it's a roadmap to the electrical nervous system of your vehicle. Whether you're chasing down a short circuit, installing aftermarket accessories, or diagnosing a malfunctioning sensor, having a clear and accurate wiring diagram is paramount.
Purpose of the Wiring Diagram
At its core, a wiring diagram illustrates the electrical circuits within your vehicle. Think of it as a visual language that translates complex electrical connections into a simplified, easy-to-follow format. The primary purposes of a 1997 Jeep Wrangler wiring diagram are:
- Troubleshooting Electrical Problems: By tracing circuits, you can pinpoint the exact location of a fault, whether it's a broken wire, a faulty connector, or a short to ground.
- Performing Repairs: Once you've identified the problem, the diagram guides you on how to properly repair or replace the affected components.
- Installing Aftermarket Accessories: Whether you're adding new lights, a stereo system, or other electronic devices, the diagram helps you understand where to tap into the existing electrical system safely and effectively.
- Understanding Vehicle Systems: Even if you're not actively working on your Jeep, studying the wiring diagram can give you a deeper understanding of how the various electrical systems (e.g., ignition, lighting, fuel injection) interact.
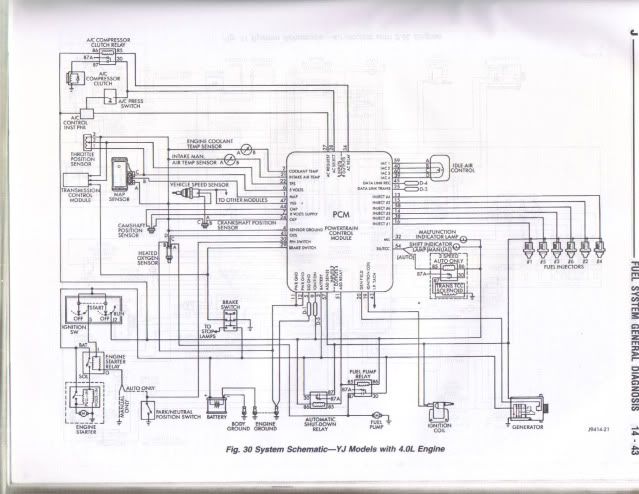
Key Specs and Main Parts of the 1997 Jeep Wrangler Electrical System
The 1997 Jeep Wrangler TJ utilizes a 12-volt DC electrical system. Understanding the key components of this system is crucial before diving into the wiring diagram:
- Battery: The primary power source, typically a 12-volt lead-acid battery.
- Alternator: Keeps the battery charged while the engine is running. Its output is crucial for supplying power to all electrical components. A failing alternator can cause a multitude of electrical issues.
- Starter Motor: Cranks the engine to initiate combustion.
- Fuse Box(es): Contain fuses and relays that protect circuits from overloads and control various electrical functions. The TJ has both an under-hood fuse box and one typically located inside the cabin.
- Wiring Harnesses: Bundles of wires that connect various electrical components throughout the vehicle. These harnesses are often wrapped in protective tape or conduit.
- Connectors: Allow for easy connection and disconnection of wiring harnesses and components. These are prime spots for corrosion and can cause intermittent electrical problems.
- Sensors: Gather data about engine performance, vehicle speed, and other parameters. These send signals to the PCM (Powertrain Control Module).
- Actuators: Respond to commands from the PCM to control various functions, such as fuel injectors and ignition timing.
- PCM (Powertrain Control Module): The "brain" of the engine management system, controlling fuel injection, ignition timing, and other functions based on sensor inputs.
- Grounds: Every circuit needs a path back to the negative terminal of the battery. Clean, secure ground connections are vital for proper electrical function.
Understanding the Symbols and Conventions
Wiring diagrams use a standardized set of symbols and conventions to represent electrical components and connections. Here are some common ones you'll encounter in the 1997 Jeep Wrangler TJ wiring diagram:
- Lines: Represent wires. Thicker lines may indicate heavier gauge wires, capable of carrying more current. Dashed lines often indicate shielded wiring or communication buses.
- Colors: Wires are color-coded to aid in identification. For example, a red wire might be power, while a black wire is typically ground. The diagram will include a color code legend.
- Ground Symbols: Indicate a connection to the vehicle's chassis ground.
- Fuse Symbols: Represent fuses, which are safety devices that protect circuits from overcurrent.
- Relay Symbols: Show relays, which are electrically operated switches used to control high-current circuits with a low-current signal.
- Component Symbols: Each component (e.g., headlight, sensor, motor) has its own unique symbol. Refer to the diagram's legend for a complete listing.
- Splices: Indicate where two or more wires are joined together.
- Connectors: Shown as a symbol where two harnesses mate, often includes a connector number that can be cross-referenced in the repair manual.
It's important to consult the legend provided with the wiring diagram to fully understand the symbols and conventions used. The legend is your key to deciphering the diagram's language.
How It Works: Following a Circuit
To effectively use a wiring diagram, you need to understand how to follow a circuit. Let's take a simple example: the headlight circuit.
- Start at the Power Source: Trace the circuit from the battery, through the fuse box (where it's protected by a fuse), and then to the headlight switch.
- Follow the Switch: The headlight switch controls the flow of electricity to the headlights. When the switch is turned on, it completes the circuit.
- Trace to the Headlights: From the switch, the current flows through the wires to the headlights.
- Complete the Circuit: The headlights illuminate, and the current flows through the ground wire back to the battery, completing the circuit.
By following the wires and symbols on the diagram, you can trace the entire circuit and identify any potential points of failure.
Real-World Use: Basic Troubleshooting Tips
Here are some practical troubleshooting tips using the 1997 Jeep Wrangler TJ wiring diagram:
- No Power to a Component: If a component isn't working, start by checking the fuse associated with that circuit. Use the diagram to locate the correct fuse. If the fuse is blown, replace it. If it blows again immediately, there's a short circuit somewhere in the wiring.
- Short Circuit: A short circuit occurs when a wire accidentally touches ground. Use the wiring diagram to trace the circuit and look for damaged wires or exposed terminals that could be contacting the chassis. Pay particular attention to areas where the wiring harness rubs against metal.
- Open Circuit: An open circuit occurs when a wire is broken or disconnected. Use a multimeter to check for continuity (a complete electrical path) along the circuit.
- High Resistance: Corroded connections or damaged wires can create high resistance, reducing the voltage reaching the component. Clean connectors and repair or replace damaged wiring.
- Intermittent Problems: These can be the most difficult to diagnose. Often, they are caused by loose connections or frayed wires that only make contact intermittently. Wiggling the wiring harness while monitoring the component's operation can sometimes help pinpoint the problem area.
Remember to always disconnect the battery's negative terminal before working on any electrical components to prevent accidental shorts or shocks.
Safety Considerations
Working with automotive electrical systems can be dangerous if proper precautions are not taken. Always disconnect the battery's negative terminal before starting any electrical work. Be especially cautious when working with the following components:
- Airbag System: Mishandling the airbag system can result in accidental deployment, causing serious injury. Refer to the service manual for specific safety procedures before working on any airbag-related components.
- Fuel Injection System: The fuel injection system operates at high pressure and contains flammable fuel. Take precautions to prevent fuel leaks and avoid sparks or open flames.
- High-Voltage Components (Ignition System): The ignition system generates high voltage that can deliver a painful and potentially dangerous shock. Avoid touching ignition components while the engine is running.
Using insulated tools and wearing safety glasses are also essential safety practices.
The 1997 Jeep Wrangler TJ wiring diagram is an invaluable resource for diagnosing and repairing electrical problems. By understanding the symbols, conventions, and basic troubleshooting techniques, you can confidently tackle a wide range of electrical tasks on your Jeep. With a systematic approach and a healthy dose of caution, you can keep your Jeep running smoothly and reliably.
We have the complete 1997 Jeep Wrangler TJ wiring diagram PDF file readily available for download. This comprehensive resource will provide you with detailed schematics, component locations, and color-coded wiring information, empowering you to confidently tackle any electrical repair or modification on your Jeep. Happy wrenching!