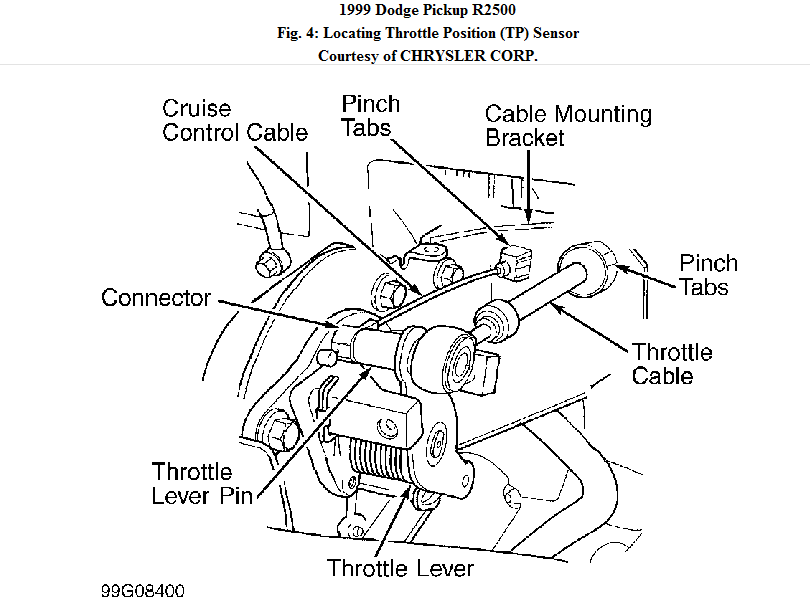
1999 Dodge Ram 2500 Cummins Throttle Position Sensor Diagram
Alright, let's dive into the Throttle Position Sensor (TPS) diagram for a 1999 Dodge Ram 2500 Cummins. This is a critical component for smooth engine operation, and understanding its wiring is essential for diagnosing issues, performing repairs, or even modding your rig. We're going to approach this like a seasoned mechanic walking you through it. We have the actual diagram file, and you can download it at the end of this article.
Purpose of the Diagram
Why do you need this diagram? Simple. Your TPS is the linchpin between your foot on the accelerator and the engine's response. Without accurate data from the TPS, your engine's Electronic Control Module (ECM), sometimes called the Powertrain Control Module (PCM), won't know how much fuel to inject. This can lead to a whole host of problems, including:
- Poor fuel economy
- Hesitation or stumbling during acceleration
- Rough idling
- Check Engine Light (CEL) illuminated
- Transmission shifting issues (especially in automatic transmissions)
Having the TPS wiring diagram allows you to:
- Properly diagnose TPS issues.
- Test the TPS and its wiring using a multimeter.
- Repair damaged wiring.
- Confirm correct wiring after modifications or repairs.
- Understand how the TPS integrates with the overall engine management system.
Key Specs and Main Parts
The 1999 Dodge Ram 2500 Cummins TPS is typically a three-wire sensor. It's important to note that while aftermarket sensors might look similar, they may have slightly different wiring configurations. Always refer to the diagram specific to your truck's year and engine.
Here's a breakdown of the key parts and specs:
- TPS Sensor Body: The physical sensor itself, usually mounted on the throttle body or injection pump. It contains a potentiometer that varies resistance based on throttle position.
- Connector: The electrical connector that plugs into the TPS. This is where the wires are connected.
- Wires: Typically three wires, each serving a specific purpose:
- 5V Reference Voltage: This wire provides a stable 5-volt power supply from the ECM to the TPS. This is a *critical* voltage for proper sensor operation.
- Ground: This wire provides a ground connection for the TPS, completing the circuit.
- Signal Wire: This wire carries the variable voltage signal *back to the ECM*. The voltage changes as the throttle is opened or closed. This signal is what the ECM uses to determine throttle position.
- Voltage Range: The signal wire voltage should typically range from approximately 0.5V at idle to 4.5V at wide-open throttle (WOT). These values can vary slightly.
- Resistance Range: The potentiometer's resistance changes with the throttle position. While directly measuring resistance isn't always the best diagnostic method, knowing the expected range can be helpful. Refer to the service manual for exact resistance values for your specific engine code.
Symbols and Conventions (Reading the Diagram)
A TPS wiring diagram, like any schematic, uses standard symbols to represent electrical components and connections. Here's a guide to common symbols you'll encounter:
- Solid Lines: Represent wires. The thickness of the line doesn't usually indicate wire gauge, but it can sometimes be used to differentiate between power and signal lines.
- Dashed Lines: Can indicate shielding, grounding, or a connector housing.
- Circles or Dots: Indicate wire splices or connections. A dot where lines cross means they are connected electrically. If there's no dot, the lines simply cross without making contact.
- Rectangles: Often represent components like the ECM or relays.
- Ground Symbol (typically three horizontal lines, decreasing in length): Indicates a connection to ground (chassis or engine block).
- Component Symbols: The TPS itself will likely be represented by a symbol resembling a variable resistor (potentiometer). The ECM will be shown as a rectangular box with pin numbers and labels indicating the input and output signals.
- Color Codes: Wires are usually identified by color codes (e.g., "GRN/WHT" for Green with a White stripe). Refer to the diagram's legend for a complete list of color codes and their abbreviations. *This is crucial for identifying the correct wires.*
How It Works: From Throttle to ECM
The TPS works on a simple principle: variable resistance. Here's the sequence of events:
- You press the accelerator pedal.
- This rotates the throttle shaft (or actuates the injection pump linkage).
- The TPS, mechanically linked to the throttle shaft, rotates its internal wiper arm across a resistive track.
- As the wiper arm moves, the resistance between the 5V reference voltage and the signal wire changes.
- This changing resistance alters the voltage on the signal wire.
- The ECM reads this voltage signal.
- Based on the voltage signal, the ECM determines the throttle position.
- The ECM then adjusts fuel injection, ignition timing, and other parameters to match the desired engine output.
Think of it like a dimmer switch for your engine. The TPS is the dimmer switch, and the ECM is the light controller, adjusting the brightness (engine power) based on the dimmer's setting (throttle position).
Real-World Use: Basic Troubleshooting Tips
Here's how you can use the TPS wiring diagram to troubleshoot common problems:
- Visual Inspection: Start by visually inspecting the TPS connector and wiring for any signs of damage, corrosion, or loose connections. Pay close attention to the insulation on the wires.
- Voltage Testing: Using a multimeter, check the voltage at the TPS connector with the ignition key on but the engine off. You should see approximately 5V on the reference voltage wire. Also, verify that the ground wire has a good connection to ground (0 ohms resistance to chassis).
- Signal Wire Voltage Sweep: Backprobe the signal wire (with the connector plugged in) and slowly open the throttle. The voltage should smoothly increase from approximately 0.5V at idle to 4.5V at WOT. Any sudden jumps, dropouts, or flat spots in the voltage reading indicate a faulty TPS.
- Continuity Testing: With the ignition OFF and the TPS disconnected, use a multimeter to check the continuity of each wire from the TPS connector to the ECM connector. This verifies that there are no breaks or shorts in the wiring.
- Scan Tool: Use a scan tool to monitor the TPS voltage signal in real-time. This allows you to see how the ECM is interpreting the TPS signal and identify any discrepancies. Look for P0121, P0122, or P0123 codes, which are commonly associated with TPS issues.
Safety: Be Mindful of These Risky Components
Working with electrical systems can be dangerous. Keep these safety tips in mind:
- Disconnect the Battery: Always disconnect the negative battery cable before working on any electrical components. This prevents accidental shorts and electrical shocks.
- Handle ECM Connectors Carefully: The ECM connectors are delicate. Avoid bending or damaging the pins.
- Avoid Probing Through Wires: When testing wires, use backprobing techniques to avoid damaging the insulation. Puncturing the insulation can lead to corrosion and future problems.
- Be Aware of Fuel Lines: The throttle body and injection pump are in close proximity to fuel lines. Be careful not to damage these lines when working on the TPS.
- Don't Tamper with High-Voltage Components: This article is *only* about the TPS. Do not work on the ignition system or other high-voltage components without proper training and safety equipment.
Remember that fuel pressure is high in these systems. Relieve fuel pressure before disconnecting any fuel lines or components. Consult your service manual for the proper procedure.
By following these guidelines and using the TPS wiring diagram, you can effectively diagnose and repair TPS-related issues on your 1999 Dodge Ram 2500 Cummins. This knowledge will save you time, money, and frustration, and help you keep your Cummins running smoothly.
We have the complete TPS wiring diagram file available for download. Click [Download Link Here - Placeholder] to access the file. Remember to always consult your vehicle's specific repair manual for detailed instructions and torque specifications.