
2002 Honda Accord Timing Belt Diagram
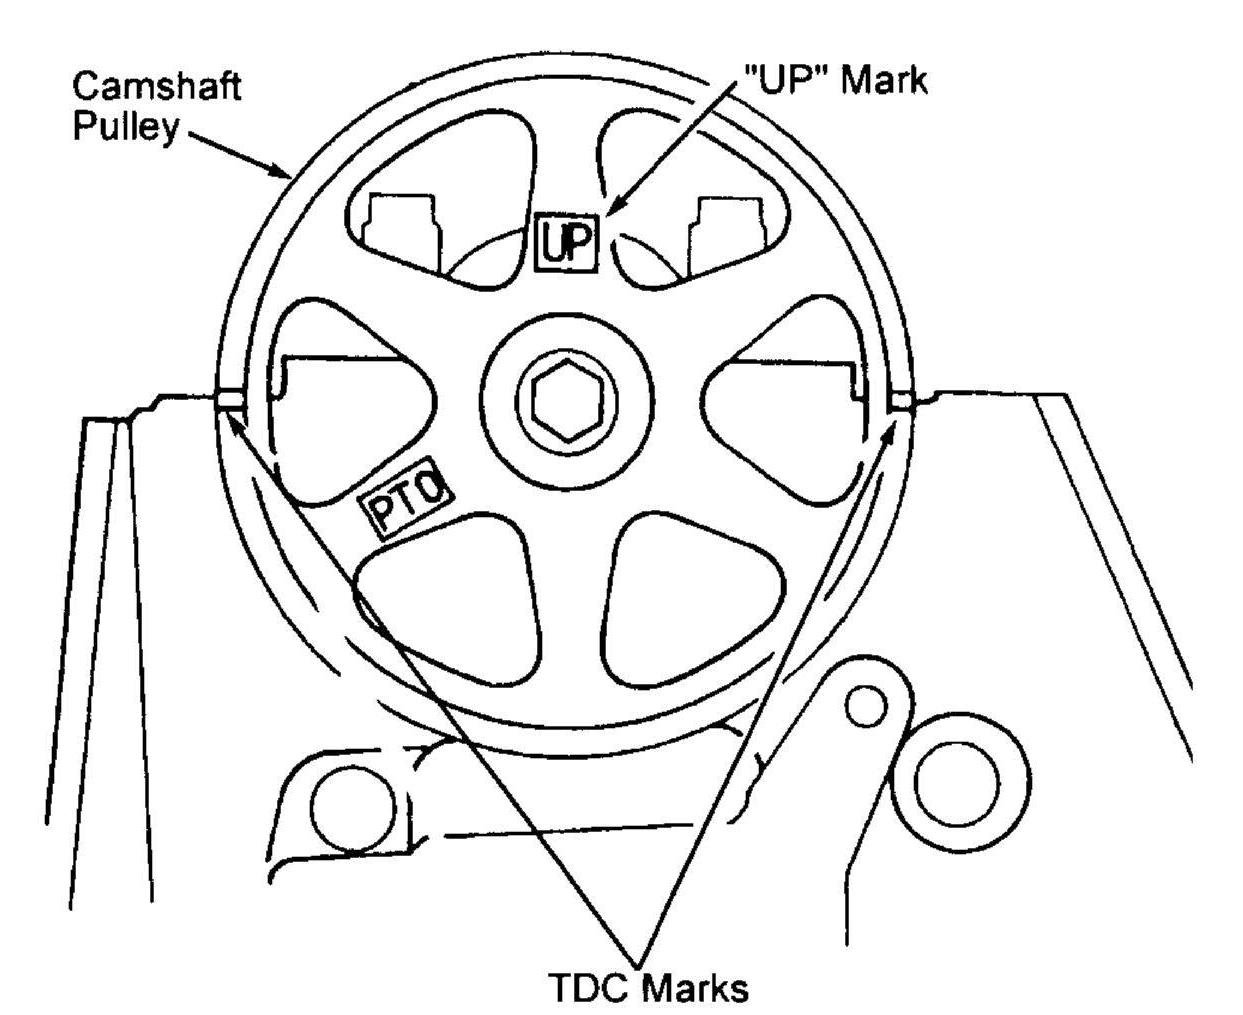
Alright, let's dive into the timing belt diagram for your 2002 Honda Accord. Whether you're tackling a timing belt replacement, diagnosing a rough idle, or just expanding your automotive knowledge, understanding this diagram is crucial. This article provides a comprehensive guide to understanding the 2002 Honda Accord timing belt diagram. And we're providing a downloadable file with the diagram itself, which you can access at the end of this article. Think of this guide as your roadmap.
Purpose of the Timing Belt Diagram
Why bother with the diagram in the first place? The timing belt's primary job is to synchronize the rotation of the crankshaft and the camshaft(s). The crankshaft, connected to the pistons, dictates when they move up and down. The camshaft(s), on the other hand, control the opening and closing of the intake and exhaust valves. The timing belt ensures these two critical processes happen in perfect coordination.
If the timing is off – even by a tooth or two – the engine's performance will suffer dramatically. You might experience rough idling, decreased power, or even catastrophic engine damage in extreme cases (valve-to-piston contact, a *very* bad scenario). The diagram is your guide to ensuring proper timing during installation.
Specifically, the diagram helps you:
- Verify the correct routing of the timing belt: Ensuring it passes around the correct pulleys and tensioners.
- Align timing marks: These marks are on the crankshaft and camshaft pulleys and must align in a specific orientation.
- Set proper belt tension: Too loose and the belt can skip; too tight and it can wear prematurely or damage bearings.
- Identify all components: Understanding the names and locations of all relevant parts.
Key Specs and Main Parts
The 2002 Honda Accord uses a timing belt on its 2.3L 4-cylinder (F23A1 or F23A4) engine, and also for its 3.0L V6 (J30A1) engine. While the basic principle remains the same, the V6 configuration has some distinct differences, primarily the presence of two camshafts per cylinder bank (dual overhead cams, or DOHC). Let's break down the components you'll see on the diagram:
- Crankshaft Pulley (or Crank Pulley): Driven by the crankshaft, this pulley turns the timing belt.
- Camshaft Pulley(s) (or Cam Pulley(s)): Driven by the timing belt, these pulleys rotate the camshaft(s), which actuate the valves. The 4-cylinder engine has one, the V6 has two per cylinder bank.
- Timing Belt Tensioner: This spring-loaded device maintains proper tension on the timing belt. There are usually two types: automatic and manual. The 2002 Accord typically uses an automatic tensioner.
- Timing Belt Idler Pulley: A smooth pulley that guides the timing belt around other components. Its purpose is to maintain proper belt path.
- Water Pump Pulley: While not directly involved in timing, the water pump is often driven by the timing belt. Its position is crucial when routing the belt.
- Timing Belt Cover: A plastic or metal cover that protects the timing belt from debris and damage.
Key Specs to Remember: Consult your repair manual for the exact torque specifications for the tensioner pulley bolts. These are critical to prevent premature failure. Also, the timing mark locations are crucial. They are usually indicated with notches or arrows on the pulleys and corresponding marks on the engine block.
Understanding the Diagram Symbols
The timing belt diagram is not just a picture; it's a schematic that uses specific symbols to convey information. Here's a breakdown of common elements:
- Solid Lines: Represent the timing belt itself, clearly showing its path around the pulleys.
- Dashed Lines: May indicate the hidden portions of the belt (behind other components) or represent the location of timing marks.
- Arrows: Indicate the direction of rotation for the crankshaft and camshaft pulleys.
- Circles or Dots: Denote bolt locations.
- Timing Marks: Usually represented by small notches, arrows, or paint marks on the pulleys and engine block. The diagram shows how these marks should align at TDC (Top Dead Center) for cylinder #1.
- Component Labels: Each part is labeled with its name or a short abbreviation (e.g., "Crank Pulley," "Cam Pulley," "Tensioner").
Color-coding, if present, is generally used to differentiate between different parts or systems. The diagram that accompanies this guide does not use complex color codes, it is mainly black and white. Consult the legend or notes on the diagram for any specific color conventions.
How It Works: The Timing Synchronization Process
At its core, the timing belt system is a precision machine. The crankshaft pulley drives the timing belt. The timing belt, in turn, drives the camshaft pulley(s). The gear ratio between the crankshaft and camshaft pulleys is 2:1. This means that the crankshaft rotates twice for every one rotation of the camshaft(s). This ratio is essential because the engine requires two crankshaft rotations for a complete four-stroke cycle (intake, compression, combustion, exhaust).
The timing marks on the pulleys and engine block serve as reference points. When these marks are aligned correctly, the pistons are in a specific position (typically TDC on cylinder #1), and the valves are closed. This precise alignment ensures that the valves open and close at the correct times relative to the piston's movement.
The tensioner maintains the correct belt tension, preventing slippage and ensuring accurate timing. An automatic tensioner uses a spring and hydraulic damper to automatically adjust for belt stretch and wear.
Real-World Use: Basic Troubleshooting Tips
Here's how the timing belt diagram can help with troubleshooting:
- Rough Idling or Misfires: If the engine idles roughly or misfires, a worn or improperly installed timing belt could be the culprit. Use the diagram to verify the timing mark alignment. If the marks are off, the belt has likely skipped a tooth.
- Engine Won't Start: A broken timing belt will prevent the engine from starting. Visually inspect the belt through the timing belt cover (if possible). If the belt is broken or severely damaged, it needs replacement.
- Unusual Noises: Squealing or chirping noises from the timing belt area can indicate a worn belt, a failing tensioner, or a misaligned pulley. Use the diagram to identify the location of these components and inspect them for damage or wear.
Diagnostic Trouble Codes (DTCs): Many engine management systems will throw DTCs related to camshaft or crankshaft position sensor errors if the timing is significantly off. Use an OBD-II scanner to check for codes and cross-reference them with the diagram to pinpoint the issue.
Safety Considerations
Working on the timing belt system involves several potential hazards:
- Rotating Components: Never work on the timing belt system with the engine running. Severe injury can result from contact with moving parts.
- High Tension Springs: The timing belt tensioner contains a strong spring that can cause injury if released improperly. Always follow the manufacturer's instructions for tensioner removal and installation.
- Electrical System: Disconnect the negative battery cable before working on the timing belt system to prevent electrical shock.
The crankshaft position sensor and camshaft position sensor are electrically sensitive. Handle them with care. Ensure the engine is cool before working on it. Contact with hot components can cause burns.
Finally, double check the timing before installing all the covers. Manually turn the engine over a few times to ensure no valves make contact and that all marks line up again. This simple check could save you from having to disassemble everything again.
Important Note: Always refer to the factory service manual for the specific procedures and torque specifications for your vehicle. This article is intended as a general guide and should not be used as a substitute for professional advice.
You can download the 2002 Honda Accord Timing Belt Diagram HERE (link to diagram).