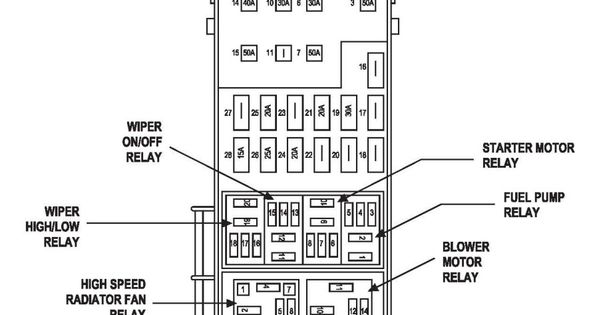
2003 Jeep Liberty Interior Fuse Box Diagram
The 2003 Jeep Liberty, also known as the KJ, is a popular vehicle for off-roading and daily driving. Understanding its electrical system is crucial for maintenance, repairs, and even custom modifications. One of the most important resources for navigating this system is the interior fuse box diagram. This article provides a detailed guide to the 2003 Jeep Liberty's interior fuse box, explaining its purpose, components, and how to use it effectively.
Purpose of the Interior Fuse Box Diagram
The interior fuse box diagram is essentially a map of the fuses and relays located inside the passenger compartment. Its primary purpose is to help you quickly identify and troubleshoot electrical issues. Whether you're dealing with a malfunctioning radio, non-functioning power windows, or a dead cigarette lighter, the fuse box diagram is your first point of reference. Furthermore, the diagram is invaluable for:
- Diagnosing electrical faults: Quickly pinpointing the cause of electrical problems.
- Replacing blown fuses: Identifying the correct fuse to replace.
- Adding aftermarket accessories: Safely tapping into the electrical system.
- Understanding the vehicle's electrical layout: Gaining a better understanding of how the various systems are interconnected.
Without the diagram, you'd be left guessing, potentially causing further damage or wasting valuable time. This resource isn't just for professional mechanics; it's an essential tool for any Jeep Liberty owner comfortable with basic DIY car maintenance.
Key Specs and Main Parts
The 2003 Jeep Liberty's interior fuse box is typically located on the driver's side, usually beneath the dashboard or behind a small access panel. It's a rectangular plastic housing containing an array of fuses and relays. Here's a breakdown of the key components:
- Fuses: These are small, sacrificial devices designed to protect the electrical circuits from overcurrent. When excessive current flows through a circuit, the fuse's internal filament melts, breaking the circuit and preventing damage to the connected components. Fuses are rated in Amperes (Amps), indicating the maximum current they can handle before blowing.
- Relays: These are electromechanical switches that control high-current circuits using a low-current signal. They act as intermediaries, allowing a small switch in the cabin to control a larger electrical load, such as the headlights or the fuel pump.
- Fuse Box Housing: This is the physical container that holds the fuses and relays. It's usually made of durable plastic and provides protection from the elements.
- Fuse Puller: Many fuse boxes include a small plastic tool designed to safely remove fuses without damaging them.
- Diagram Label: Crucially, the fuse box should have a label, either directly on the box or on the inside of the access panel, that provides the fuse box diagram. This diagram is the key to identifying each fuse and relay's function.
Symbols, Lines, and Colors Explained
Fuse box diagrams use symbols, lines, and colors to represent different components and their functions. Understanding these elements is essential for interpreting the diagram correctly. While the specific symbols may vary slightly, here are some common conventions:
- Fuse Symbols: Fuses are typically represented by a simple line connecting two terminals, often with a number indicating the fuse's amperage rating (e.g., "20A"). Older diagrams might use a zigzag line.
- Relay Symbols: Relays are represented by a square or rectangle containing a coil symbol and a switch symbol. The coil represents the relay's electromagnet, and the switch represents the contacts that open or close the circuit.
- Lines: Lines on the diagram indicate electrical connections. Thicker lines might represent main power feeds, while thinner lines represent control signals.
- Colors: Colors are often used to differentiate between different circuits or functions. For example, a red line might represent a constant power supply, while a blue line might represent a switched power supply. Refer to the specific diagram legend for color-coding information.
- Icons: Some diagrams use icons to represent the components powered by a particular fuse. For example, a headlight icon might indicate the fuse that protects the headlight circuit, or a radio icon for the radio circuit.
The diagram will also usually include a legend explaining the purpose of each fuse or relay, such as "Radio," "Power Windows," "Headlights," or "Fuel Pump Relay." This legend is crucial for identifying the correct fuse or relay for a specific function.
How It Works: Electrical Flow and Protection
The fuse box acts as a central distribution point for electrical power within the Jeep Liberty. Power from the battery flows through the main wiring harness to the fuse box. From there, it's distributed to various circuits throughout the vehicle via fuses and relays. Each fuse protects a specific circuit from overcurrent. If a short circuit or overload occurs, the fuse blows, interrupting the current flow and preventing damage to the wiring and connected components.
Relays, on the other hand, allow low-current circuits to control high-current circuits. For example, when you turn on the headlights, a low-current signal from the headlight switch activates the headlight relay. The relay then closes the high-current circuit, allowing power to flow to the headlights. This prevents the headlight switch from being overloaded with the full current required by the headlights.
Real-World Use: Basic Troubleshooting Tips
Here's how to use the fuse box diagram for basic troubleshooting:
- Identify the Problem: Determine which electrical component is malfunctioning.
- Locate the Diagram: Find the fuse box diagram inside the access panel or in your owner's manual.
- Identify the Fuse: Use the diagram to identify the fuse associated with the malfunctioning component.
- Inspect the Fuse: Visually inspect the fuse. If the filament inside the fuse is broken or blackened, the fuse is blown.
- Replace the Fuse: Replace the blown fuse with a new fuse of the same amperage rating. Never use a fuse with a higher amperage rating, as this could damage the circuit.
- Test the Component: After replacing the fuse, test the component to see if it's working. If the fuse blows again immediately, there's likely a short circuit in the wiring or the component itself. This requires further investigation.
A multimeter can also be invaluable for troubleshooting. You can use it to check for voltage at the fuse terminals or to test the continuity of a circuit.
Safety: Highlighting Risky Components
Working with automotive electrical systems can be dangerous if not done properly. Here are some safety precautions to keep in mind:
- Disconnect the Battery: Before working on the electrical system, disconnect the negative terminal of the battery to prevent accidental short circuits.
- Use Insulated Tools: Always use insulated tools to avoid electric shock.
- Avoid Tampering with High-Current Circuits: Be extremely careful when working with high-current circuits, such as the starter motor or alternator circuits. These circuits can carry a significant amount of current and can cause serious injury.
- Never Replace a Fuse with a Higher Amperage Rating: As mentioned before, using a fuse with a higher amperage rating can overload the circuit and cause a fire.
- Consult a Professional: If you're not comfortable working with automotive electrical systems, consult a qualified mechanic.
Some components, like the airbags and ABS system, are particularly sensitive and should only be serviced by trained professionals. Incorrectly handling these systems can lead to serious injury.
We understand the importance of having immediate access to this vital information. We have a digital file containing a detailed 2003 Jeep Liberty interior fuse box diagram available for download. This diagram will provide you with a clear and concise visual guide to the fuse box layout, making troubleshooting and repairs much easier. This resource can save you time, money, and frustration when dealing with electrical issues on your Jeep Liberty.