2004 Chevy Silverado 2500hd 6.0 Belt Diagram
Let's dive into the serpentine belt system of your 2004 Chevy Silverado 2500HD with the 6.0L Vortec engine. Understanding this system is crucial for everything from basic maintenance to diagnosing strange noises and preventing catastrophic engine damage. This article provides a detailed breakdown of the belt diagram, its components, and practical troubleshooting tips.
Purpose: Why Understanding the Belt Diagram Matters
The serpentine belt, often simply referred to as "the belt," is a critical component that drives various engine accessories. Knowing the belt routing is essential for several reasons:
- Belt Replacement: Obviously, you need to know how the belt routes to install a new one correctly. Incorrect routing can lead to accessories not working, belt slippage, and even belt failure.
- Accessory Diagnosis: If your power steering suddenly stops working, or your air conditioning blows warm air, the belt is a prime suspect. Knowing the routing helps you visually inspect the belt for wear, cracks, or proper tension.
- Troubleshooting Noises: Squealing or chirping noises under the hood are often belt-related. Identifying which accessory is driven by which part of the belt can help you pinpoint the source of the noise.
- General Engine Health: A properly functioning serpentine belt system is vital for overall engine health and reliability.
Key Specs and Main Parts
The 2004 Silverado 2500HD with the 6.0L Vortec engine utilizes a single serpentine belt to drive the following accessories:
- Crankshaft Pulley (Crank Pulley): The main driver. Connected directly to the engine's crankshaft, it's the starting point for the belt's rotation.
- Water Pump Pulley: Driven by the belt to circulate coolant throughout the engine. Critical for preventing overheating.
- Power Steering Pump Pulley: Provides hydraulic pressure for power-assisted steering.
- Alternator Pulley: Charges the battery and powers the electrical system.
- Air Conditioning Compressor Pulley: Compresses refrigerant for the air conditioning system.
- Idler Pulley(s): Smooth, non-driven pulleys that guide the belt and maintain its tension. Your specific truck might have one or more idler pulleys.
- Tensioner Pulley: A spring-loaded pulley that maintains constant tension on the serpentine belt. This is a critical component. A failing tensioner can cause belt slippage, noise, and premature belt wear.
The 6.0L Vortec engine generally uses a 6-rib serpentine belt. The exact length can vary slightly depending on whether your truck has certain options, such as dual alternators. Always double-check the part number against your vehicle's specifications.
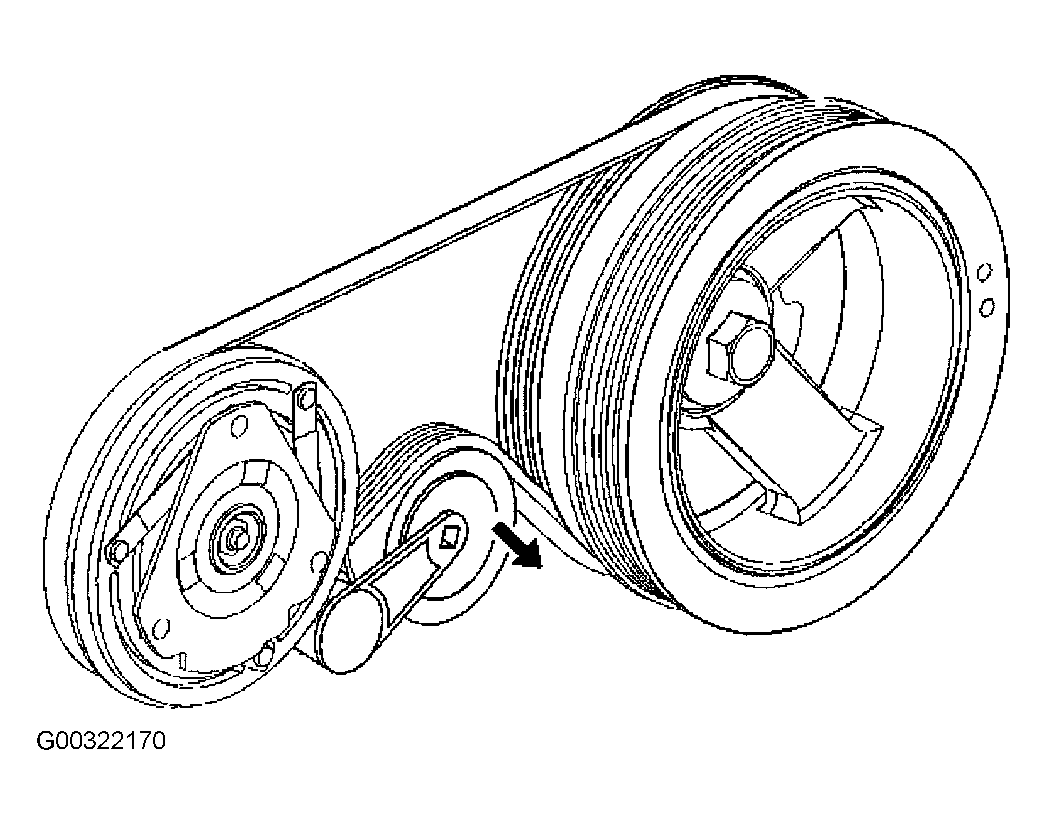
Decoding the Belt Diagram: Symbols and Conventions
A serpentine belt diagram isn't just a picture; it's a carefully crafted representation of the system. Understanding the symbols makes it much easier to interpret:
- Solid Lines: Represent the outside of the serpentine belt, the part that makes contact with the pulleys' grooved surfaces.
- Dotted Lines: Often (but not always) indicate the inside of the belt. Some diagrams don't show the inside at all, so don't be surprised if you only see solid lines.
- Arrows: Indicate the direction of belt rotation around each pulley. This is vital for understanding how the belt drives the accessories.
- Component Labels: Each pulley is labeled with its corresponding component (e.g., ALT for alternator, P/S for power steering).
- Tensioner Indicator: The tensioner pulley usually has a small arrow or mark indicating the direction to rotate it when releasing tension for belt removal or installation. This is important!
Color coding is less common on these diagrams, but if present, it might highlight different sections of the belt path or indicate specific instructions. Always refer to the diagram's legend if colors are used.
How It Works: The Serpentine Belt in Action
The serpentine belt's operation is straightforward, but crucial. The engine's crankshaft turns the crankshaft pulley. This rotational force is transferred to the serpentine belt, which wraps around and drives all the other accessory pulleys. The tensioner pulley maintains consistent pressure on the belt, ensuring adequate grip on each pulley to prevent slippage. Without proper tension, the belt will slip, leading to reduced accessory performance and potential damage.
Think of it like a series of gears, but instead of interlocking teeth, the belt relies on friction between its grooved surface and the pulleys to transmit power. Because of this reliance on friction, a worn or improperly tensioned belt will struggle to maintain grip, leading to the squealing noises and reduced performance mentioned earlier.
Real-World Use: Basic Troubleshooting Tips
Here are some common issues and how the belt diagram can help you troubleshoot them:
- Squealing Noise: Inspect the belt for cracks, glazing, or fraying. Check the tensioner pulley for proper movement. If the tensioner is weak or seized, it needs replacement. Also, make sure none of the accessory pulleys are seized or difficult to turn by hand (with the engine off and the belt removed, of course!). A seized pulley will cause the belt to slip and squeal.
- Battery Not Charging: A slipping belt can prevent the alternator from spinning at the correct speed, leading to insufficient charging. Verify belt tension and condition. Also, a failing alternator can cause the belt to work harder.
- Power Steering Issues: If the power steering assist is intermittent or absent, suspect a slipping belt, especially if it's noisy.
- Air Conditioning Problems: Warm air blowing from the AC vents could be caused by a slipping belt not properly driving the AC compressor.
- Visual Inspection: Use the diagram to ensure the belt is routed correctly. It's surprisingly easy to misroute a belt, especially if you're working in a tight space.
Troubleshooting Tip: A simple test for belt slippage is to spray a small amount of belt dressing onto the belt while the engine is running (use extreme caution and keep hands and clothing clear of moving parts!). If the noise temporarily disappears, it confirms that the belt is slipping. However, belt dressing is a temporary fix and should not be considered a long-term solution. Address the underlying issue – usually belt replacement or tensioner replacement.
Safety: Highlighting Risky Components
Working on the serpentine belt system involves significant risks. Always disconnect the negative battery cable before starting any work! This prevents accidental starting of the engine.
- Moving Parts: The serpentine belt and pulleys are rapidly moving components. Keep your hands, clothing, and tools clear of the system while the engine is running. Seriously, this is non-negotiable.
- Tensioner Spring: The tensioner pulley is spring-loaded and can snap back forcefully when released. Use the correct tool (a serpentine belt tool) to safely relieve the tension.
- Hot Engine: Avoid working on the system immediately after the engine has been running, as components can be very hot. Allow sufficient time for the engine to cool down.
Warning: Never attempt to bypass or disable the tensioner pulley. It's a critical safety component designed to maintain proper belt tension and prevent belt slippage. Tampering with it can lead to serious engine damage and personal injury.
We have a copy of the 2004 Chevy Silverado 2500HD 6.0L belt diagram available for download. Please contact us through [Your Contact Information Here] and we would be happy to provide it to you.
By understanding the serpentine belt system and using the diagram as a guide, you can confidently tackle common maintenance tasks and troubleshoot potential issues, keeping your Silverado running smoothly for years to come.