
2004 Chevy Silverado 5.3 Belt Diagram
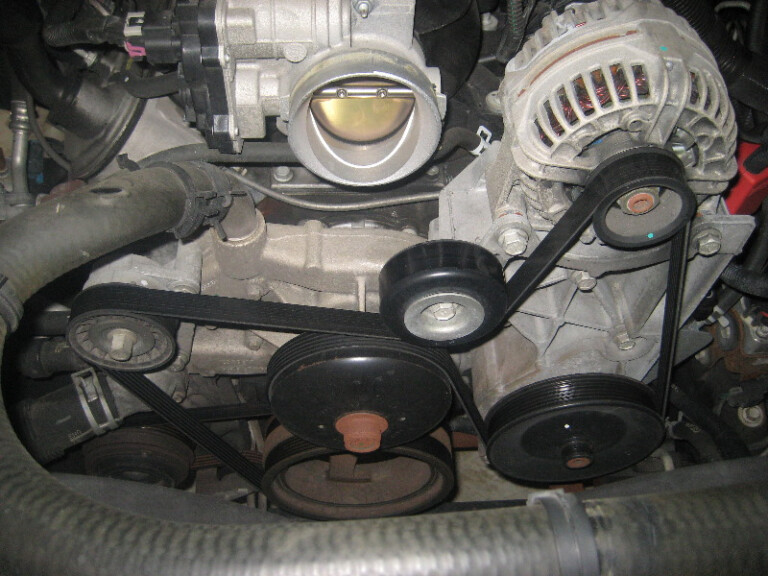
Alright, let's dive into the serpentine belt system on your 2004 Chevy Silverado with the 5.3L engine. This seemingly simple loop of rubber is crucial for powering essential engine accessories. Understanding its layout and function is invaluable for preventative maintenance, diagnosing issues, and even performing simple repairs. We're going to break down the belt diagram, explain its components, and equip you with the knowledge to tackle common problems.
Purpose of the Serpentine Belt Diagram
Why bother with a belt diagram? It's your roadmap to understanding the serpentine belt system. This diagram provides a visual representation of how the belt is routed around various pulleys, ensuring each component receives the necessary power. It's essential for:
- Replacement: Incorrect belt routing is a recipe for disaster. The diagram ensures you install the new belt correctly.
- Troubleshooting: Identifying the components driven by the belt allows you to pinpoint the source of squealing, slipping, or complete belt failure.
- General Understanding: Learning the system helps you better understand how your engine operates and allows you to perform preventative maintenance before problems arise.
Key Specs and Main Parts of the 2004 Silverado 5.3L Serpentine Belt System
Let's identify the major players in this system:
- Serpentine Belt: The heart of the system. A single, continuous belt that drives multiple accessories. Typically made of reinforced rubber compounds, designed for longevity and high-speed operation.
- Crankshaft Pulley (Harmonic Balancer): Driven directly by the engine's crankshaft, this pulley is the driving force behind the entire serpentine belt system. It also incorporates a harmonic balancer to dampen engine vibrations.
- Alternator Pulley: The alternator generates electrical power for the vehicle. The belt spins the alternator, which in turn charges the battery and powers electrical components.
- Power Steering Pump Pulley: This pulley drives the power steering pump, providing hydraulic assistance to make steering easier.
- Water Pump Pulley: The water pump circulates coolant throughout the engine to prevent overheating.
- Air Conditioning Compressor Pulley: Engages when the AC is turned on, driving the compressor that circulates refrigerant to cool the cabin.
- Tensioner Pulley: A spring-loaded pulley that maintains constant tension on the serpentine belt, preventing slippage and extending belt life. Its spring tension is *critical* for proper belt operation.
- Idler Pulley(s): Smooth pulleys used to guide the belt around other components or to change its direction.
The specific routing and number of idler pulleys can vary slightly depending on the exact configuration of your Silverado, but the core components remain the same. Knowing the function of each component is just as important as knowing its location.
Decoding the Belt Diagram: Symbols and Markings
Belt diagrams aren't just pretty pictures; they're packed with information. Let's decipher the common symbols:
- Solid Lines: Represent the path of the serpentine belt, showing which pulleys it wraps around.
- Arrows: Indicate the direction of belt rotation around each pulley. Crucial for understanding how the belt needs to be routed.
- Pulley Symbols: Simplified representations of each pulley, often labeled with abbreviations (e.g., ALT for Alternator, P/S for Power Steering).
- Tensioner Symbol: A distinct symbol, often with an arrow indicating the direction of tension release.
- Color Coding (Less Common): Some diagrams use color coding to highlight specific sections or to differentiate between different belt paths in multiple configuration setups.
It's vital to pay close attention to the direction of the arrows. Routing the belt incorrectly, even by a small deviation, can prevent components from functioning properly or even damage them. When using a diagram, always double-check the pulley labels and arrows to ensure accurate routing.
How the Serpentine Belt System Works
The system works on a simple principle: the engine's crankshaft spins the crankshaft pulley, which in turn drives the serpentine belt. The belt then transmits this rotational force to all the other pulleys in the system, powering the various accessories. The tensioner pulley plays a critical role in maintaining the proper belt tension. Without adequate tension, the belt will slip, reducing the efficiency of the accessories and potentially causing damage. Too much tension, on the other hand, can lead to premature bearing wear in the driven components and shorten the belt's lifespan.
The entire system is a delicate balance of tension, friction, and rotational force. Proper alignment of the pulleys is also crucial. Misaligned pulleys can cause the belt to wear unevenly and eventually fail.
Real-World Use: Troubleshooting Common Serpentine Belt Issues
Here's where your understanding of the belt diagram really pays off. Let's look at some common issues and how the diagram can help:
- Squealing Belt: Often caused by a loose belt, worn belt, or contaminated pulleys. The diagram allows you to visually inspect the belt's path and identify potential areas of slippage or contamination. Check the tensioner pulley's operation; if it's bouncing excessively or not providing adequate tension, it needs to be replaced. Clean the pulleys with a brush and degreaser, and consider replacing the belt if it's glazed or cracked.
- Belt Slippage: Results in reduced accessory performance (e.g., weak AC, stiff steering). The diagram helps you confirm that the belt is routed correctly and that all pulleys are engaged. A slipping belt often indicates a worn belt or a faulty tensioner.
- Belt Breakage: A broken belt is a serious issue, as it immediately disables essential engine accessories. The diagram helps you identify the likely cause of the breakage (e.g., seized pulley, misalignment, excessive wear). Before replacing the belt, inspect all pulleys for damage or signs of seizure. Never install a new belt without addressing the underlying cause of the failure.
- Noisy Idler/Tensioner Pulley: Whining or grinding noises can indicate a worn bearing in the idler or tensioner pulley. The diagram clearly shows the location of these pulleys, making it easy to identify and replace them.
Safety Considerations
Working on the serpentine belt system can be dangerous. Here's what you need to know:
- Engine OFF: Always work on the serpentine belt system with the engine completely off and the key removed from the ignition.
- Battery Disconnect: Disconnect the negative battery cable to prevent accidental starting of the engine.
- Moving Parts: The serpentine belt and pulleys spin at high speeds when the engine is running. Keep your hands, clothing, and tools clear of these moving parts.
- Spring Tension: The tensioner pulley is spring-loaded and can snap back forcefully when released. Use the correct tools to safely release the tension on the belt.
- Hot Components: The engine components, especially the exhaust manifold, can be extremely hot. Allow the engine to cool completely before working on the serpentine belt system.
The most dangerous component is arguably the crankshaft pulley. It's directly connected to the engine's crankshaft and can cause severe injury if it starts rotating while you're working on the belt. Always double-check that the engine is off and the battery is disconnected before proceeding.
With this information, you're well-equipped to understand and work on the serpentine belt system of your 2004 Chevy Silverado 5.3L. Remember, preventative maintenance and careful observation can go a long way in preventing costly repairs down the road.
By the way, we have a high-resolution version of the 2004 Chevy Silverado 5.3L Serpentine Belt Diagram available for download. It can be a handy resource to have on hand during your repairs.