
2004 Nissan Frontier Fuse Box Diagram
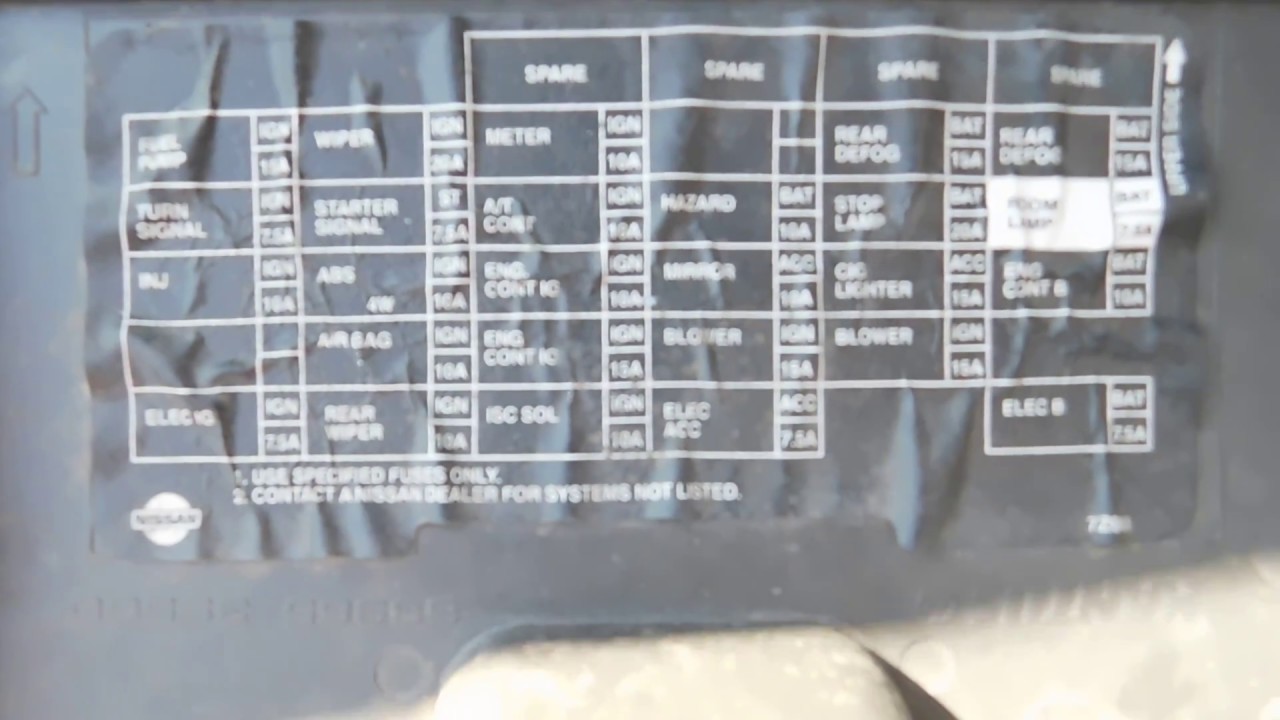
Okay, let's dive into the fuse box diagram for a 2004 Nissan Frontier. Whether you're troubleshooting an electrical issue, planning a modification that requires tapping into existing circuits, or simply want to understand your truck's electrical system better, having a clear understanding of the fuse box layout and its components is crucial. This article will provide you with a detailed overview, covering everything from the diagram's purpose to real-world troubleshooting tips.
Purpose of the 2004 Nissan Frontier Fuse Box Diagram
Why bother with a fuse box diagram? Several reasons. First and foremost, it's essential for electrical troubleshooting. If a circuit stops working – say, your radio dies or a taillight goes out – the first thing you should check is the corresponding fuse. The diagram tells you which fuse to examine. Without it, you're playing a guessing game. Second, the diagram is invaluable for planning electrical modifications. Adding aftermarket lights, a new stereo system, or even a simple accessory like a USB charger requires you to tap into the truck's existing wiring. The diagram helps you identify appropriate circuits and determine their amperage ratings. Finally, understanding the fuse box layout can simply increase your overall knowledge of your vehicle and make you a more confident DIYer. It provides a glimpse into how different electrical systems are powered and protected within your Frontier.
Key Specs and Main Parts
The 2004 Nissan Frontier typically has two primary fuse boxes:
- Interior Fuse Box: Located inside the cabin, usually under the dashboard on the driver's side. This box generally houses fuses for interior components like the radio, lights, power windows, and instrument panel.
- Engine Compartment Fuse Box: Located under the hood, typically near the battery. This box contains fuses and relays for engine management systems, headlights, starter motor, and other critical engine-related components.
Within each fuse box, you'll find the following components:
- Fuses: These are safety devices designed to protect circuits from overcurrents. Each fuse has an amperage rating (e.g., 10A, 15A, 20A) which indicates the maximum current it can handle before blowing and interrupting the circuit. Different circuits require different amperage ratings.
- Relays: Relays are electrically operated switches that allow a low-current circuit to control a high-current circuit. For example, the headlights might be controlled by a relay activated by the headlight switch. This prevents the switch from having to handle the full current required by the headlights.
- Circuit Breakers: Some circuits may be protected by circuit breakers instead of fuses. Unlike fuses, circuit breakers can be reset after they trip due to an overcurrent. However, the 2004 Frontier primarily uses fuses.
- Fuse Puller: A small plastic tool (often stored in the fuse box itself) used to safely remove fuses without damaging them or your fingers.
Each fuse and relay location is labeled in the diagram, either with a number or a description of the circuit it protects.
Understanding the Symbols on the Diagram
Fuse box diagrams use a variety of symbols to represent different components and connections. Here's a breakdown of common symbols:
- Lines: Lines represent wires or electrical conductors. Thicker lines might indicate higher-current wires.
- Colors: Wire colors are often indicated on the diagram using abbreviations (e.g., BL for blue, RED for red, GRN for green). These colors correspond to the actual wire colors in your truck, helping you trace circuits.
- Fuse Symbol: Fuses are typically represented by a wavy line inside a rectangle. The amperage rating is usually printed next to the symbol.
- Relay Symbol: Relays are usually depicted as a square or rectangle with multiple terminals, representing the coil and the contacts.
- Ground Symbol: Ground connections, where the circuit returns to the vehicle's chassis, are often shown as a series of descending horizontal lines.
- Component Symbols: Specific components, such as headlights, tail lights, or the radio, might be represented by simplified icons.
It's crucial to refer to the specific legend or key provided with your fuse box diagram. Different diagrams may use slightly different symbols.
How It Works: The Electrical Flow
Understanding how the electrical system functions is key to effectively using the fuse box diagram. The system operates on a closed-loop principle. Power flows from the battery, through a fuse (or circuit breaker), through the component (e.g., headlight, motor), and then back to the battery through a ground connection. The fuse acts as a safeguard. If the current in the circuit exceeds the fuse's amperage rating, the fuse element melts, breaking the circuit and preventing damage to the wiring or the component itself.
Relays allow low-current circuits (like those controlled by a switch on the dashboard) to control high-current circuits (like the headlights). When the switch is activated, it energizes the relay coil, which then closes the relay contacts, allowing power to flow to the high-current circuit.
The fuse box is essentially a central distribution point for electrical power. It's designed to organize and protect the various circuits in your vehicle. The diagram shows you which fuse or relay controls each circuit, making it easier to diagnose and repair electrical problems.
Real-World Use: Basic Troubleshooting Tips
Let's say your radio suddenly stops working. Here's how you'd use the fuse box diagram to troubleshoot:
- Locate the Diagram: The fuse box diagram is usually printed on a sticker inside the fuse box cover. If it's missing, you can find one online or in your owner's manual.
- Identify the Radio Fuse: Consult the diagram to find the fuse labeled for the radio (or "audio system"). Note its location (fuse number) and amperage rating.
- Inspect the Fuse: Use the fuse puller to remove the fuse. Examine the fuse element. If the element is broken or blackened, the fuse is blown.
- Replace the Fuse: Replace the blown fuse with a new fuse of the same amperage rating. Never use a fuse with a higher amperage rating, as this could overload the circuit and cause damage or even a fire.
- Test the Circuit: Turn on the radio to see if it works. If the radio still doesn't work, there may be a more serious problem in the circuit (e.g., a wiring fault or a faulty radio).
If a fuse blows repeatedly, it indicates a short circuit or an overload in the circuit. Don't simply keep replacing the fuse. Investigate the cause of the overcurrent before replacing the fuse again. A multimeter can be very useful for this.
Safety: Important Considerations
Working with electrical systems can be dangerous. Always take the following precautions:
- Disconnect the Battery: Before working on any electrical circuits, disconnect the negative (-) terminal of the battery to prevent accidental shorts and shocks.
- Use Proper Tools: Use insulated tools to avoid electric shock.
- Avoid Wet Conditions: Never work on electrical systems in wet or damp conditions.
- Be Careful with Airbags: Airbag circuits are high-voltage and can be dangerous. If you need to work near the airbag system, disconnect the battery and wait at least 30 minutes for the system to discharge. It is always advisable to let a trained technician handle any airbag-related repairs.
- High Current Components: Be particularly cautious around the main fuses that protect the entire electrical system, usually located near the battery. These fuses can carry very high currents.
Ignoring these safety precautions can lead to serious injury or damage to your vehicle.
We have a high-resolution, downloadable PDF version of the 2004 Nissan Frontier Fuse Box Diagram available. You can download it for easy access and reference during your repairs and modifications. This diagram is an invaluable resource for understanding and maintaining your truck's electrical system.