2007 Nissan Altima 2.5 Belt Diagram
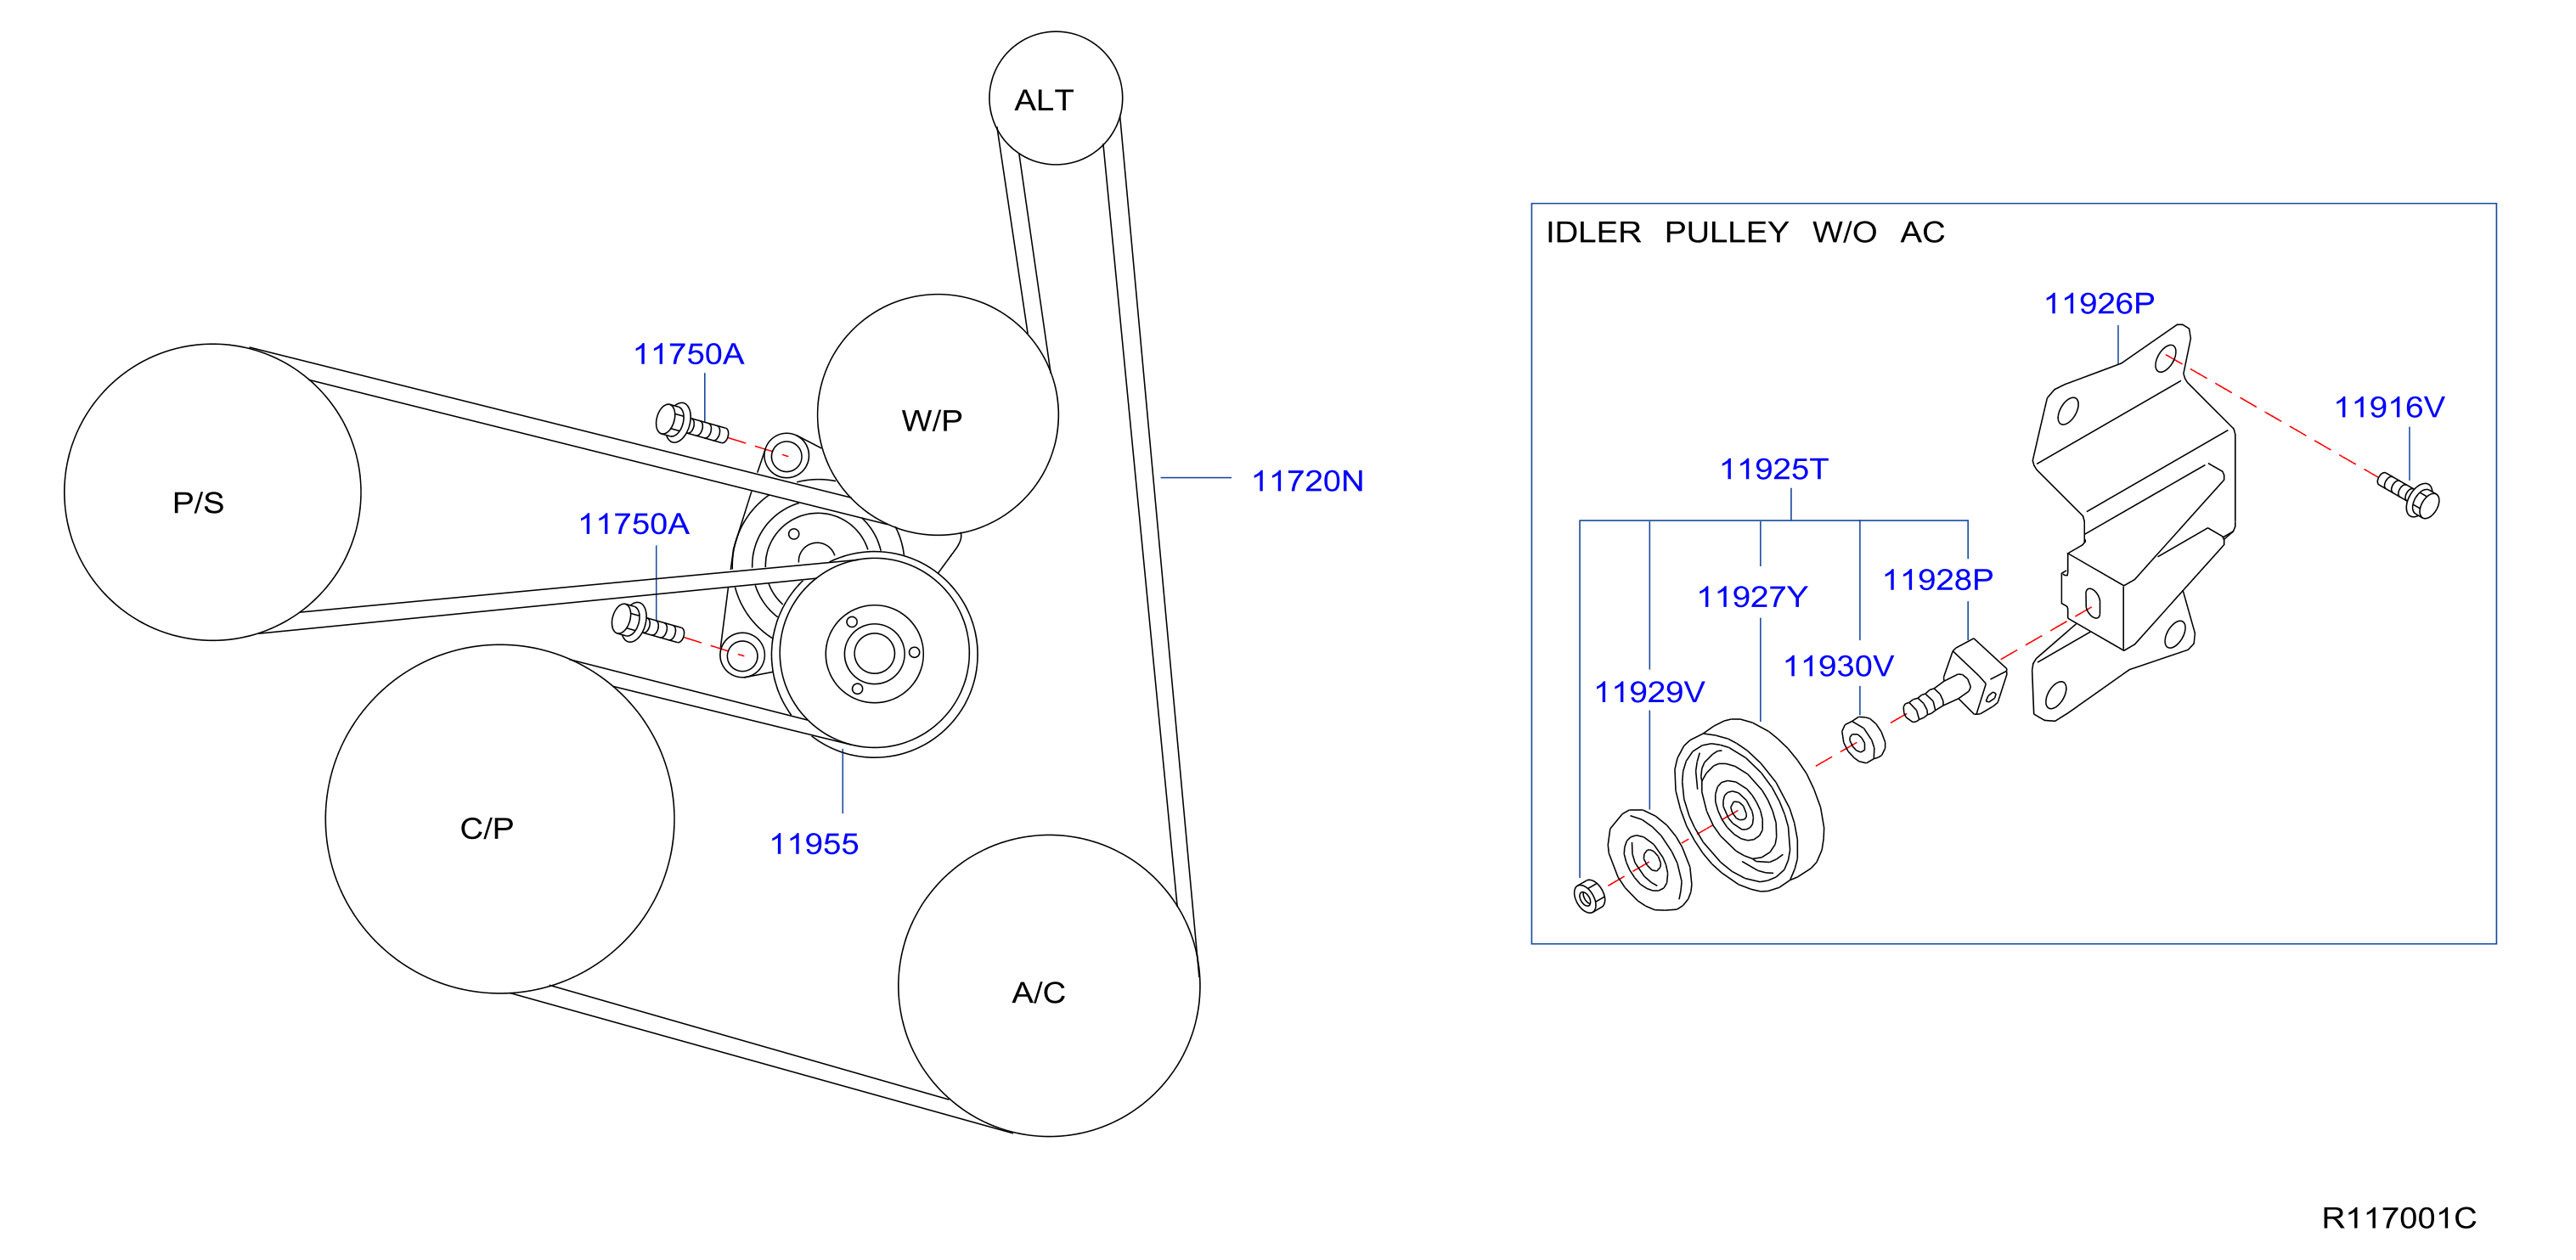
Alright, let's dive into the serpentine belt system of the 2007 Nissan Altima with the 2.5L engine. Understanding this system and its diagram is crucial for everything from preventative maintenance to diagnosing annoying squeals. This isn't just about replacing a worn belt; it's about understanding how your engine's accessories are powered and ensuring everything runs smoothly. We’re going to break down the diagram, explain the components, and give you some practical tips for troubleshooting common issues.
Purpose of Understanding the Belt Diagram
Why bother with a belt diagram? Several reasons. First and foremost, accurate belt routing is essential. A misrouted belt can lead to accessory malfunction (power steering failure, no AC, overheating), premature belt wear, and even engine damage. The diagram serves as your roadmap when replacing a belt, ensuring you get it right the first time. Secondly, it helps with troubleshooting. If you're experiencing issues with your power steering, alternator, or AC, understanding the belt's path can help you pinpoint potential problems like a seized pulley or a failing tensioner. Finally, for those interested in modifying or upgrading components, the diagram gives you a clear picture of the system's layout and limitations.
Key Specs and Main Parts
The 2007 Altima 2.5L utilizes a serpentine belt system. This means a single, continuous belt drives multiple accessories. Here are the key components:
- Crankshaft Pulley (or Crank Pulley): This is the main driving force, connected directly to the engine's crankshaft. It transfers rotational energy to the belt.
- Alternator Pulley: The alternator generates electricity to power the car's electrical system and charge the battery.
- Power Steering Pump Pulley: This pulley drives the power steering pump, providing hydraulic assistance for steering.
- Air Conditioning Compressor Pulley: The compressor circulates refrigerant to cool the cabin air.
- Water Pump Pulley: Circulates coolant throughout the engine to regulate temperature. Critically important for preventing overheating.
- Tensioner Pulley (or Belt Tensioner): This spring-loaded or hydraulically dampened pulley maintains the correct tension on the belt, preventing slippage and premature wear. It’s a critical component.
- Idler Pulley: A smooth pulley that helps guide the belt and maintain proper wrap angle around other pulleys. Not all setups include idler pulleys.
- Serpentine Belt: A reinforced rubber belt, typically made of EPDM (Ethylene Propylene Diene Monomer), designed to withstand high temperatures and constant flexing.
The belt itself is typically a multi-ribbed belt, also known as a "V-ribbed" belt. This design provides increased surface area for better grip and power transfer.
Symbols and Interpretation
Understanding the symbols on the belt diagram is key to interpreting it correctly.
- Solid Lines: These represent the path of the outer surface of the belt. This is the side that has the ribbed pattern.
- Dashed Lines: These often indicate the path of the inner (smooth) surface of the belt.
- Arrows: Arrows show the direction of belt rotation. Pay close attention to these to ensure you understand how the belt is supposed to travel around the pulleys.
- Component Icons: Each component (alternator, power steering pump, etc.) will be represented by a stylized icon. These are usually fairly self-explanatory, but if you're unsure, consult the diagram's legend or a service manual.
- Tensioner Icon: The tensioner is often depicted as a pulley with an arrow indicating the direction of its spring-loaded or hydraulic tensioning action.
Color coding is rarely used on these diagrams, but if you see different colored lines, they might be used to differentiate between different belt routing options for different model years or engine configurations. Always confirm the diagram matches your specific vehicle.
How It Works: The Serpentine Dance
The serpentine belt system is elegantly simple in principle. The crankshaft pulley, driven by the engine's combustion, is the primary driver. As the crankshaft rotates, it spins the belt, which in turn drives all the other pulleys. The tensioner pulley ensures the belt remains taut, maintaining sufficient grip on each pulley to prevent slippage.
The belt snakes around each pulley in a specific order, dictated by the engine's design and the placement of the accessories. The direction of rotation of each accessory is determined by whether the belt is contacting the pulley on its outer (ribbed) or inner (smooth) surface. This allows some accessories to rotate clockwise and others counter-clockwise, as required by their internal mechanisms.
The tensioner is absolutely critical. If the belt becomes too loose (due to stretching or a failing tensioner), it will slip, leading to reduced performance of the accessories. Slippage also generates heat, accelerating belt wear and potentially damaging the pulleys.
Real-World Use: Troubleshooting
Here are a few common scenarios where the belt diagram proves invaluable:
- Squealing Belt: A common symptom of a loose or worn belt. Check the tensioner and the belt's condition. If the tensioner is weak or the belt is cracked, glazed, or shows signs of wear, replace them. A misaligned pulley can also cause squealing.
- Accessory Malfunction: If your power steering stops working, AC isn't cooling, or the battery isn't charging, check the belt. Is it still intact and properly routed? If the belt is fine, the problem likely lies within the accessory itself. However, if the belt is broken or missing, investigate why. Did a pulley seize, causing the belt to snap?
- Belt Replacement: Use the diagram as your guide when installing a new belt. Take a picture of the old belt routing before removing it as a backup reference. Ensure the belt is properly seated in all the pulley grooves before releasing the tensioner.
Here's a basic troubleshooting process:
- Visual Inspection: Check the belt for cracks, fraying, glazing, or missing chunks. Look for signs of oil contamination.
- Tension Check: Inspect the tensioner. Does it move freely? Is it providing adequate tension? Many tensioners have a wear indicator.
- Pulley Inspection: Spin each pulley by hand (with the engine off, of course). They should spin smoothly and quietly. Any wobbling, roughness, or noise indicates a potential bearing failure.
Safety First: Proceed with Caution
Working on the serpentine belt system involves risks. The most critical safety precaution is to disconnect the negative battery cable before starting any work. This prevents accidental starting of the engine while your hands are near moving parts.
High Heat Components: Be aware that the engine components, including the pulleys, can be very hot, especially after the engine has been running. Allow the engine to cool down completely before working on the belt system. Burns are no fun.
Spring-Loaded Tensioner: The tensioner pulley is often spring-loaded and can snap back with considerable force if not handled properly. Use the correct tools (typically a breaker bar or socket wrench) to carefully release the tension and lock the tensioner in the retracted position before removing the belt.
Moving Parts: Never, under any circumstances, attempt to work on the serpentine belt system while the engine is running. This is extremely dangerous and can result in serious injury.
Important Note: Always consult a repair manual specific to your 2007 Nissan Altima 2.5L for detailed instructions and torque specifications. The information provided here is a general overview and should not be considered a substitute for professional guidance.
We have a high-resolution PDF of the 2007 Nissan Altima 2.5L serpentine belt diagram available for download. This diagram is an invaluable resource for anyone working on this engine, providing a clear and accurate visual representation of the belt routing. Contact us through the website to get the download link. Good luck with your repairs!