
2008 Mazda 3 Serpentine Belt Diagram
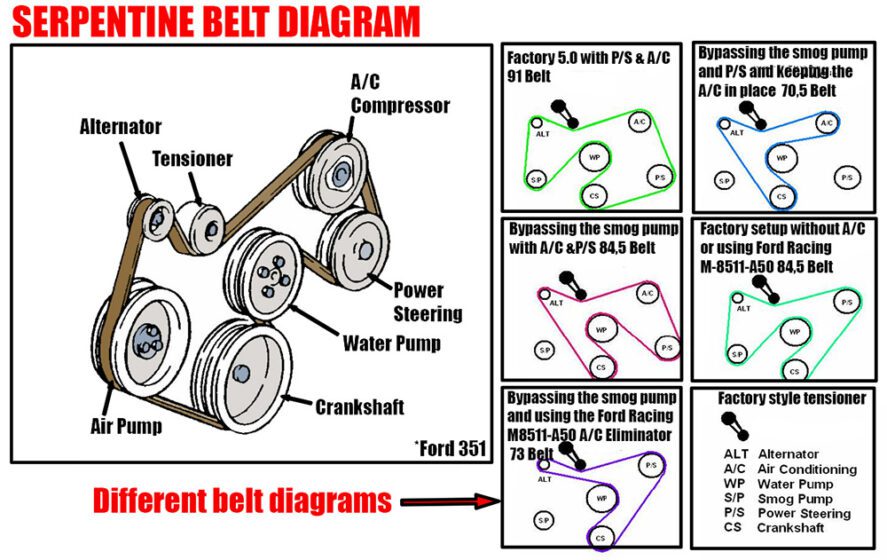
Alright, let's dive into the serpentine belt diagram for your 2008 Mazda 3. This isn't just some pretty picture; it's your roadmap to understanding and maintaining a critical part of your engine. Whether you're tackling a squealing belt, preparing for preventative maintenance, or simply wanting to deepen your automotive knowledge, understanding this diagram is essential. We're going to break it down in a way that's clear, concise, and useful for any experienced DIYer.
Purpose of the Serpentine Belt Diagram
The serpentine belt diagram is your visual guide to how the serpentine belt is routed around the various pulleys in your 2008 Mazda 3's engine bay. This routing is crucial. The belt powers essential components like the alternator, power steering pump, air conditioning compressor, and sometimes even the water pump. An incorrectly routed belt won't drive these components properly, leading to malfunctions, overheating, or even complete engine failure. The diagram allows you to:
- Correctly replace a worn or broken belt: Ensure the new belt is installed exactly as the original.
- Diagnose issues: By understanding the belt's path, you can pinpoint potential problems like misaligned pulleys or seized components.
- Perform preventative maintenance: Inspect the belt for wear and tear, knowing which pulleys are most susceptible to slippage.
- Learn your engine: Familiarize yourself with the layout of your engine and the function of each component.
Key Specs and Main Parts (2.0L and 2.3L Engines)
The 2008 Mazda 3 typically came with either a 2.0L or a 2.3L engine. While the basic principle of the serpentine belt system is the same, the exact routing and sometimes even the belt length can differ slightly. Always verify the specific diagram for your engine. Generally, you'll find the diagram on a sticker located somewhere in the engine bay, often near the hood latch or on the radiator support. The length of the belt is also typically printed on the belt itself. Belt length also depends on whether the vehicle is equipped with A/C or not.
Here are the main components the serpentine belt interfaces with:
- Crankshaft Pulley (Harmonic Balancer): This is the driving pulley, connected directly to the engine's crankshaft. It's the power source for the entire system.
- Alternator Pulley: Drives the alternator, which generates electricity to power the car's electrical system and charge the battery.
- Power Steering Pump Pulley: Drives the power steering pump, providing hydraulic assistance for steering.
- Air Conditioning Compressor Pulley: Drives the A/C compressor, which circulates refrigerant to cool the cabin.
- Water Pump Pulley: (Sometimes) Drives the water pump, which circulates coolant to regulate engine temperature. Note: Some models have an electrically driven water pump. If yours has this, the belt will NOT route through the water pump.
- Tensioner Pulley: This pulley maintains the correct tension on the belt. It's spring-loaded and automatically adjusts to compensate for belt stretch. It's also CRITICAL for installation/removal of the belt.
- Idler Pulley: A smooth pulley that simply guides the belt around other components. It doesn't drive anything.
Diagram Symbols: Lines, Colors, and Icons
The serpentine belt diagram uses a simplified representation to show the belt's path. Understanding these symbols is key to interpreting the diagram correctly:
- Solid Lines: Represent the outer surface of the belt. This is the part of the belt that makes contact with the pulleys.
- Dotted Lines: Represent the inner surface of the belt. These are typically used to show where the belt passes *behind* a pulley in the diagram, indicating that it's not making contact at that point.
- Arrows: Indicate the direction of rotation for each pulley. This is helpful for visualizing how the belt drives each component.
- Pulley Icons: Simple circles or rounded shapes represent the pulleys. Some diagrams may label each pulley with an abbreviation (e.g., "ALT" for alternator, "P/S" for power steering).
- Tensioner Symbol: The tensioner pulley is often represented with a spring symbol attached to it, indicating its spring-loaded function.
How It Works: The Flow of Power
The serpentine belt system is a continuous loop. The crankshaft pulley, driven by the engine, sets the entire system in motion. The belt wraps around the crankshaft pulley and then snakes its way around the other pulleys, transferring rotational force to each component. The tensioner pulley maintains the correct amount of tension on the belt, preventing slippage and ensuring efficient power transfer. A properly tensioned belt will allow the engine to work as expected. Too loose, and the belt will slip. Too tight, and the belt will wear out prematurely (and could damage components).
Think of it like a train. The crankshaft pulley is the engine, pulling the train (belt) along. Each car (alternator, power steering pump, etc.) is connected to the train and receives power from it. The tensioner is like a buffer car, keeping the train taut and preventing it from derailing.
Real-World Use: Troubleshooting Tips
Here's how you can use the serpentine belt diagram for troubleshooting common problems:
- Squealing Belt: A squealing belt often indicates slippage. Use the diagram to check the alignment of the pulleys. A misaligned pulley can cause the belt to wear unevenly and slip. Also, check the tensioner. If it's weak or failing, it won't maintain proper belt tension.
- Cracked or Worn Belt: Inspect the belt for cracks, fraying, or missing chunks. Use the diagram to identify areas where the belt is under the most stress (e.g., tight bends around small pulleys). These areas are more likely to show signs of wear.
- Accessory Malfunction: If an accessory (e.g., the alternator or A/C compressor) isn't working, use the diagram to verify that the belt is properly routed around its pulley. A broken or slipped belt will prevent the accessory from functioning. You may need to use a multimeter to check voltage levels.
- Belt Keeps Coming Off: If the belt repeatedly slips off the pulleys, suspect a misalignment issue or a faulty tensioner. Use the diagram to carefully inspect the alignment of each pulley.
For example, say your alternator isn't charging the battery. Consult the diagram to ensure the serpentine belt is correctly routed around the alternator pulley. Check the tensioner to see if it's providing adequate tension. If the belt is slipping on the alternator pulley, it won't spin fast enough to generate electricity. If all is well, then the alternator may be at fault.
Safety: Handle with Care
Working with the serpentine belt system can be dangerous if you're not careful. Here are some key safety precautions:
- Disconnect the Battery: Always disconnect the negative battery terminal before working on the serpentine belt system. This will prevent accidental electrical shocks.
- Hot Engine: Never work on the serpentine belt system when the engine is hot. The components can be extremely hot and cause burns.
- Moving Parts: Keep your hands and clothing clear of the serpentine belt and pulleys when the engine is running. These parts are rotating at high speeds and can cause serious injury.
- Tensioner Release: The tensioner pulley is spring-loaded and can snap back with considerable force. Use the correct tool (usually a serpentine belt tool or a wrench) to carefully release the tension before removing the belt. Always wear eye protection when working with the tensioner.
- Proper Tools: Use the correct tools for the job. Using the wrong tools can damage the components or cause injury.
Important: Some components, like the alternator, can store electrical energy even after the battery is disconnected. Exercise caution when handling these components.
We've covered the essentials. Remember, this diagram is your friend. Use it wisely, and you'll be well-equipped to tackle serpentine belt maintenance and troubleshooting on your 2008 Mazda 3.
We have the serpentine belt diagram file for the 2008 Mazda 3 available for download. This diagram is essential for performing maintenance and repairs related to the serpentine belt system. Contact us to get the file.