2008 Toyota Tacoma Serpentine Belt Diagram
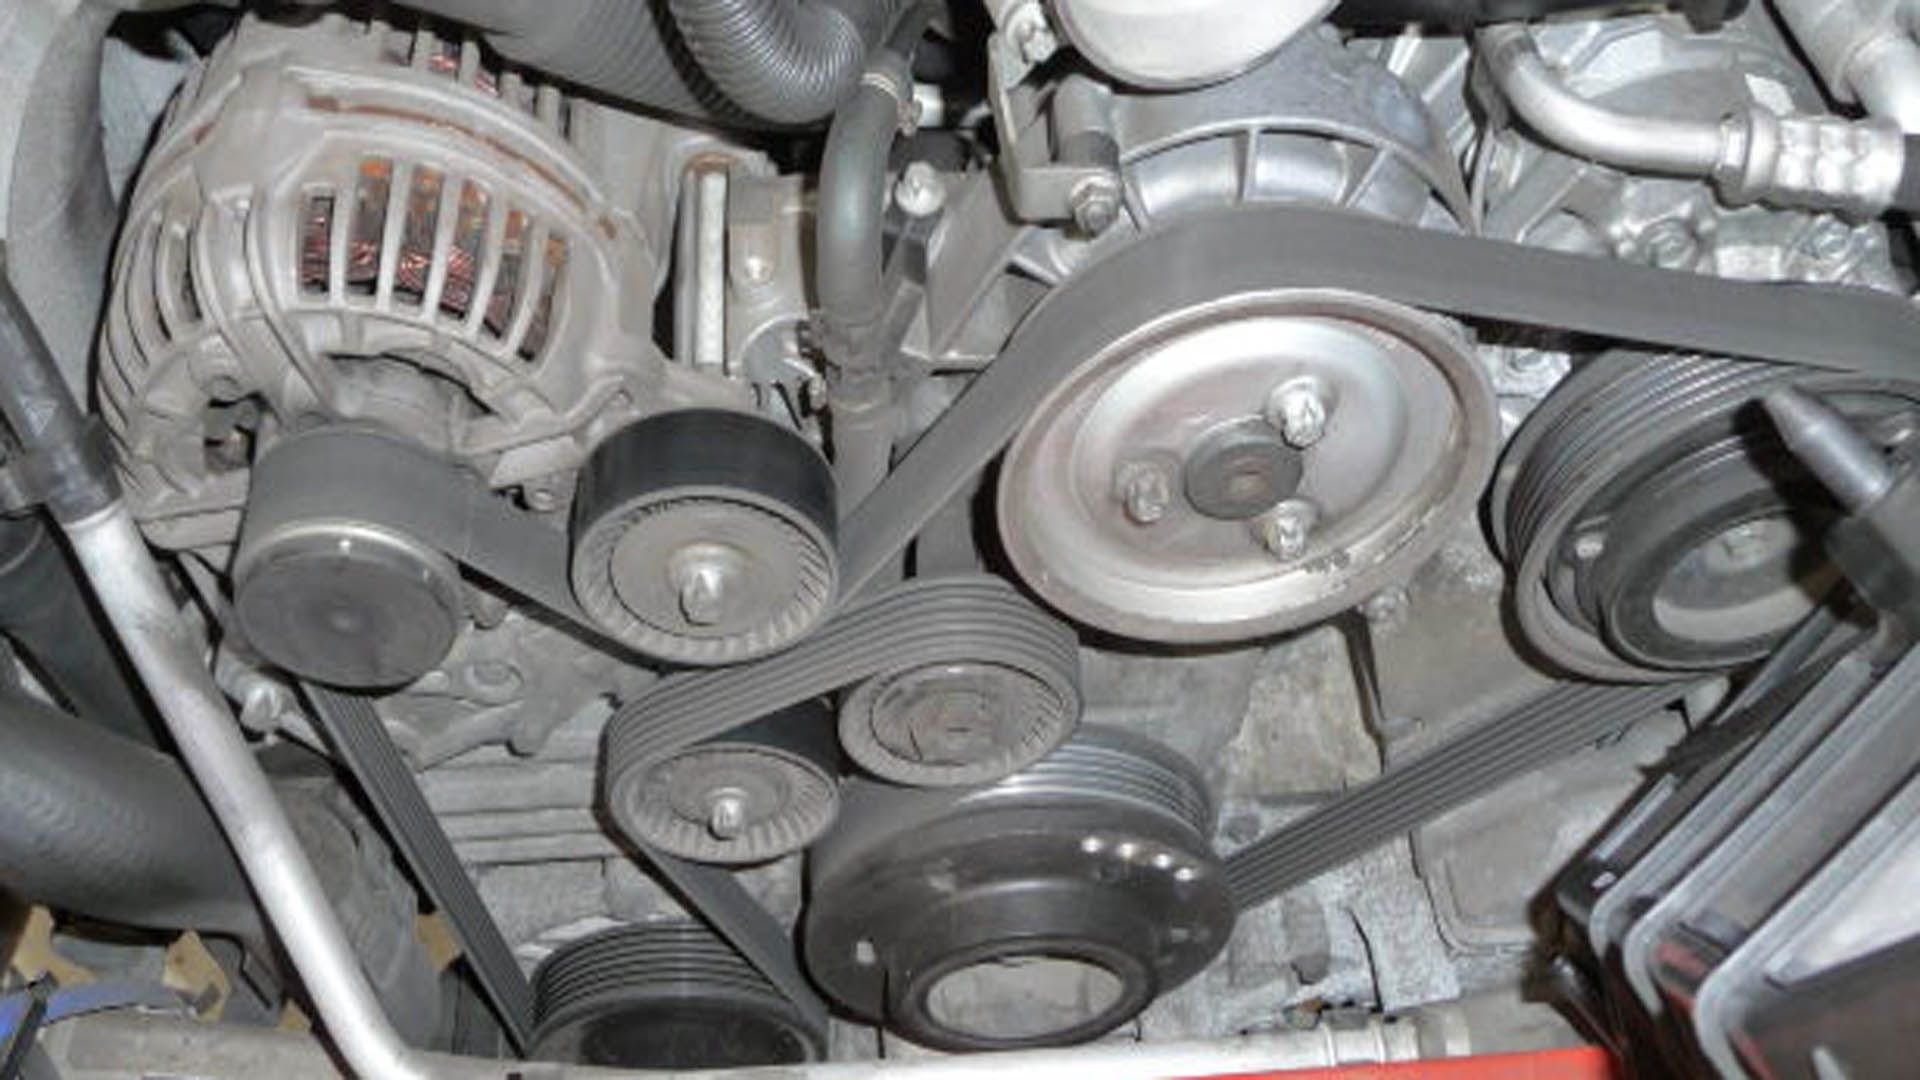
Maintaining your 2008 Toyota Tacoma's engine is crucial for its longevity and performance. A key part of that maintenance is understanding the serpentine belt system. This single, long belt drives multiple engine accessories, and knowing its routing is essential for replacement, inspection, and troubleshooting. Think of this article as your detailed guide to the 2008 Tacoma's serpentine belt diagram, empowering you to handle related tasks with confidence.
Purpose of the Serpentine Belt Diagram
Why bother with a diagram? It's simple. The serpentine belt is a vital component. If it fails, you lose power steering, air conditioning, the alternator (leading to a dead battery), and potentially even water pump function, leading to engine overheating. The diagram serves several important purposes:
- Replacement Guide: The most common use is for correctly routing the new belt after replacing a worn or broken one. Incorrect routing will lead to accessory malfunction and belt damage.
- Troubleshooting Aid: The diagram helps identify which accessory is squealing or malfunctioning based on the belt's path. Is it the power steering pump causing the noise, or is it the AC compressor?
- Preventative Maintenance: By understanding the belt's path, you can inspect it more thoroughly for wear, cracks, or damage, potentially preventing a roadside breakdown.
- Learning and Understanding: For those interested in how their engine works, the diagram provides a visual representation of the accessory drive system.
Key Specs and Main Parts of the Serpentine Belt System
Let's break down the main components of the 2008 Tacoma's serpentine belt system:
- Serpentine Belt: A long, continuous belt, typically made of EPDM rubber (ethylene propylene diene monomer rubber), that transmits power from the crankshaft pulley to the various engine accessories.
- Crankshaft Pulley (Harmonic Balancer): Located at the bottom of the engine, this pulley is driven directly by the engine's crankshaft. It's usually the starting point of the belt's journey.
- Alternator Pulley: Driven by the serpentine belt, the alternator generates electricity to charge the battery and power the vehicle's electrical system.
- Power Steering Pump Pulley: Driven by the serpentine belt, the power steering pump provides hydraulic pressure to assist steering.
- Air Conditioning (AC) Compressor Pulley: Driven by the serpentine belt, the AC compressor circulates refrigerant to cool the cabin.
- Water Pump Pulley: (In some Tacoma configurations) Driven by the serpentine belt, the water pump circulates coolant through the engine to regulate its temperature. Note: Some Tacoma models use an electric water pump not driven by the serpentine belt.
- Idler Pulleys: Smooth, bearing-mounted pulleys that guide the belt along its path, preventing it from rubbing against other components. They often change the direction of the belt.
- Tensioner Pulley (Automatic Tensioner): This pulley applies tension to the serpentine belt, ensuring it remains tight enough to drive the accessories effectively. It usually incorporates a spring-loaded mechanism that automatically adjusts for belt stretch. This is critical for proper belt operation.
The exact belt length and number of grooves will vary slightly depending on the specific engine configuration (2.7L inline-4 or 4.0L V6) and optional equipment (like AC). Always refer to the correct diagram for your specific vehicle.
Symbols and Conventions in the Serpentine Belt Diagram
Understanding the symbols used in the diagram is just as important as knowing the parts. Here's a breakdown:
- Solid Lines: Represent the path of the serpentine belt itself. The thickness of the line can sometimes indicate the belt's width, but this is not always consistent.
- Dashed Lines: May indicate the back (smooth side) of the belt contacting a pulley, or they may denote components that are behind others in the diagram's perspective.
- Arrows: Indicate the direction of belt travel. Pay close attention to these, as incorrect routing will often result in the belt running backward on certain pulleys.
- Component Icons: Each accessory (alternator, AC compressor, etc.) is represented by a simplified icon. These icons are usually labeled with abbreviations (e.g., ALT for alternator, AC for air conditioning).
- Pulley Shading: Often, the diagrams will use shading to differentiate between the grooved side of the pulley (where the belt's ribs engage) and the smooth side (where the back of the belt makes contact).
- Labels: Each component and pulley is typically labeled with a name or abbreviation for easy identification.
Color is rarely used in these diagrams, but if present, it would likely be used to highlight specific components or sections of the belt path.
How the Serpentine Belt System Works
The serpentine belt system is relatively simple in principle. The engine's crankshaft turns the crankshaft pulley, which in turn drives the serpentine belt. The belt wraps around the various accessory pulleys, transferring rotational force to them. The tensioner pulley maintains the correct belt tension, preventing slippage and ensuring efficient power transfer.
The order in which the belt wraps around the pulleys is crucial. Each accessory requires a specific rotational direction, and the belt's path dictates this direction. For example, the alternator typically needs to spin clockwise, while the power steering pump might need to spin counter-clockwise. The idler pulleys strategically redirect the belt to achieve these desired rotations.
The automatic tensioner is a key component. As the belt stretches over time, the tensioner automatically adjusts, maintaining the proper tension. A worn or failing tensioner can lead to belt slippage, noise, and reduced accessory performance.
Real-World Use: Basic Troubleshooting Tips
Here are some common serpentine belt-related issues and how the diagram can help you diagnose them:
- Squealing Noise: A common symptom of a slipping belt. The diagram helps you pinpoint which pulley the belt is slipping on. Check the tensioner's condition and the belt for wear or contamination (oil, coolant). Slipping at the alternator is common, especially under high electrical load.
- Accessory Malfunction: If your power steering isn't working, or your AC is blowing warm air, consult the diagram to see if the serpentine belt drives the affected component. If it does, check the belt for breakage or slippage. If the belt is intact and properly tensioned, the problem likely lies within the accessory itself.
- Belt Wear or Damage: Regularly inspect the belt for cracks, fraying, or missing ribs. The diagram helps you access all sections of the belt for a thorough visual inspection. Pay close attention to areas where the belt bends sharply around smaller pulleys.
- Belt Coming Off: This is a serious issue. Double-check the belt routing against the diagram to ensure it's correct. Look for damaged pulleys or a failing tensioner as potential causes. A pulley with a bent flange can cause the belt to walk off.
Safety Precautions
Working on the serpentine belt system can be dangerous if proper precautions are not taken:
- Disconnect the Battery: Before working on any part of the engine, disconnect the negative battery cable to prevent accidental electrical shocks.
- Engine Off and Cool: Never work on the serpentine belt system while the engine is running or hot. The rotating belt and pulleys can cause serious injuries. Allow the engine to cool completely before beginning any work.
- Keep Hands Clear: Be extremely careful to keep your hands and fingers away from the rotating belt and pulleys when starting the engine.
- Tensioner Spring: The tensioner pulley is spring-loaded and can snap back with considerable force when released. Use the correct tool to relieve the tension and avoid injury. Consult your repair manual for the proper procedure.
- Protective Gear: Wear safety glasses to protect your eyes from debris and gloves to protect your hands.
Important: Always refer to your vehicle's repair manual for specific instructions and safety precautions.
With this guide and the diagram, you're well-equipped to understand and maintain your 2008 Toyota Tacoma's serpentine belt system. Remember to always prioritize safety and consult a professional mechanic if you're unsure about any procedure.
We have the detailed 2008 Toyota Tacoma Serpentine Belt Diagram file available for download. You can use it to get a closer look at the serpentine belt layout.